How to migrate a Surface Hub 2S to a Windows MTR
- Maxime Hiez
- MTR , Tutorial
- 23 Feb, 2026
Introduction
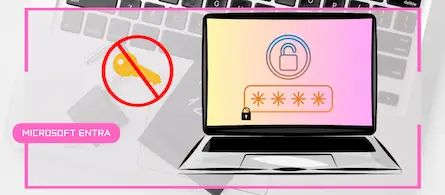
With the end of support for Windows 10, businesses can migrate their Surface Hub 2S to Microsoft Teams Rooms on Windows (MTRoW). USB migration is the method that allows the entire process to be completed on-premises and offline in a single operation. It requires no internet connection, no third-party cloud services, and no application installation, making it the fastest option.
Prerequisites
Equipment
- A Surface Hub 2S running Windows 10.
- 2 32GB USB 3.0 flash drives formatted in FAT32.
- A Windows 10/11 PC.
Download the executable
- The Surface IT Toolkit can be downloaded from https://learn.microsoft.com/en-us/surface/surface-it-toolkit.
Step 1 : Create a certificate
On the PC, generate a self-signed certificate using the following PowerShell commands :
if (-not (Test-Path "$home\Downloads\MTR Certificate"))  { New-Item -ItemType Directory -Force -Path "MTR Certificate" }
if (Test-Path "$home\Downloads\MTR Certificate\CertificateMTR.pfx") { Remove-Item "$home\Downloads\MTR Certificate\CertificateMTR.pfx" }

$pw = ConvertTo-SecureString "P@sSw0rD" -AsPlainText -Force

$UefiV2 = New-SelfSignedCertificate `
    -Subject "CN=Surface Demo Kit, O=Lab Maxime, C=CA" `
    -Type SSLServerAuthentication `
    -HashAlgorithm sha256 `
    -KeyAlgorithm RSA `
    -KeyLength 2048 `
    -KeyUsage KeyEncipherment `
    -KeyUsageProperty All `
    -Provider "Microsoft Enhanced RSA and AES Cryptographic Provider" `
    -NotAfter (Get-Date).AddYears(25) `
    -TextExtension @("2.5.29.37={text}1.2.840.113549.1.1.1") `
    -KeyExportPolicy Exportable

$UefiV2 | Export-PfxCertificate -Password $pw -FilePath "MTR Certificate\CertificateMTR.pfx"
Retrieve the certificate’s thumbprint using the following PowerShell commands :
$pfx = Get-PfxCertificate -FilePath "$home\Downloads\MTR Certificate\CertificateMTR.pfx"
$pfx.Thumbprint
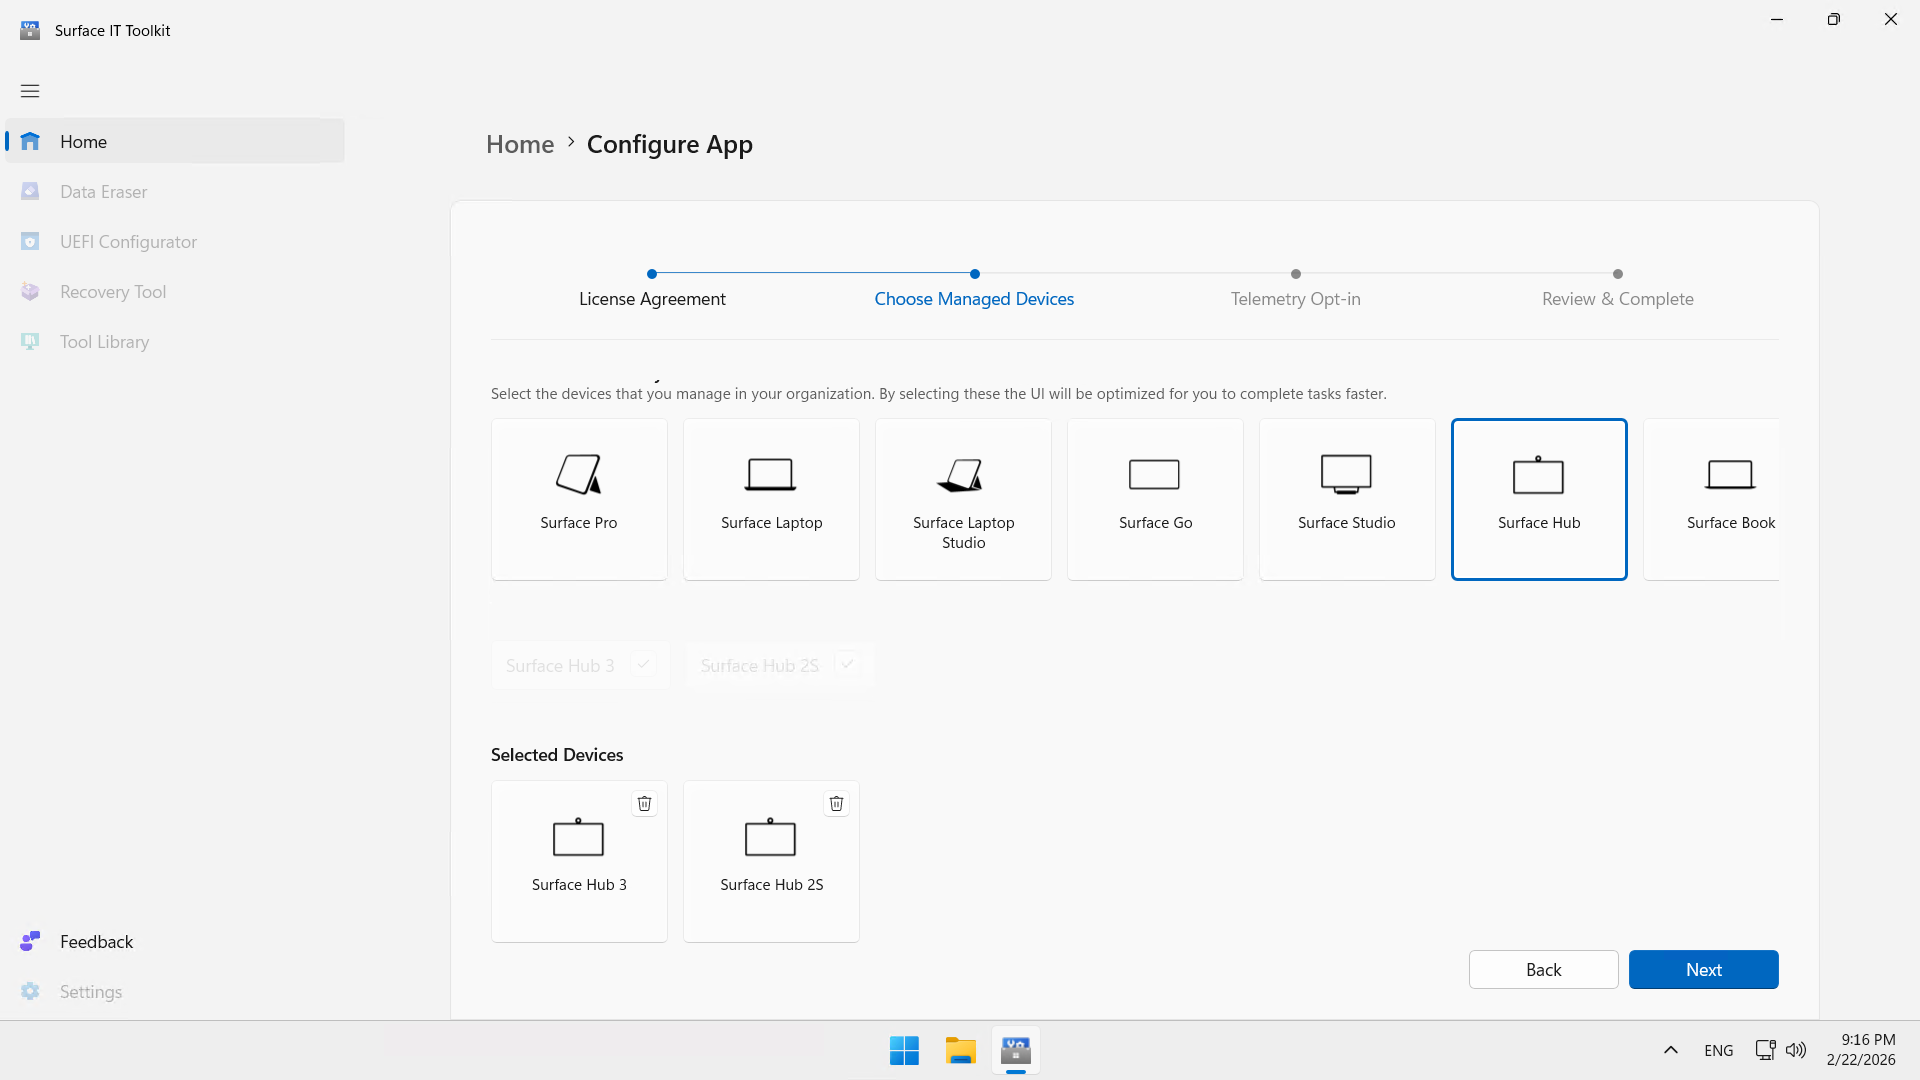
Step 2 : Install Surface IT Toolkit
On the same PC, launch the Surface IT Toolkit installation and click Start App Configuration.

Click Surface Hub, then the 2 models Surface Hub 3 and Surface Hub 2S.
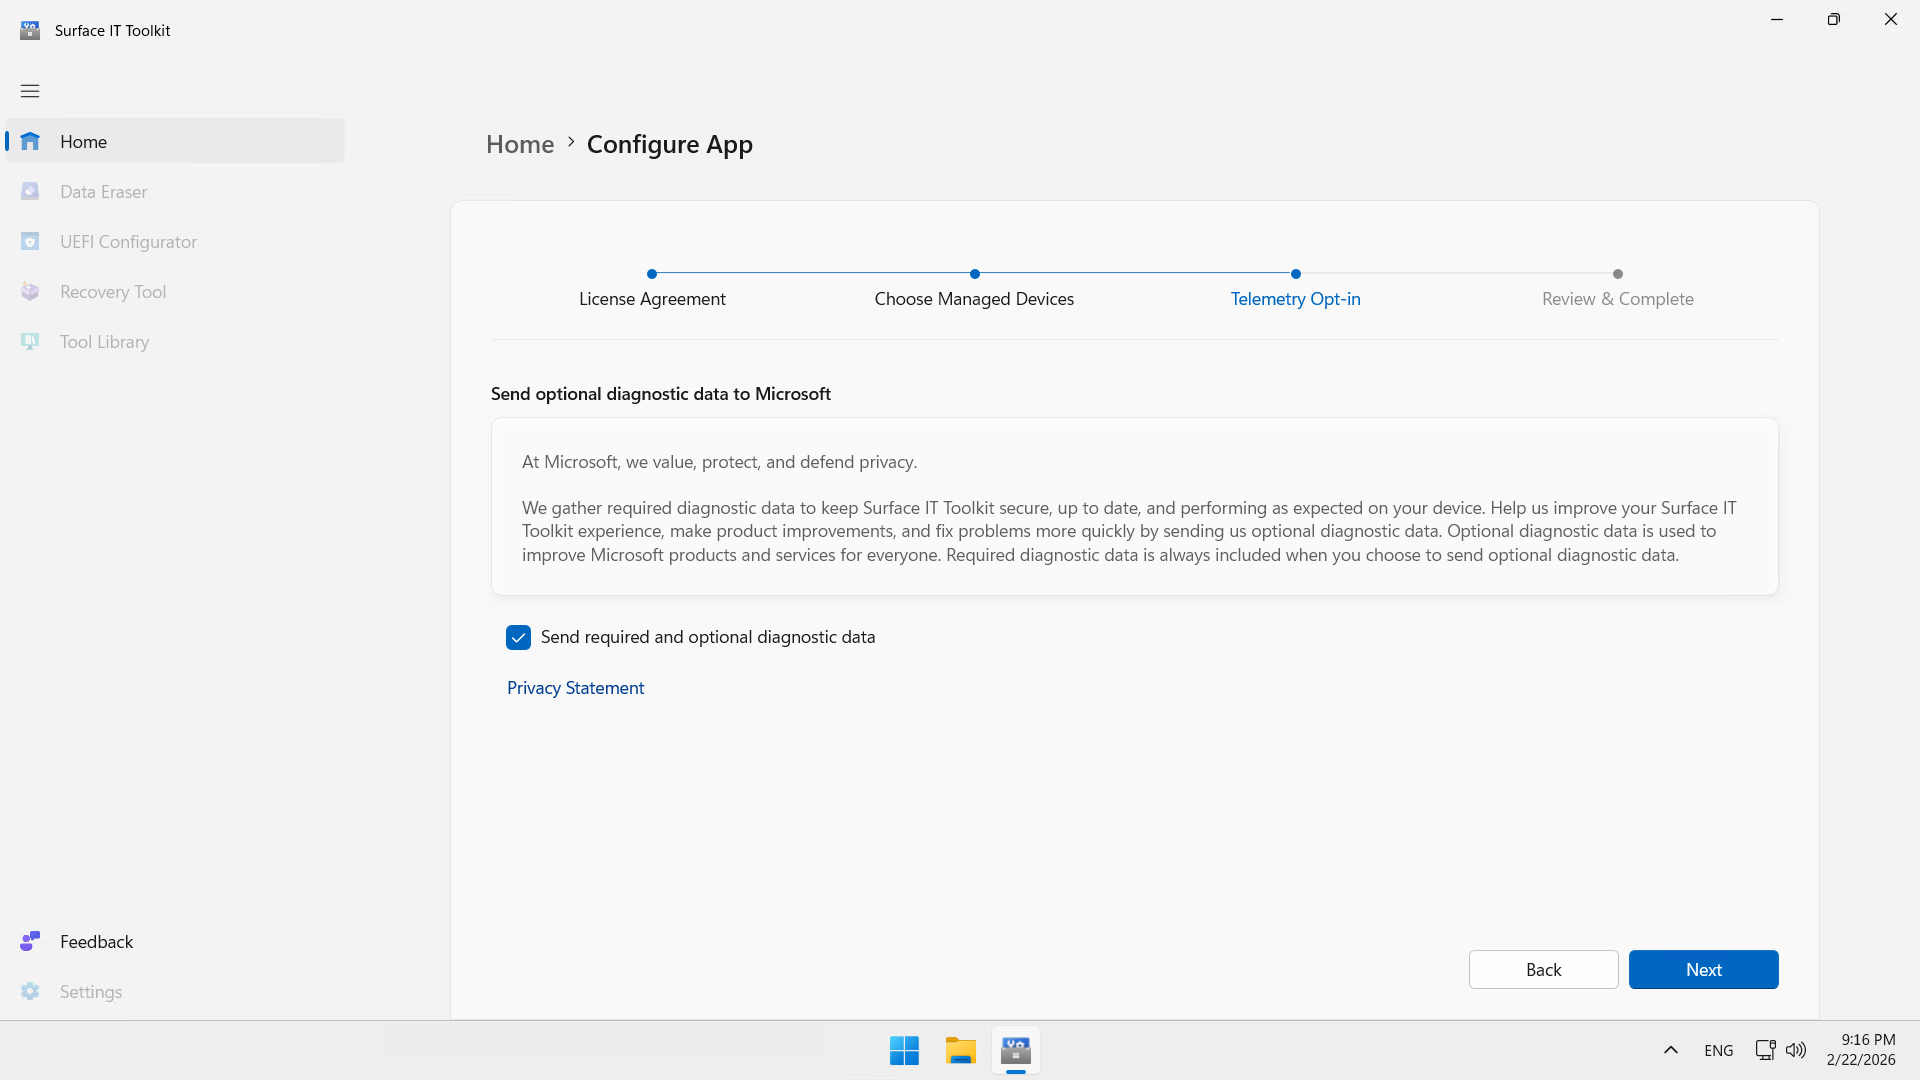
Leave the last windows as default …
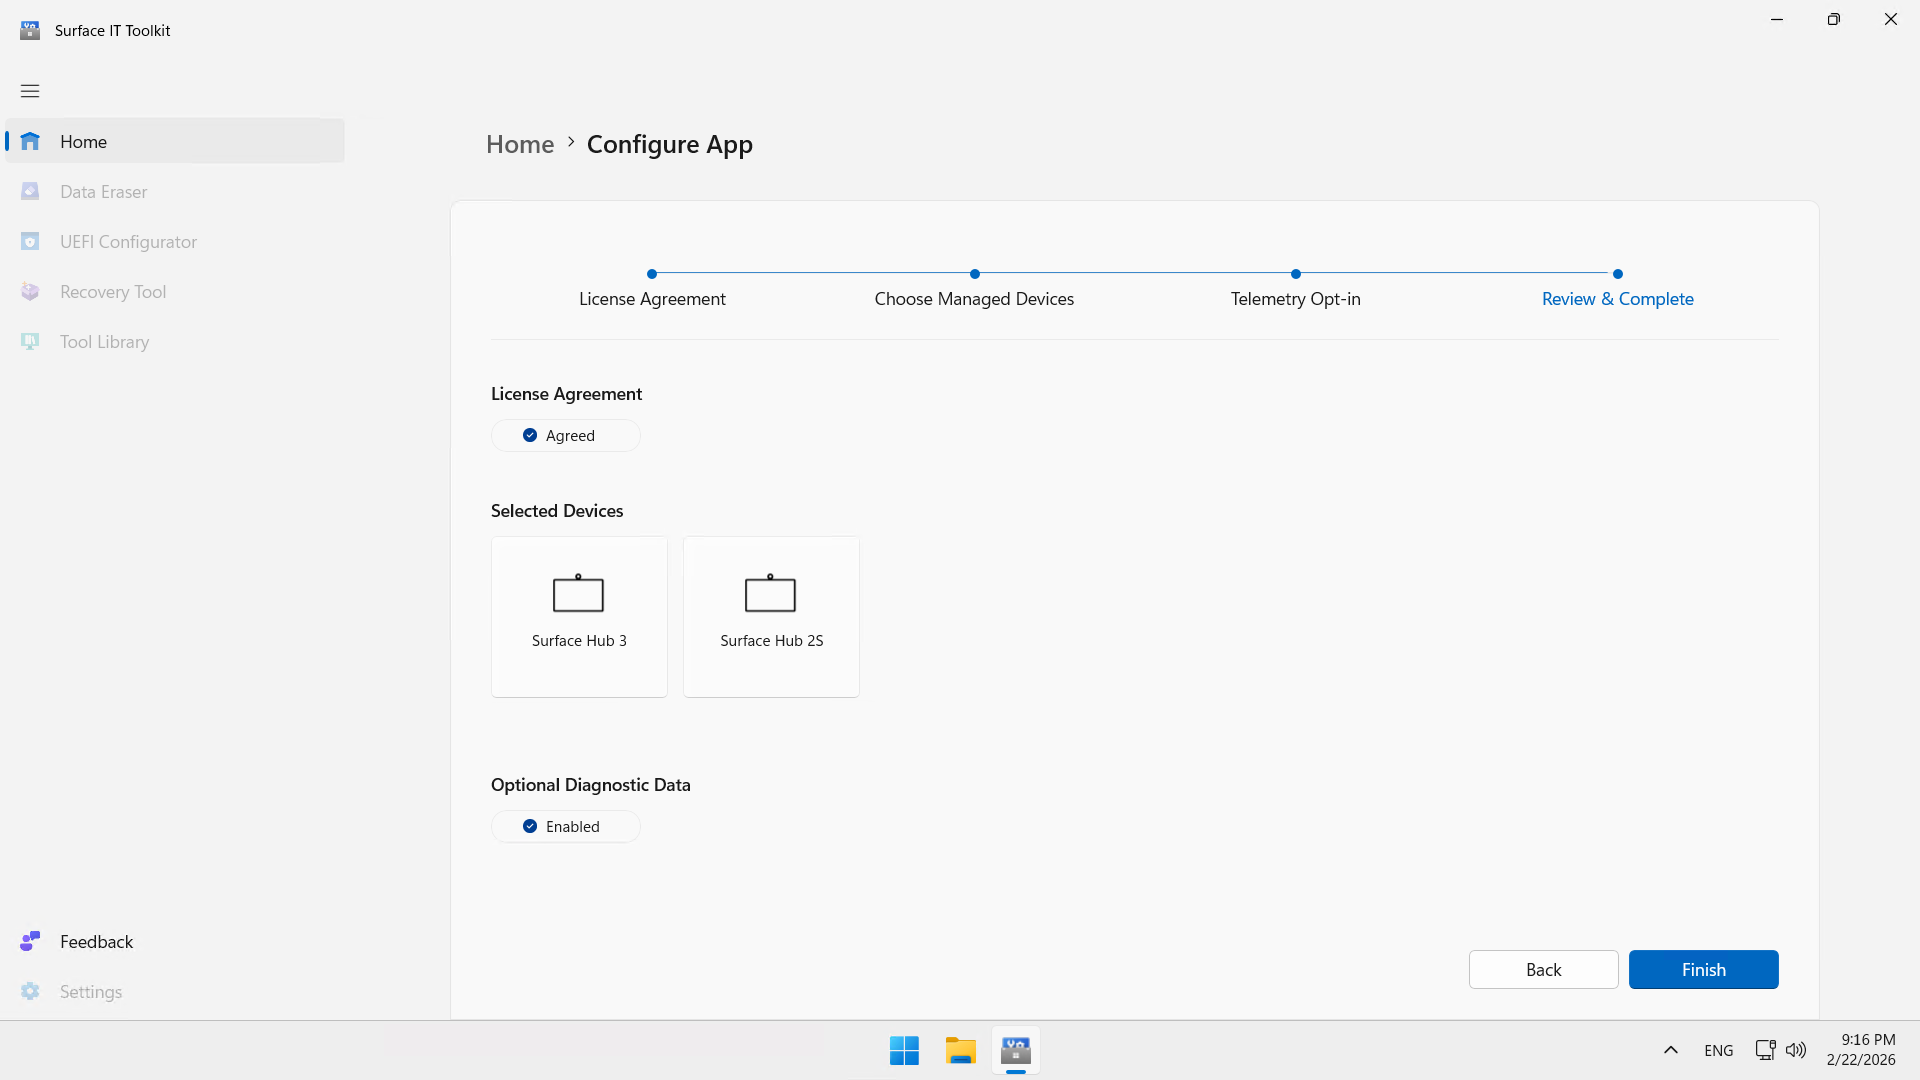
… and complete the installation.
Step 3 : Create the bootable USB drive with the SEMM package
Insert the 1st USB drive into the PC and run the application.
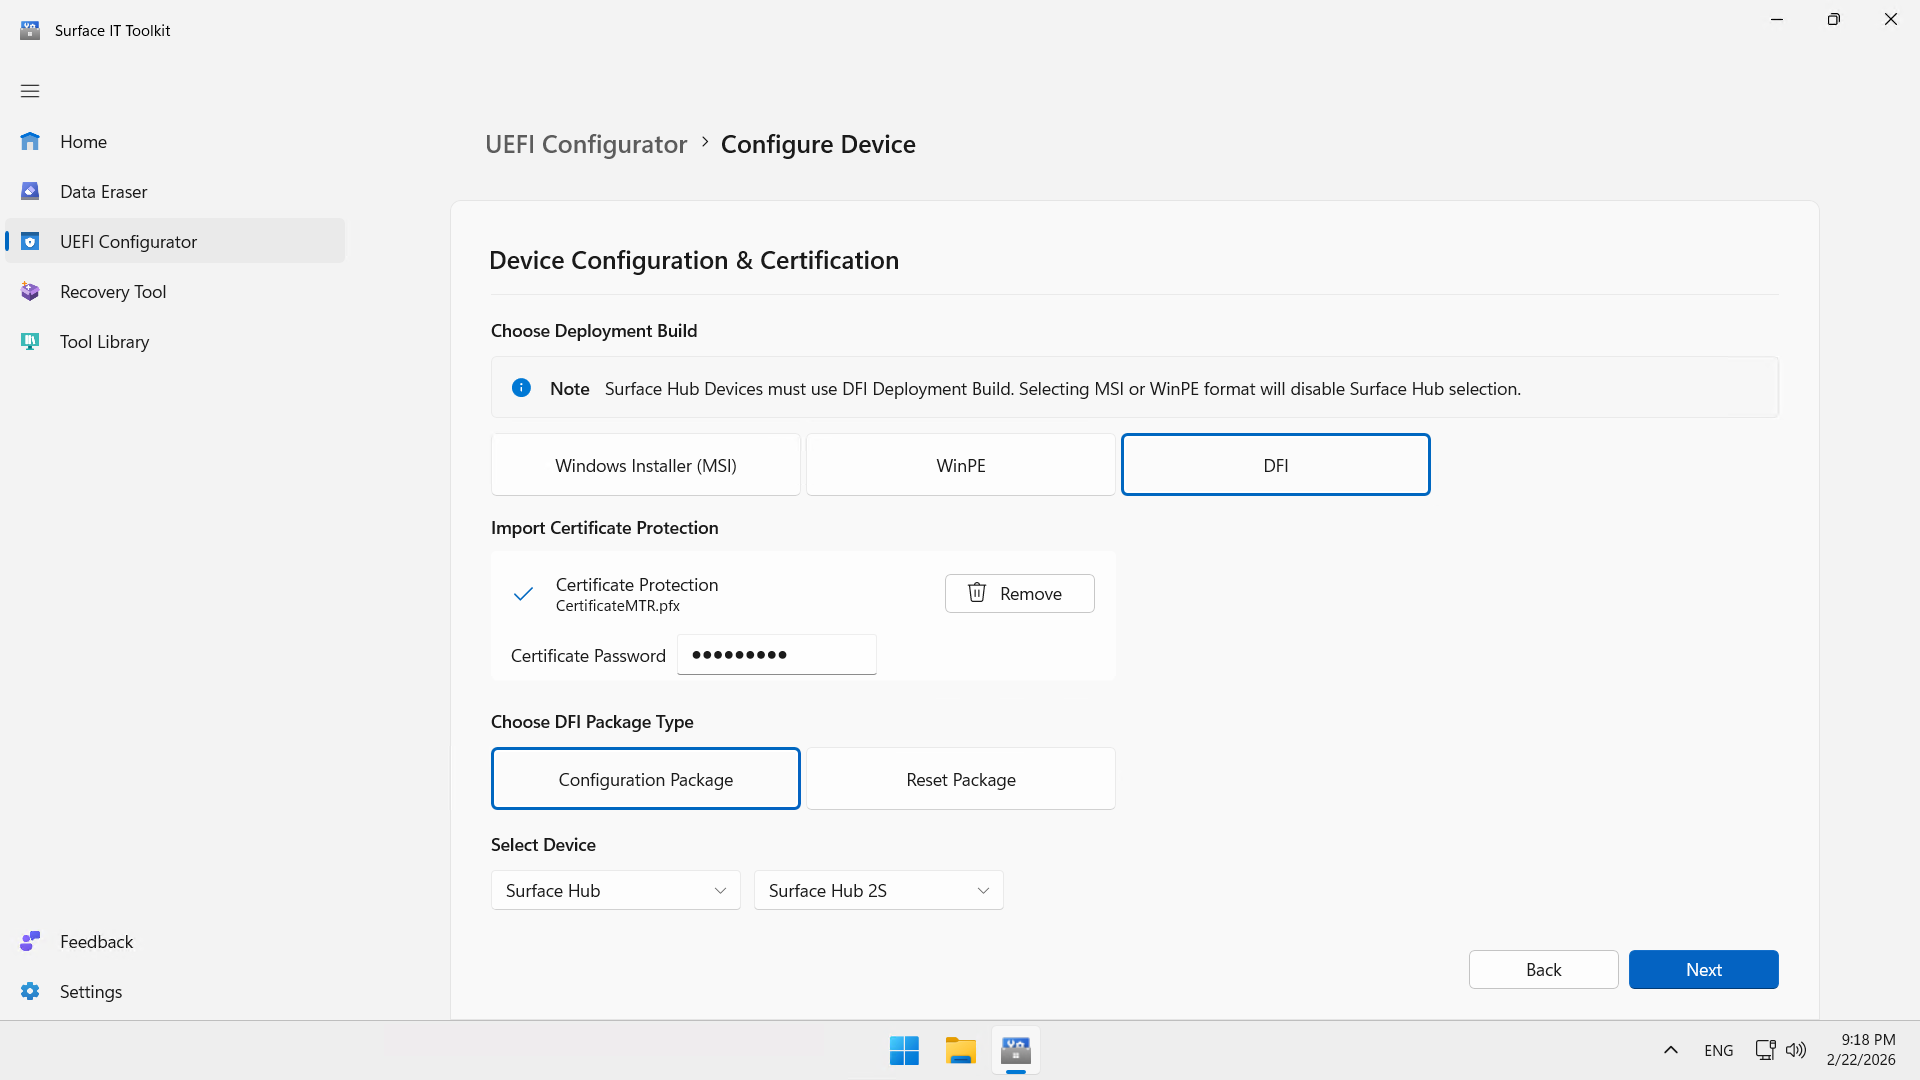
Click UEFI Configurator, then Configure Device(s).
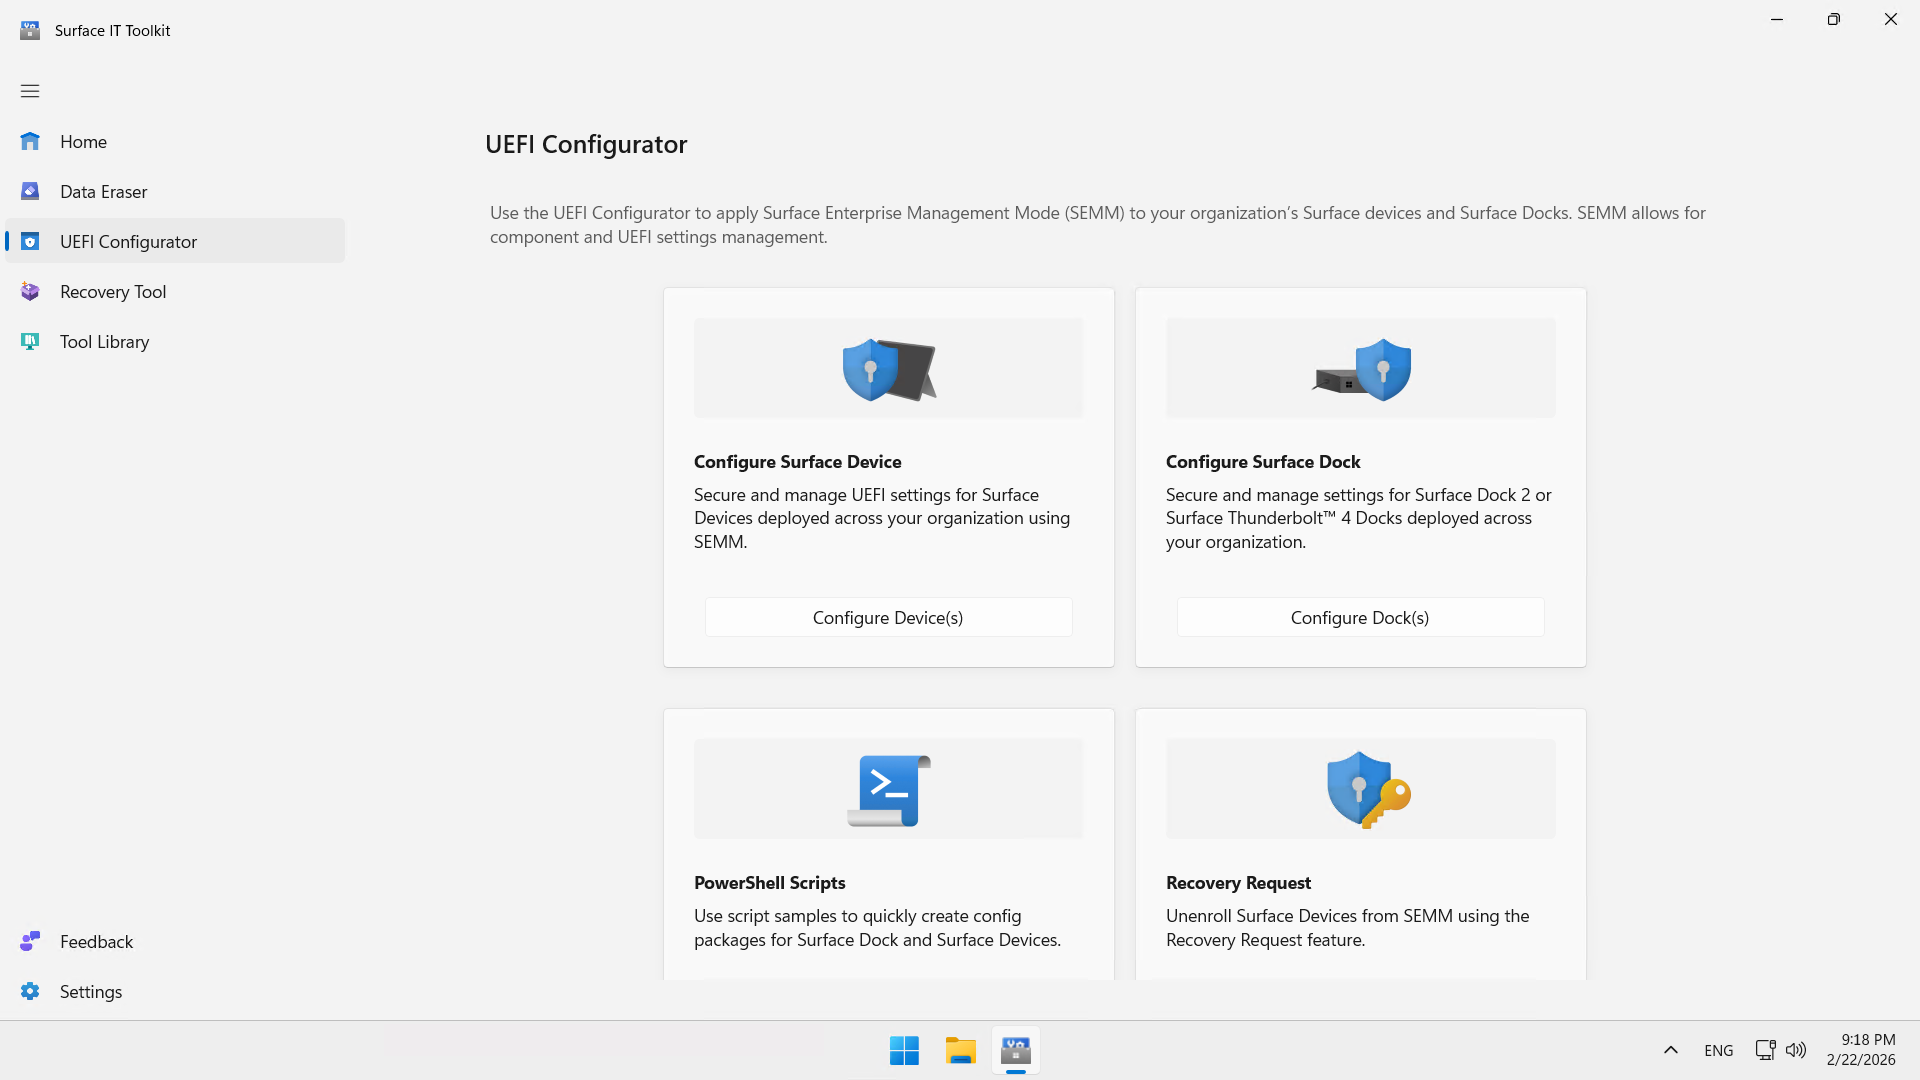
Configure the attributes (replace the values with your own) :
- Choose the deployment version : DFI
- Import certificate protection : Add → CertificateMTR.pfx
- Certificate password : P@sSw0rD
- Choose the DFI package type : Configuration Package
- Select the device : Surface Hub → Surface Hub 2S
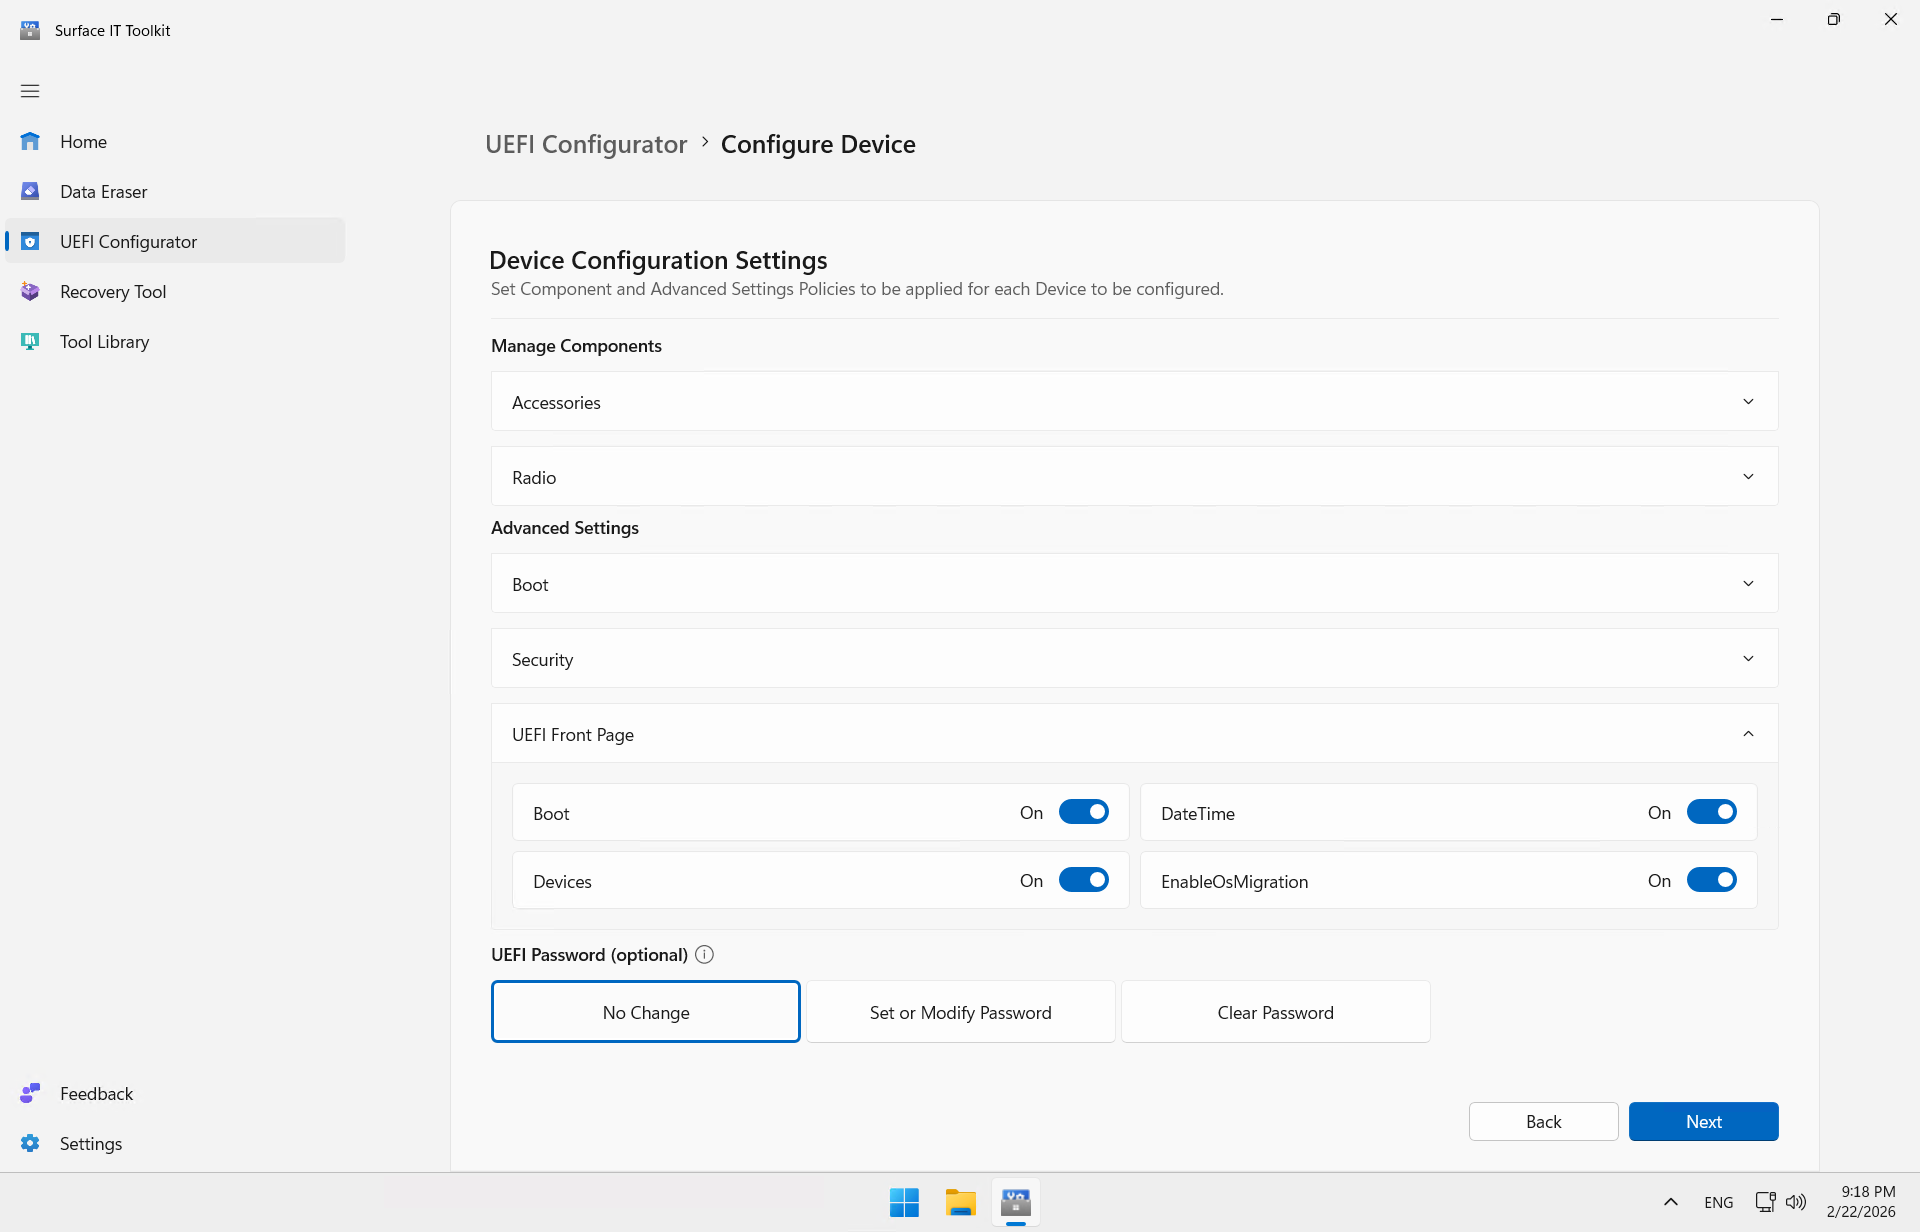
Confirm that the EnableOsMigration option is enabled.
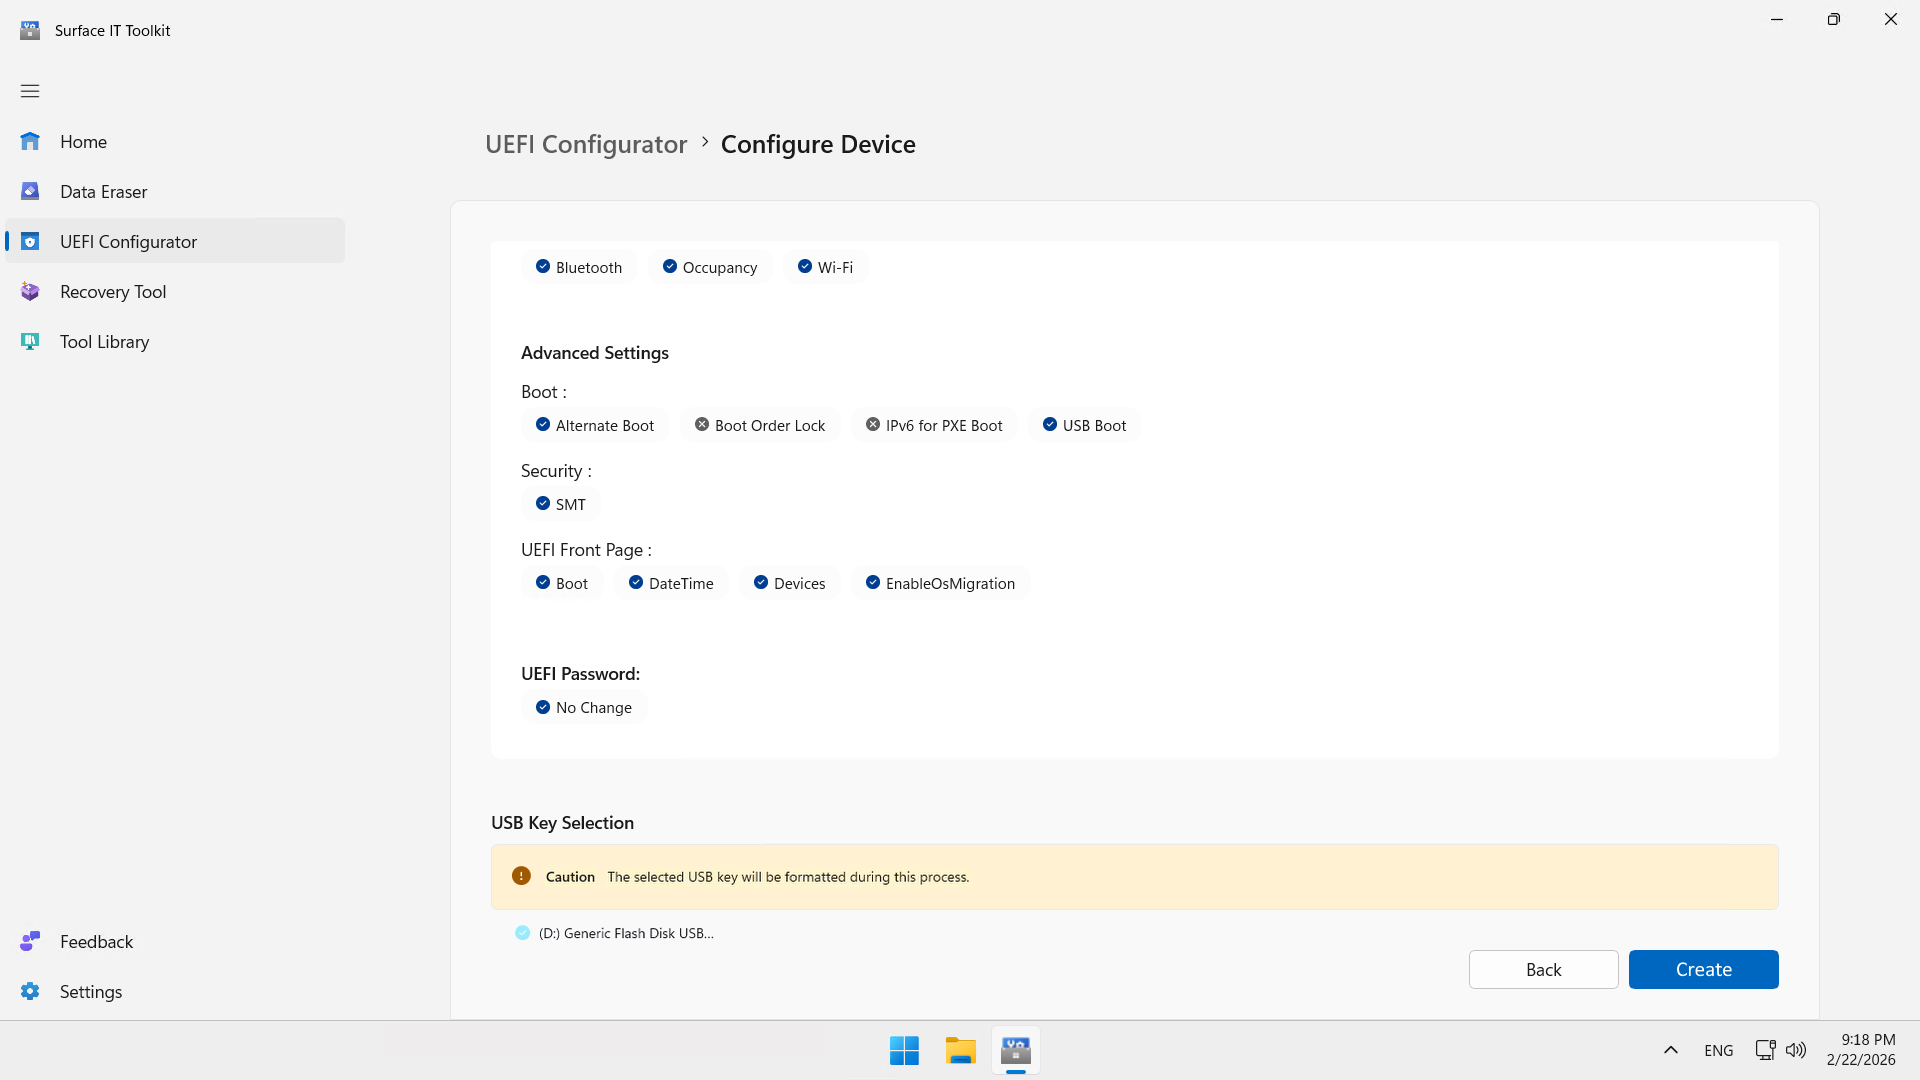
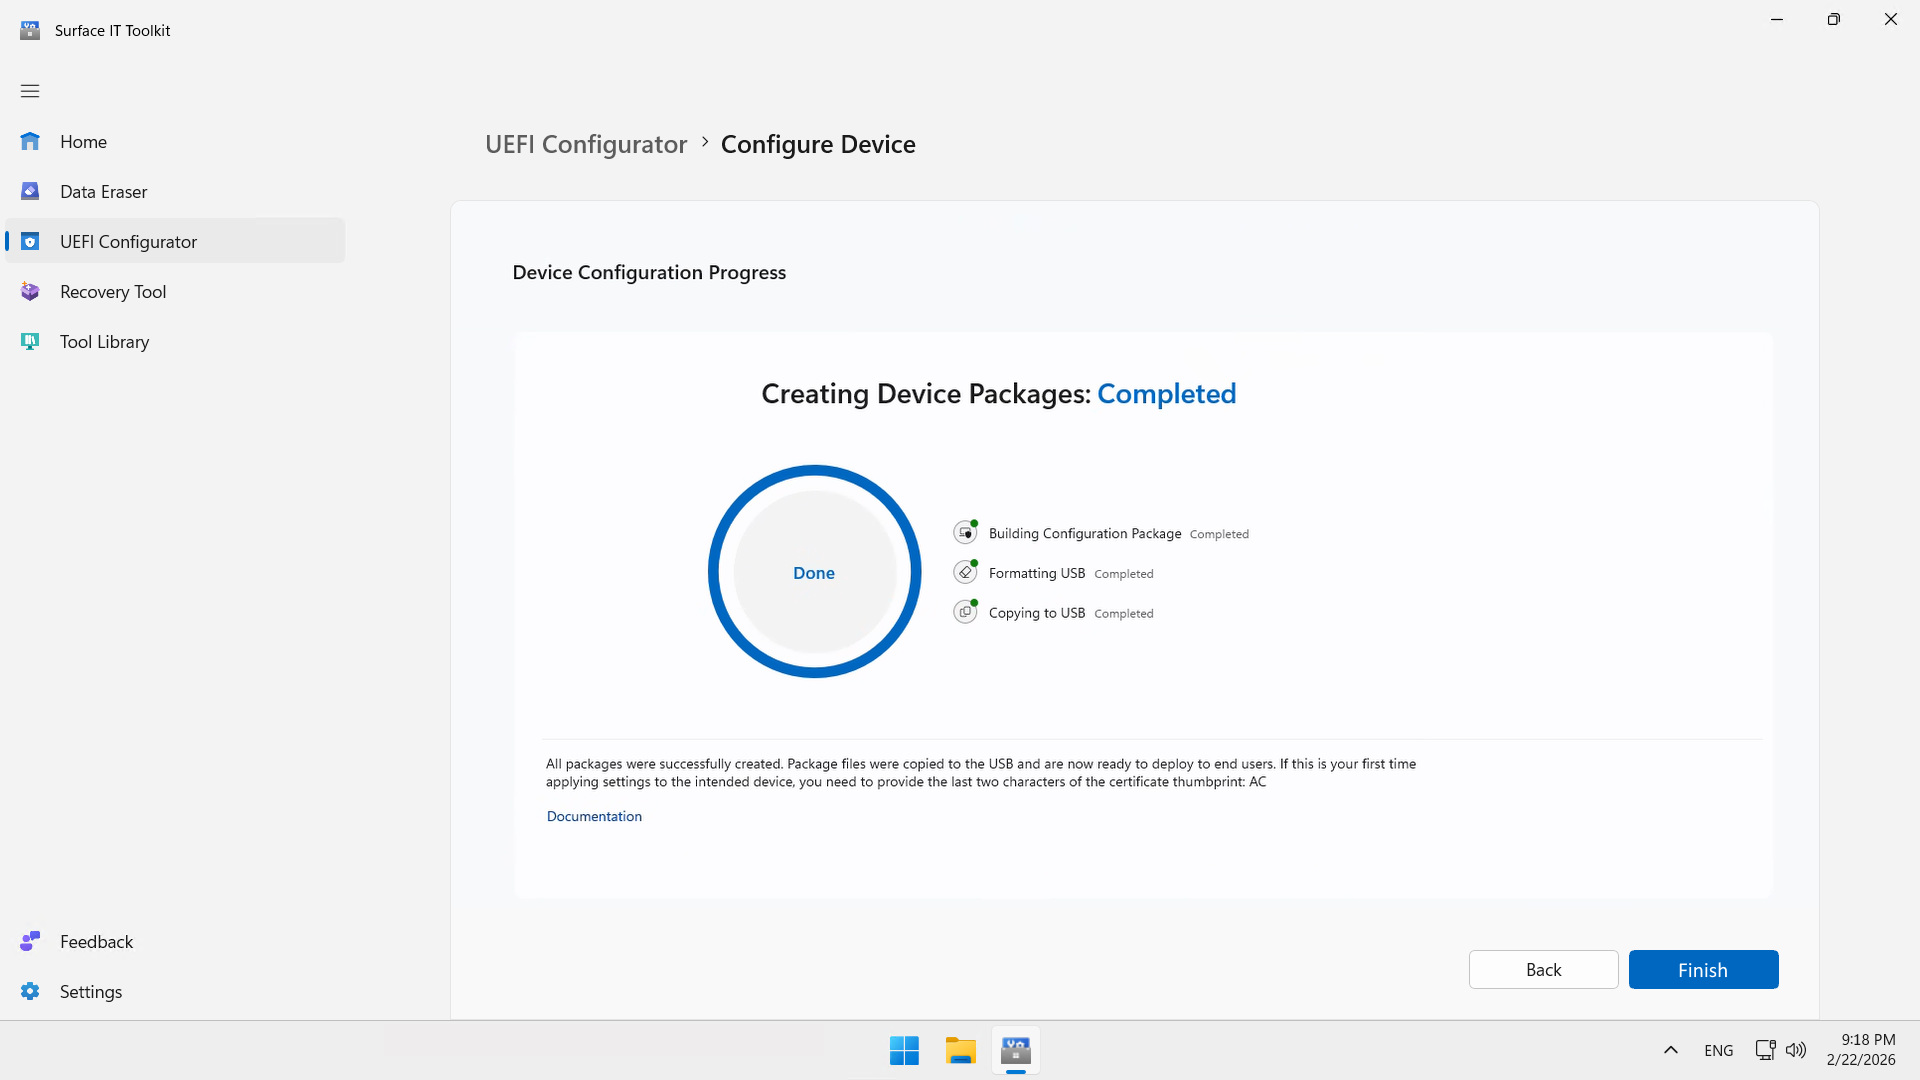
Click Create to create the first USB key.
Click Finish.
warning
Step 4 : Create the bootable USB drive with the MTR image
Browse USB drive 1 ; you should see a file named DfciUpdate.dfi. Copy the certificate to the drive and then eject it. Insert USB drive 2.
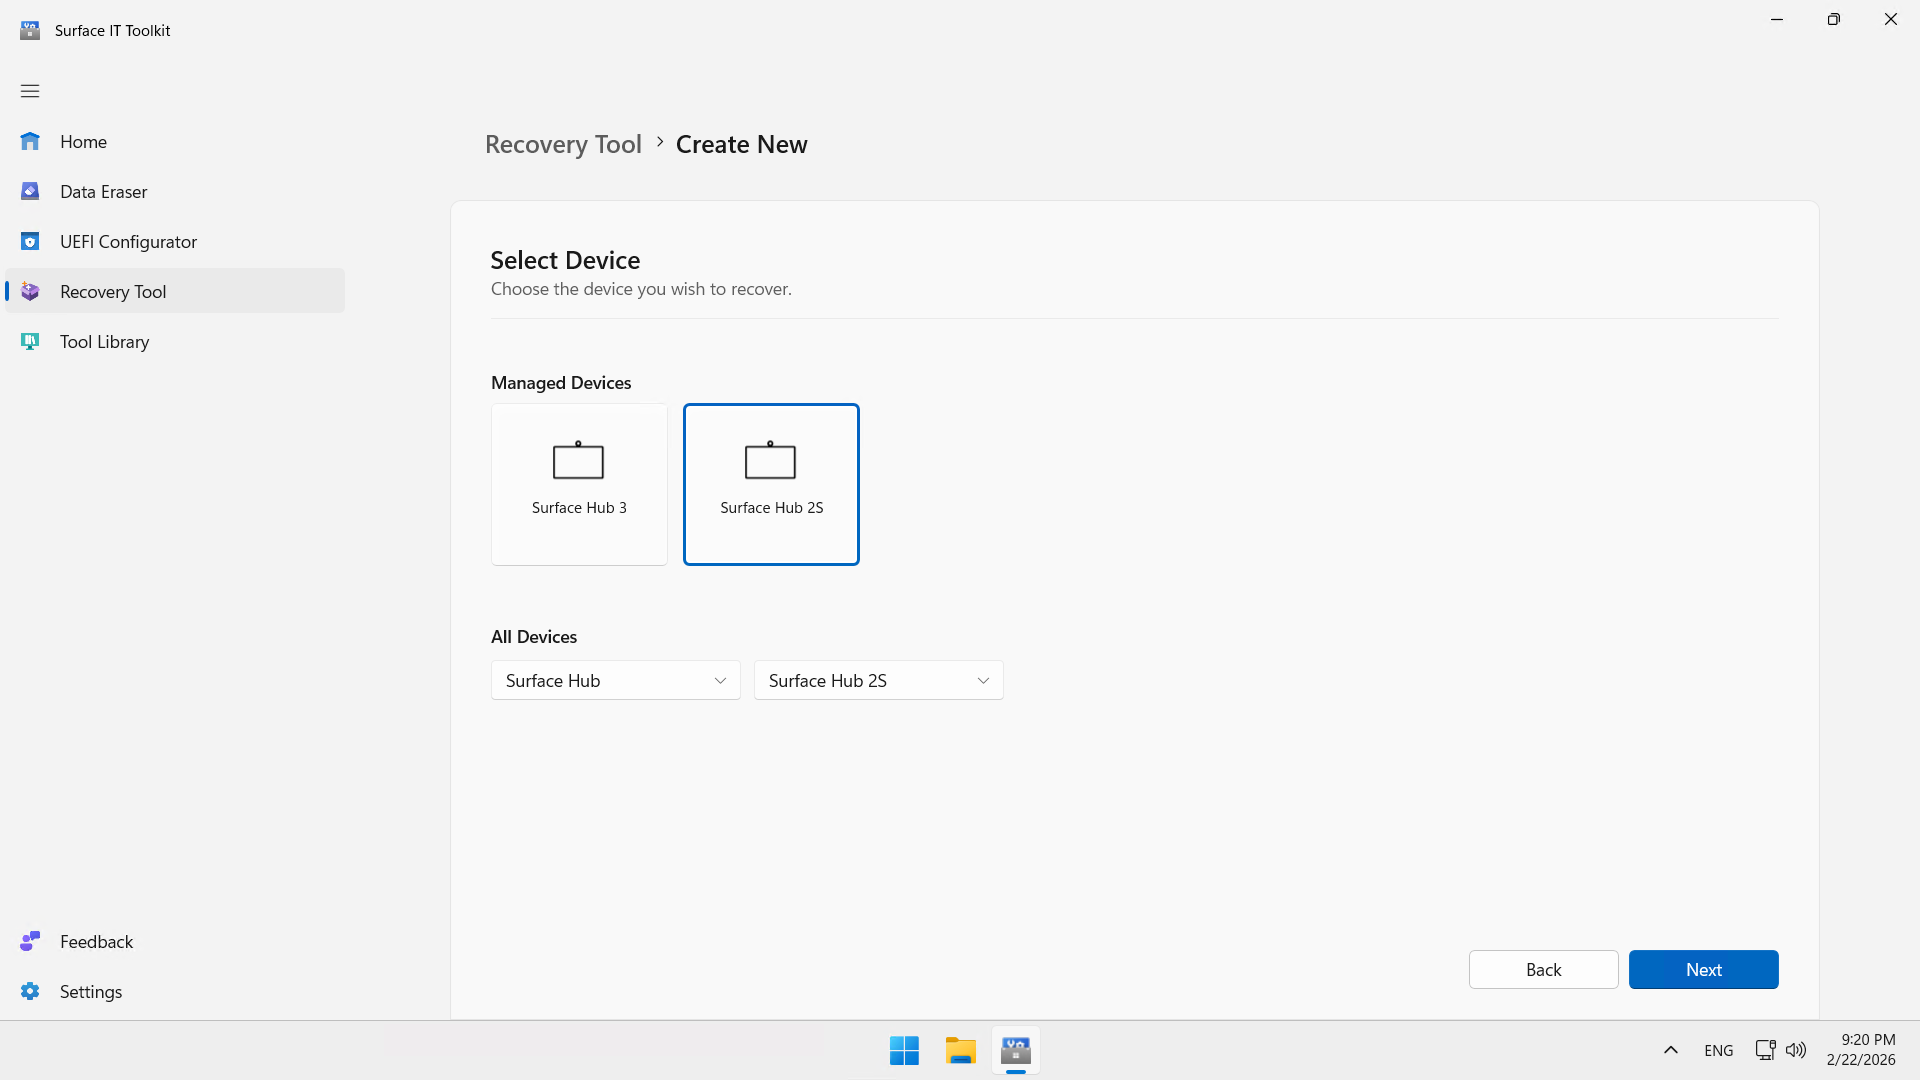
Click Recovery Tool, then Create.

Click Surface Hub 2S.
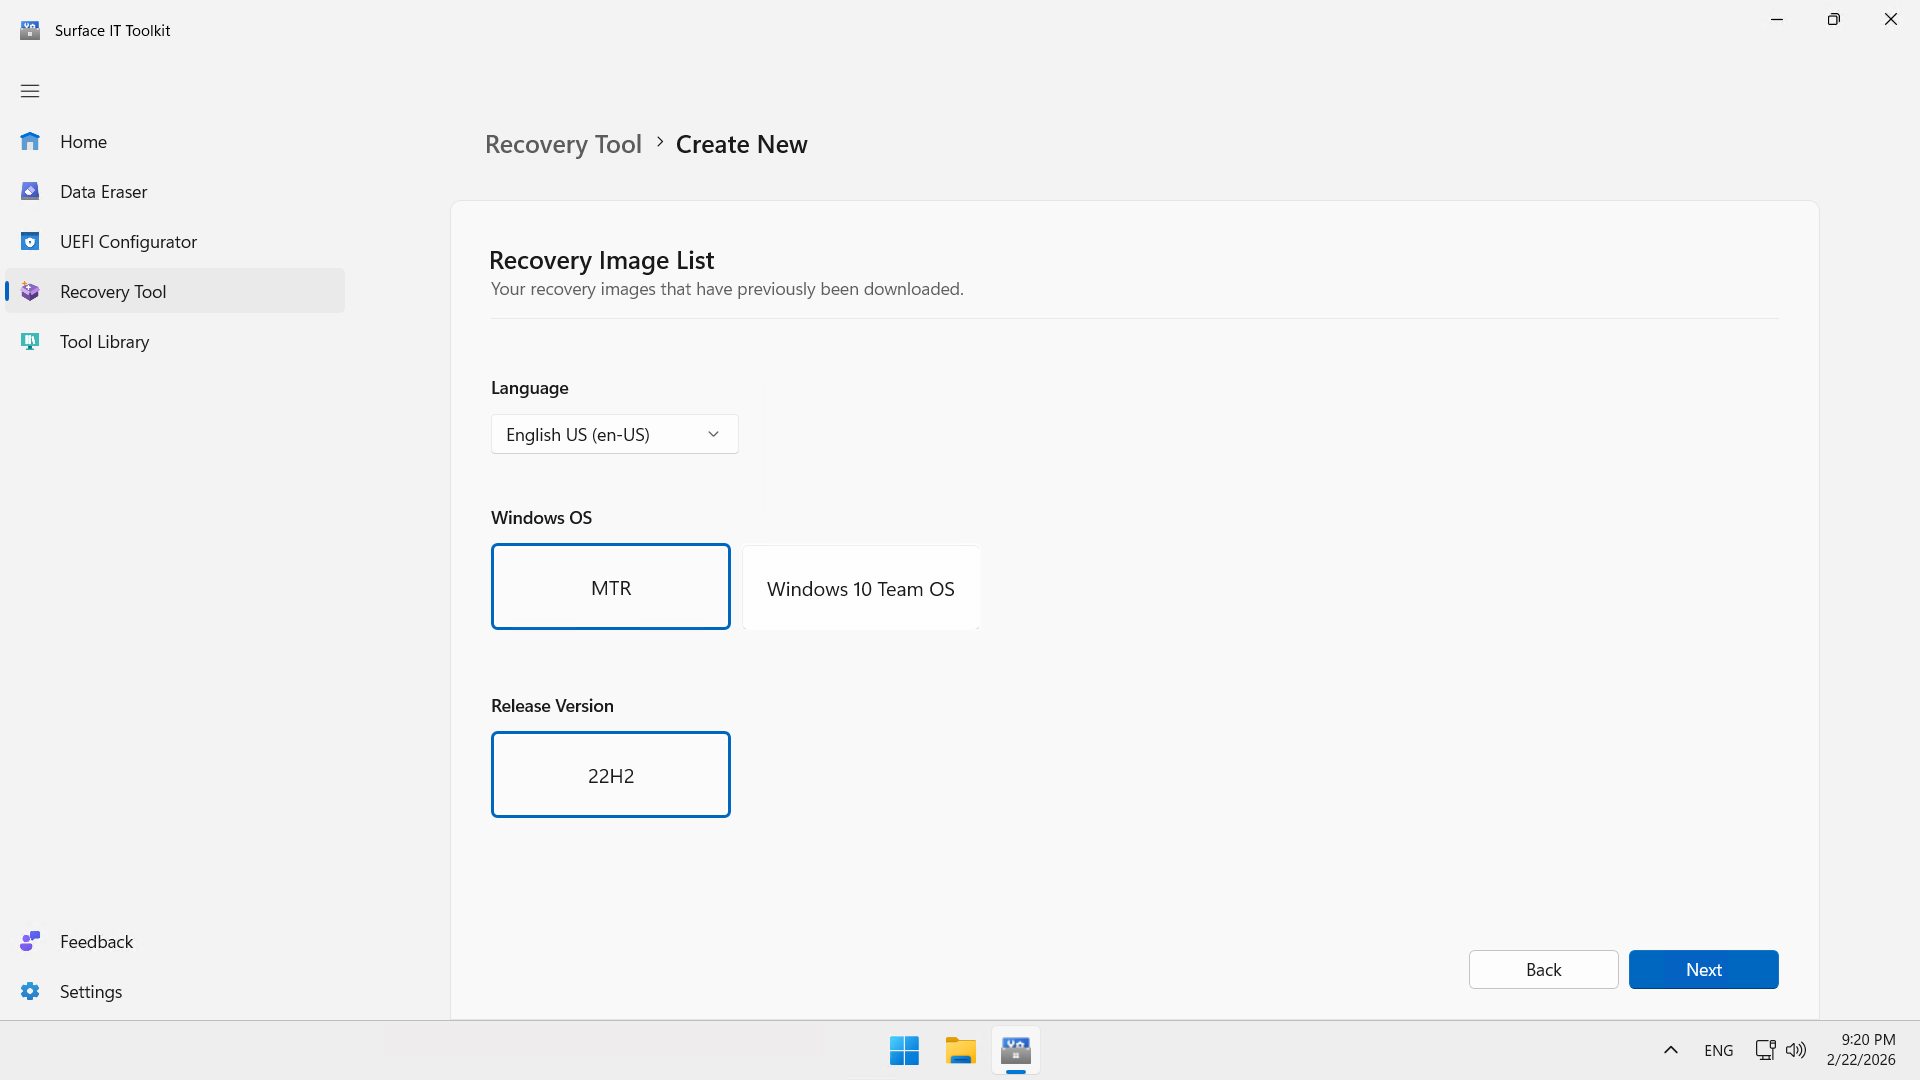
Select the language and version of the MTR.
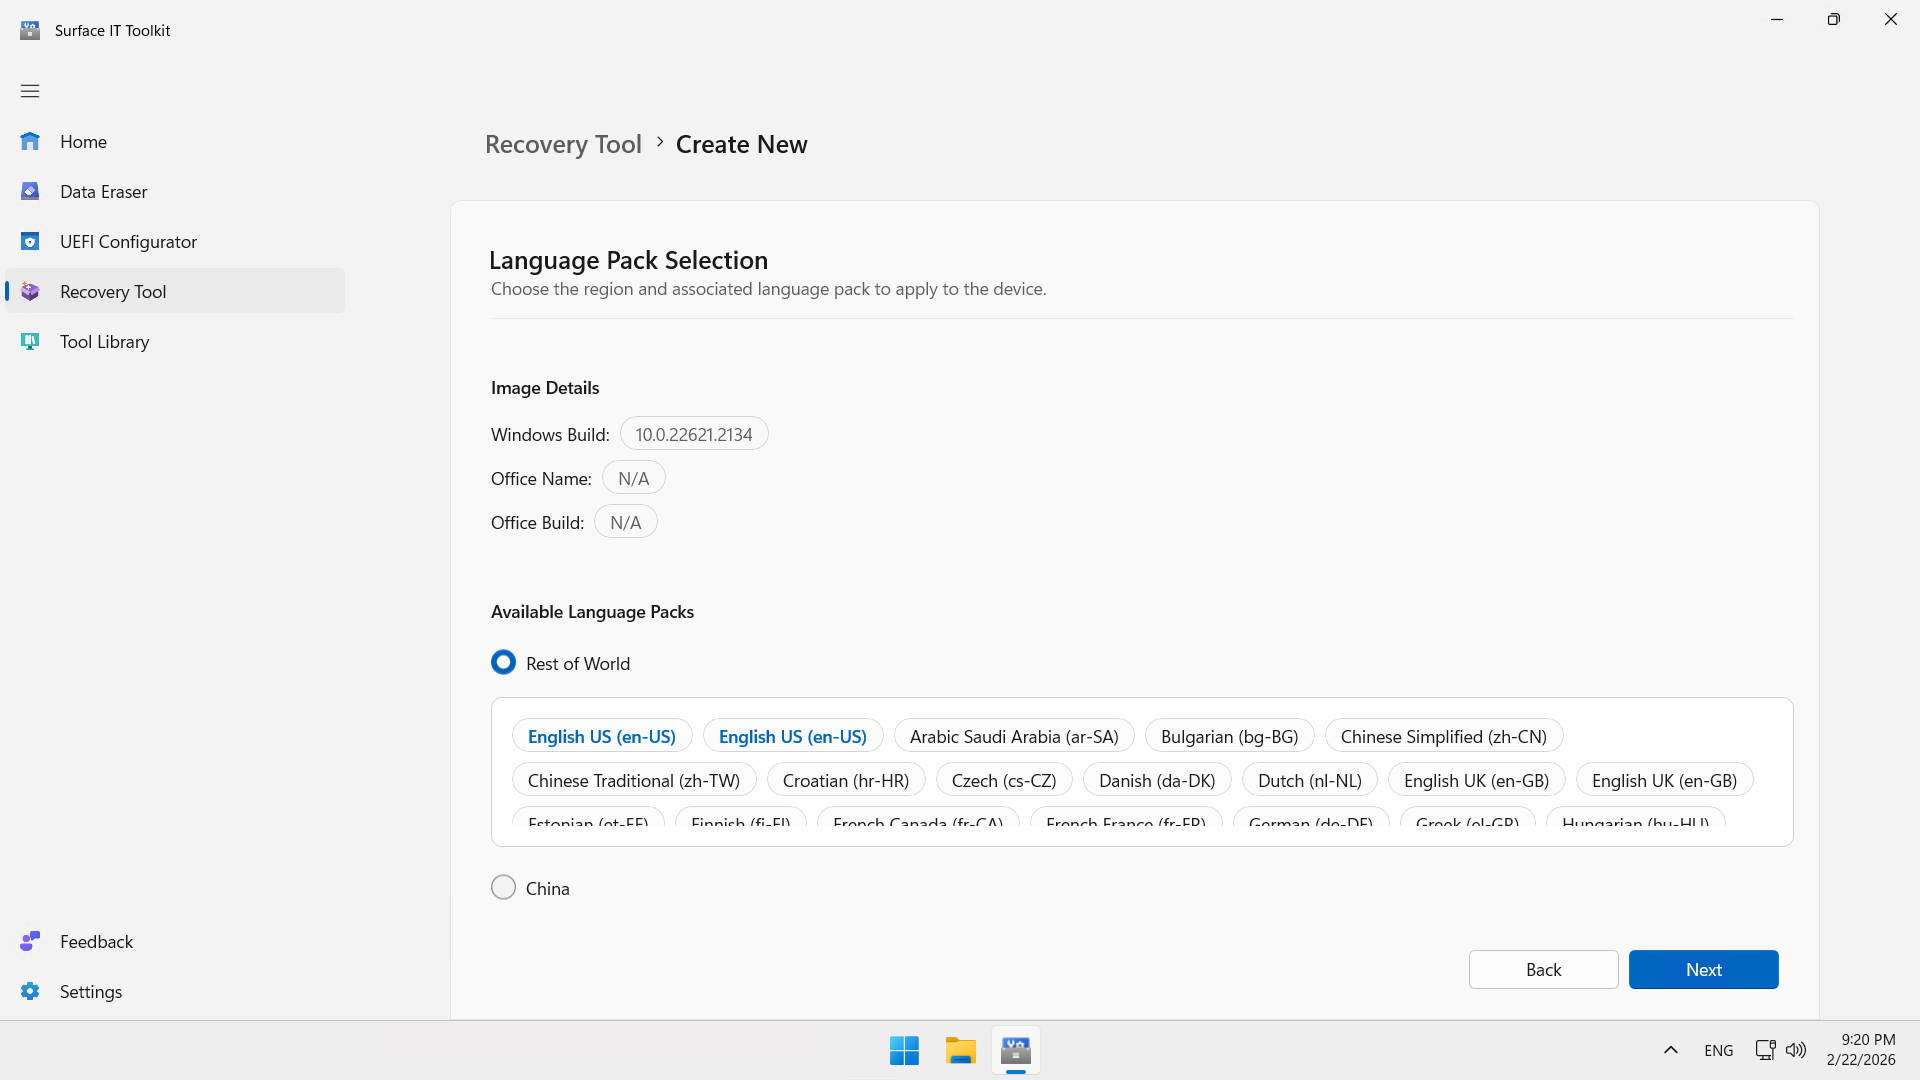
Click Rest of World, unless you are in China.
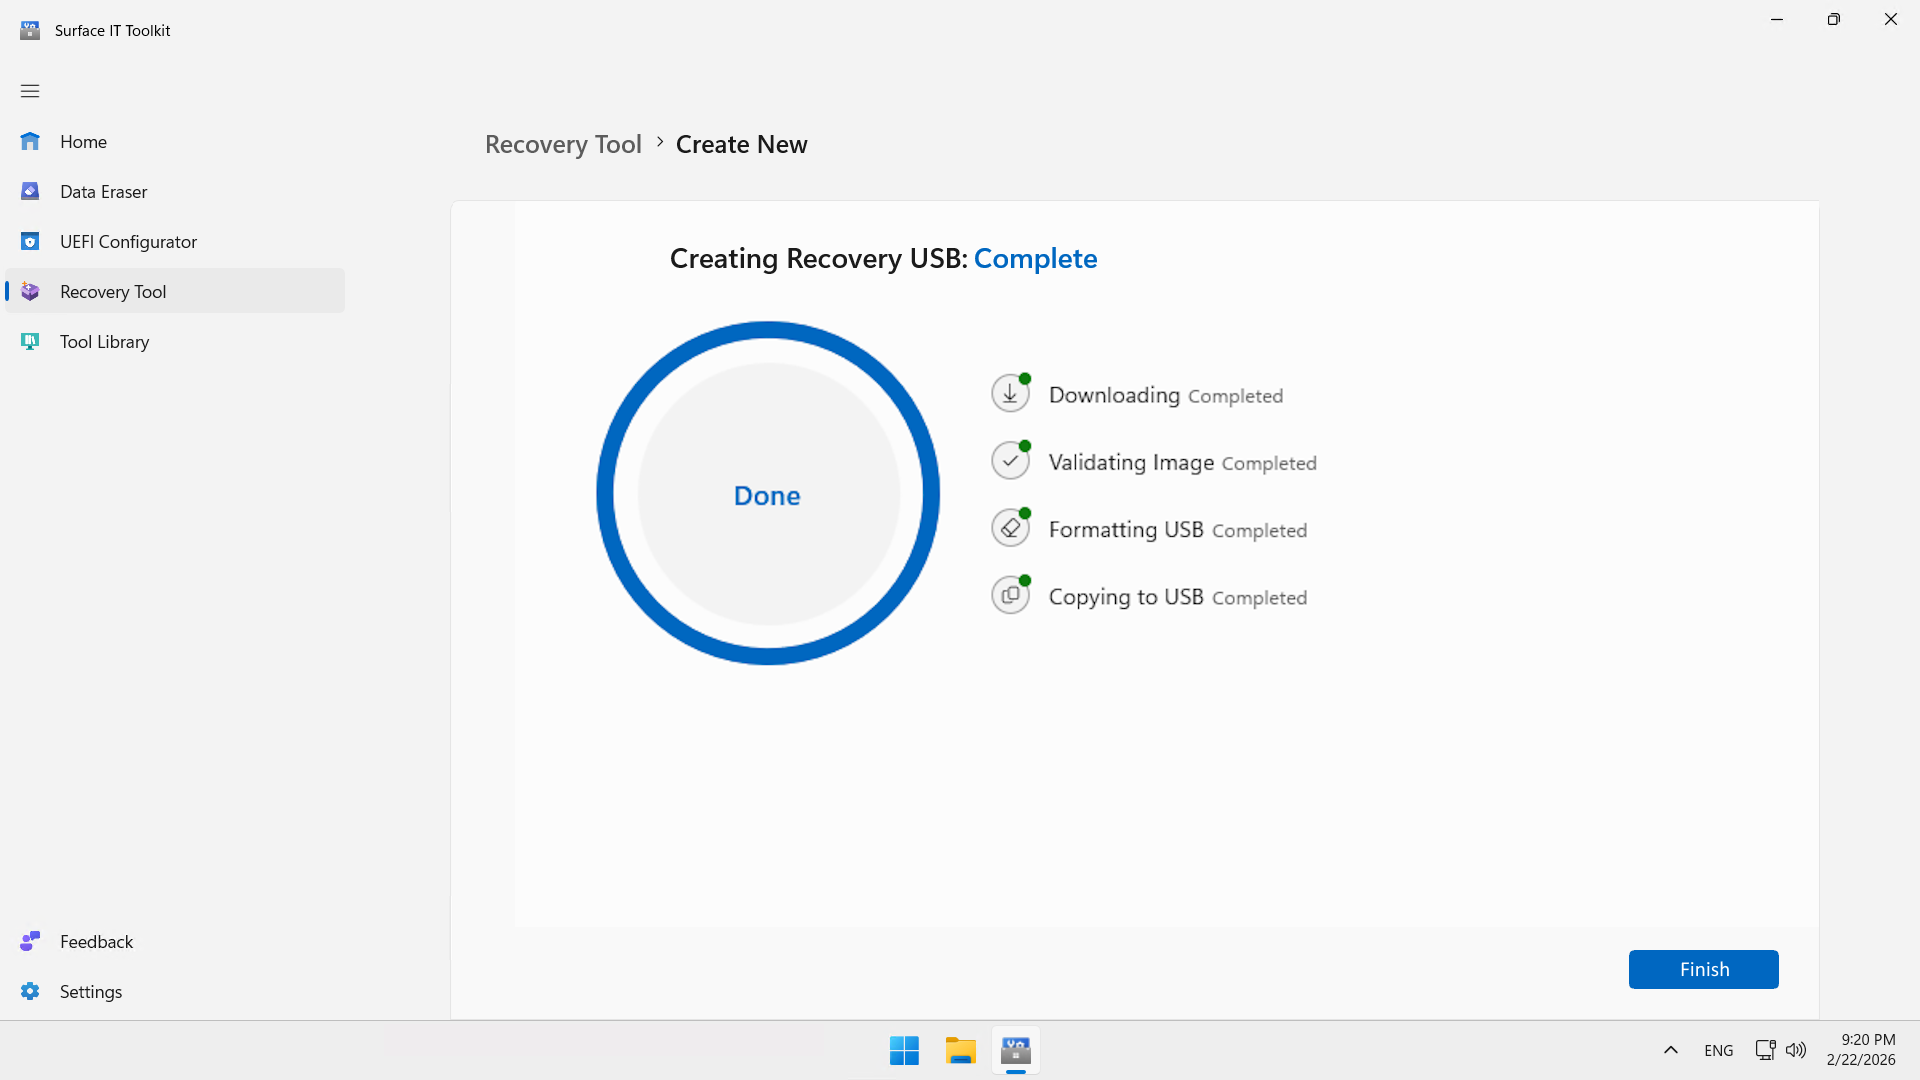
Click Create to create the 2nd USB key.
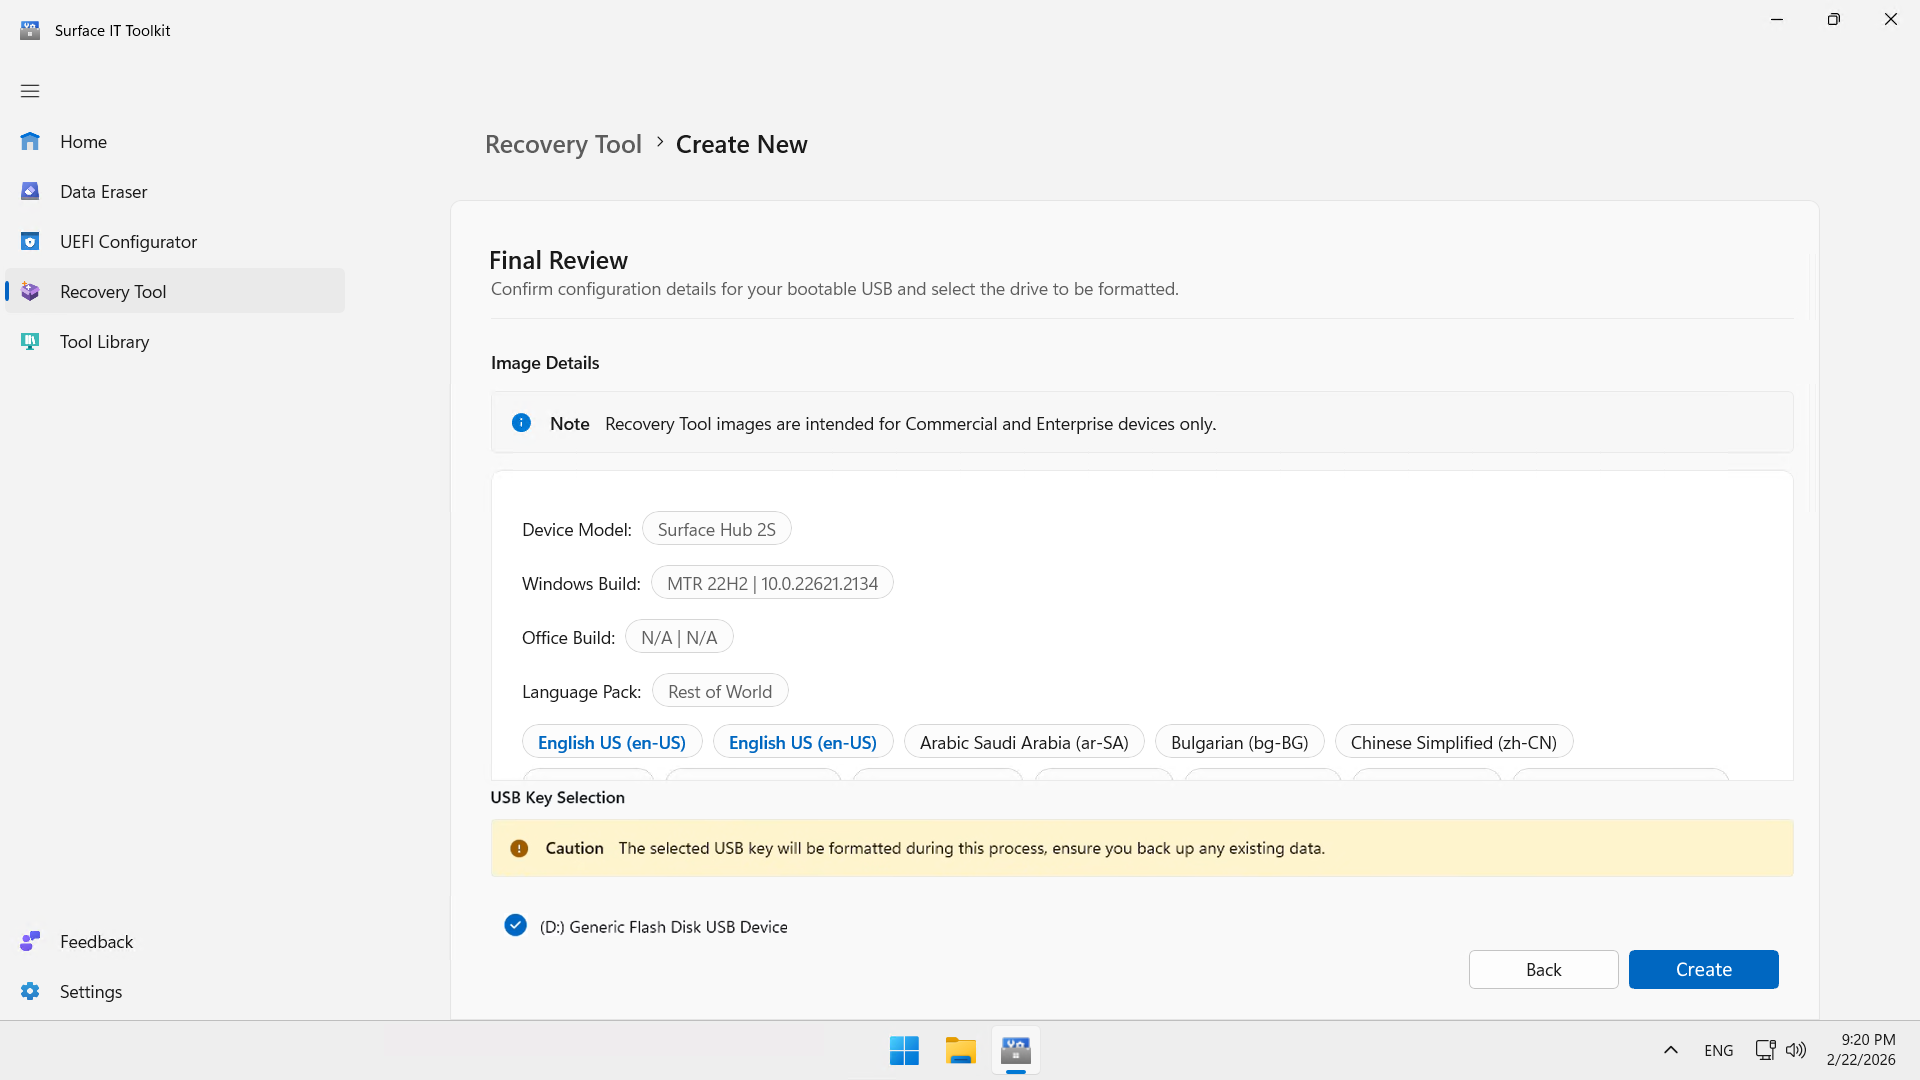
Click Finish.
warning
Step 5 : Check firmware requirements
On your Surface Hub, verify that the UEFI version is 699.845.768.0 or later. If it isn’t, update the UEFI firmware before migrating.
- Tap Start, then All apps, then Surface, and then Your Surface.
- Under Device information, check the UEFI version.
You can also check the UEFI version in the UEFI menu :
- Turn off your Surface Hub 2S.
- Press and hold the Volume + button, then briefly press the Power button. Continue holding the Volume + button until the UEFI menu appears on the screen.
- Tap System information to view the UEFI version.
Step 6 : Migrate the Windows version to MTRoW
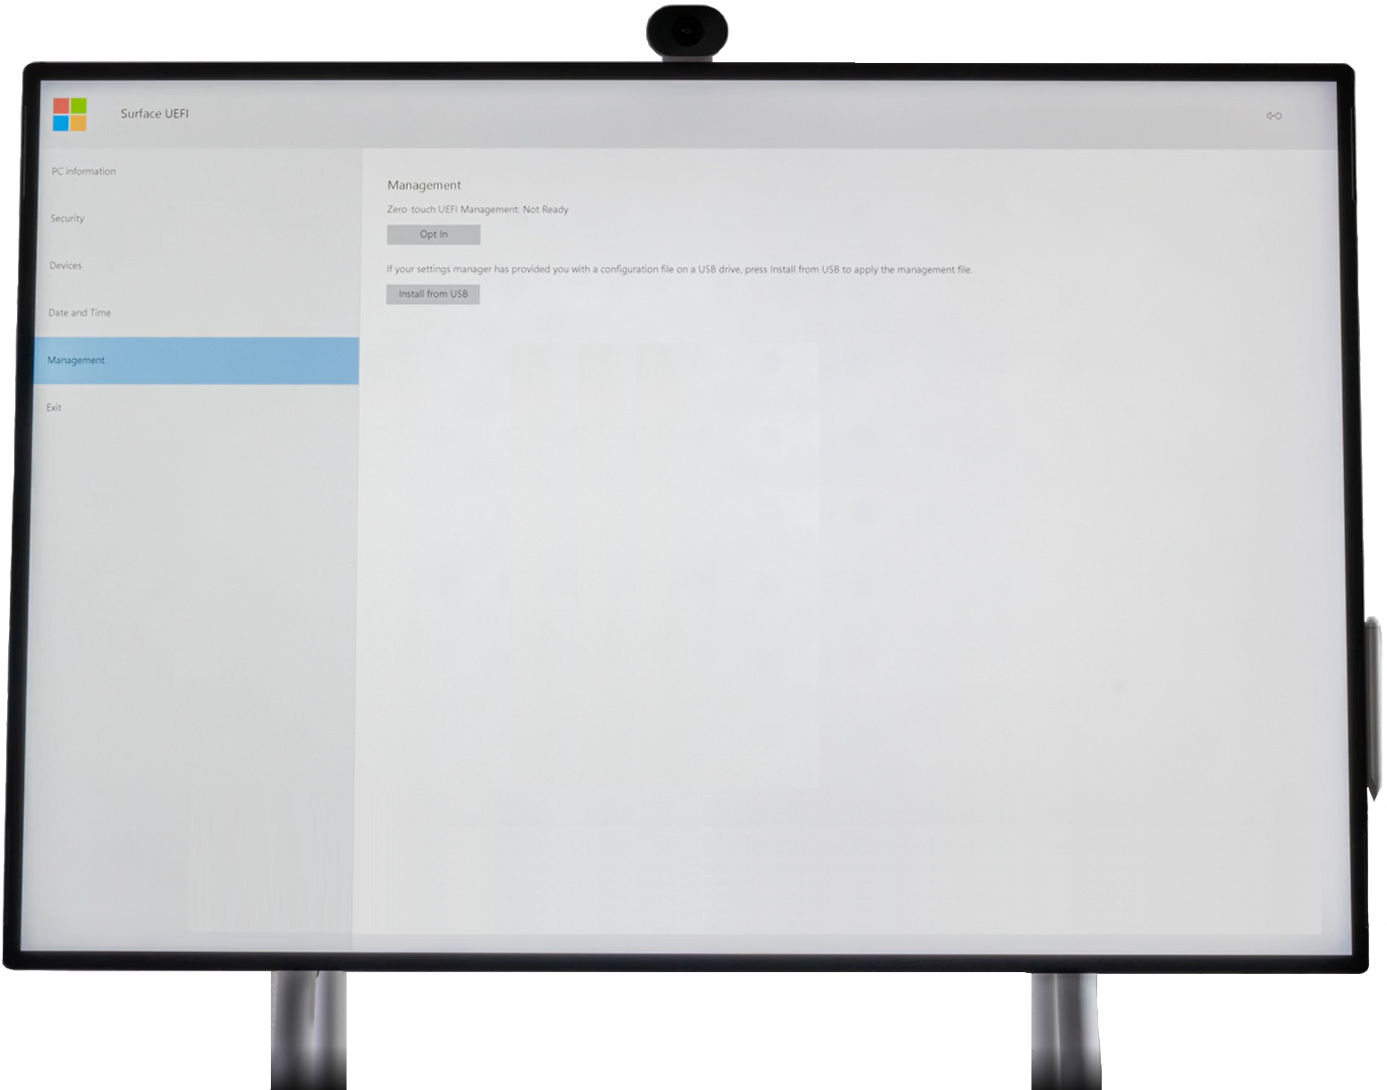
Insert the first USB drive into the Surface Hub 2S and power off the device.
Press and hold the Volume + button, then briefly press the Power button. Continue holding the Volume + button until the UEFI menu appears.
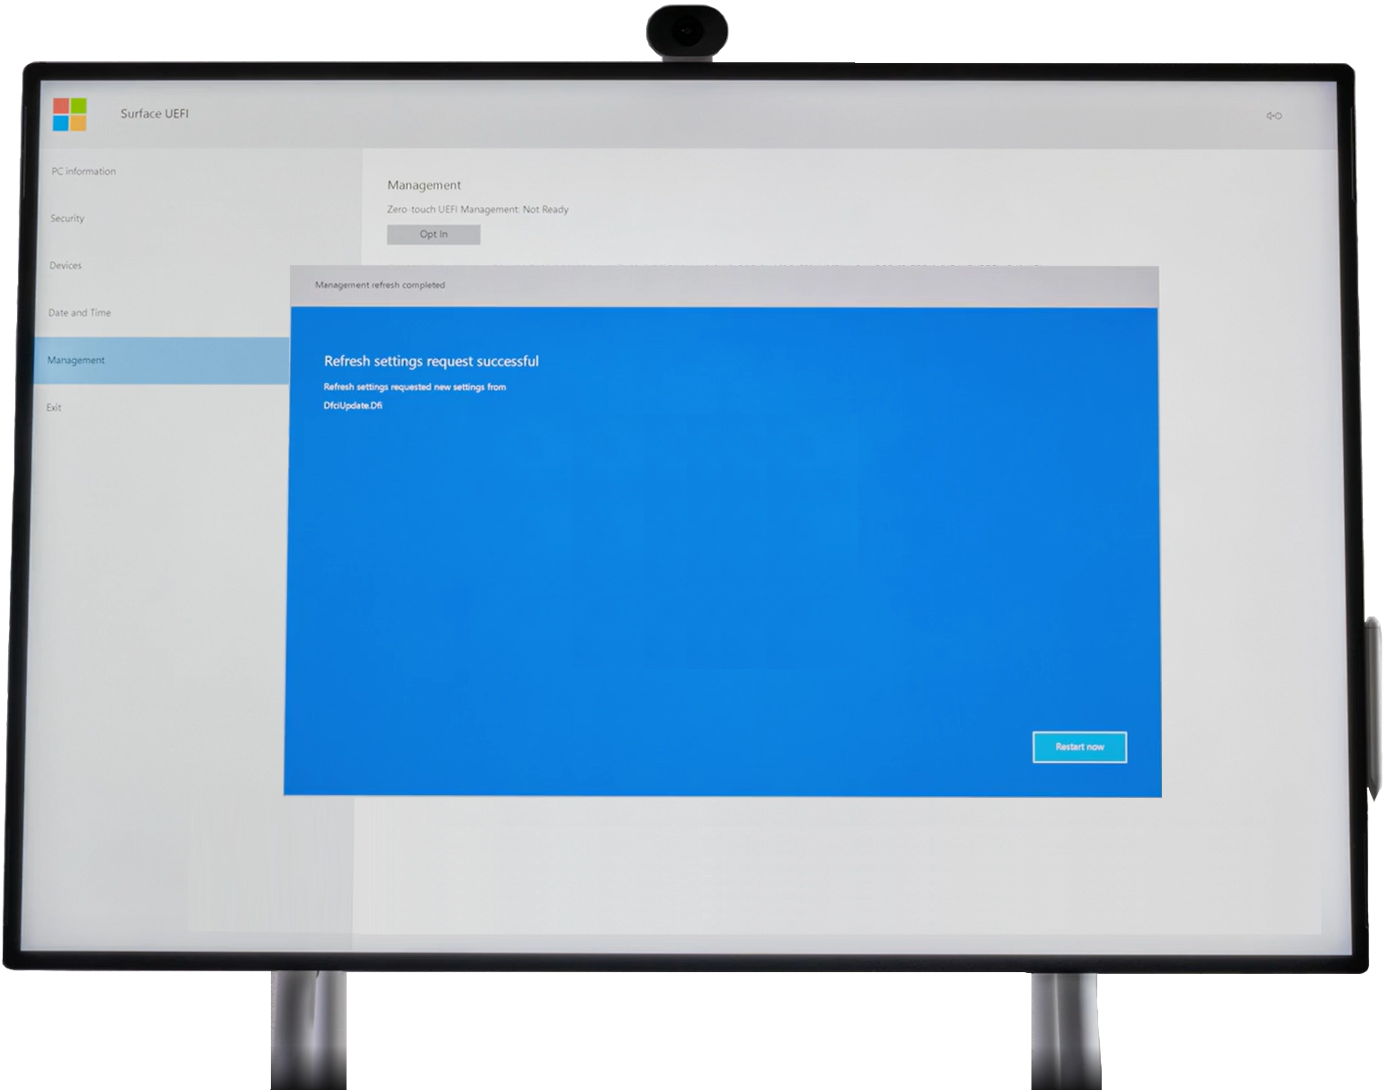
In the UEFI menu, tap Management, then tap Install from USB.
After installation, tap Restart now.
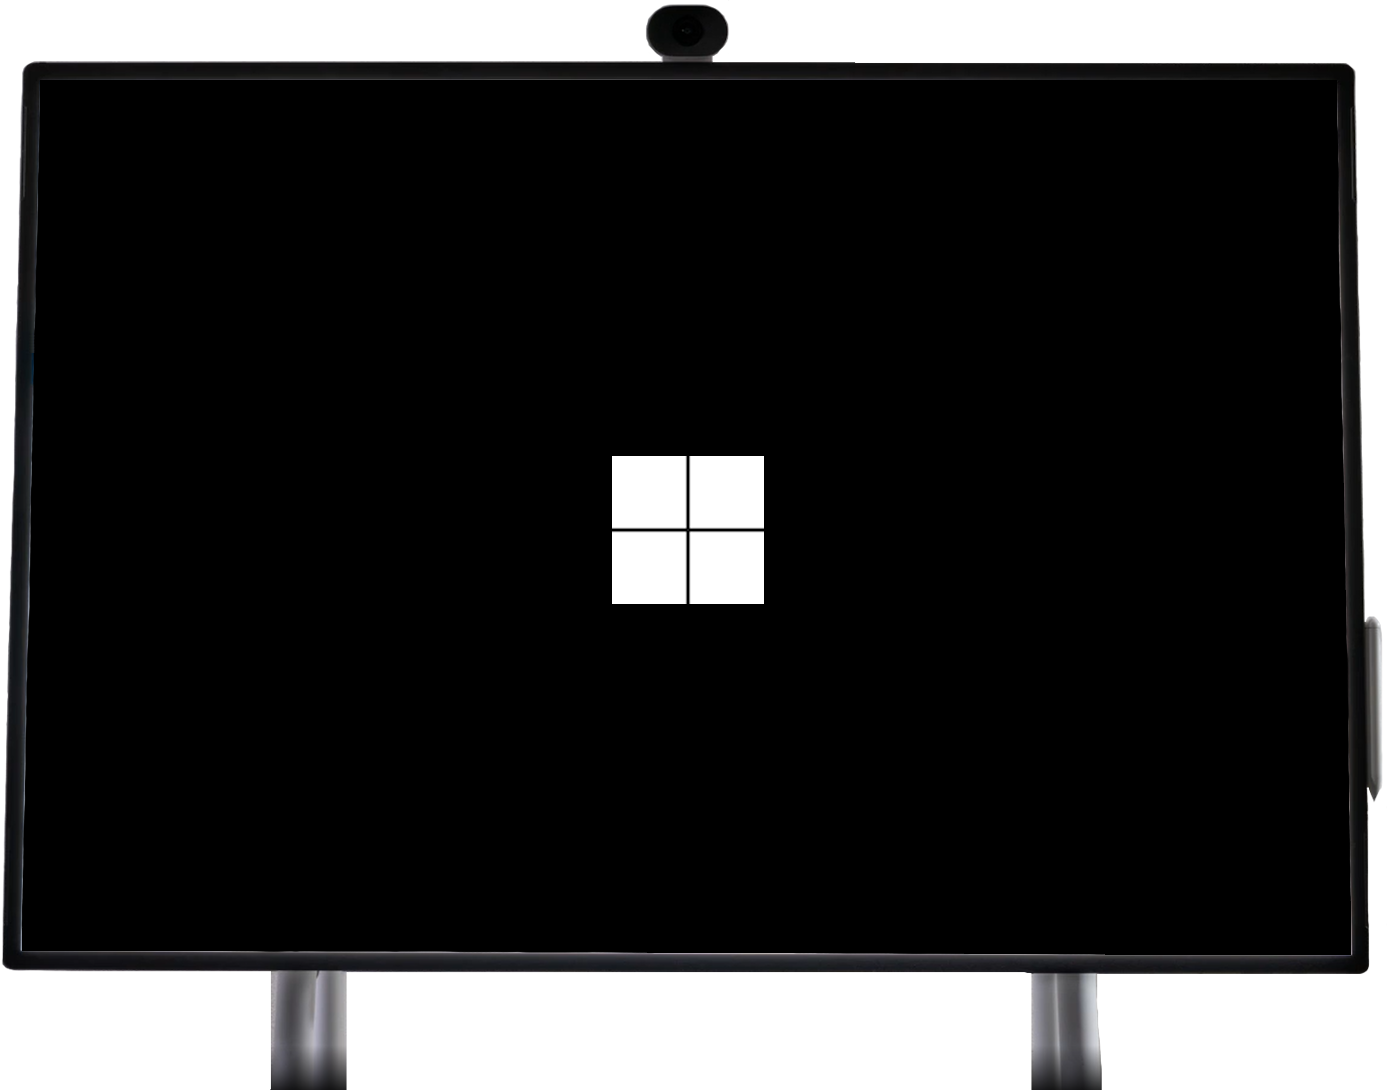
The Surface Hub 2S will display the white Microsoft logo, then power off.
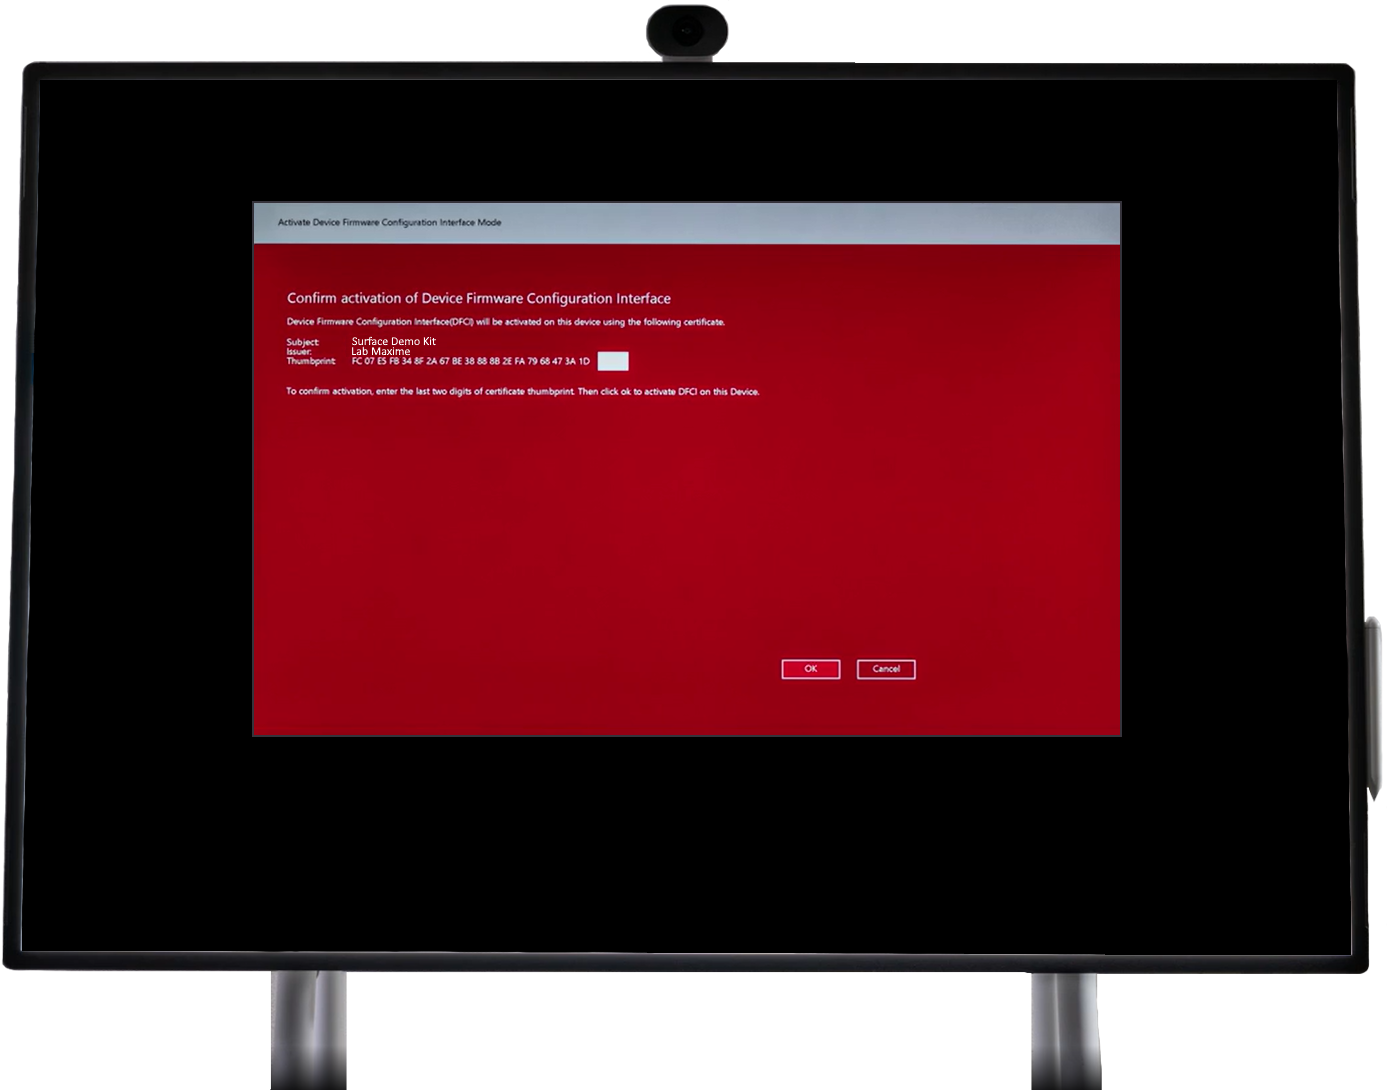
Turn the Surface Hub 2S back on. A red activation message will appear.
Enter the last two characters of the certificate’s thumbprint and tap OK.
The Surface Hub 2S will restart one last time, display a white Microsoft logo, and then shut down again.

Eject USB drive 1 and insert USB drive 2.
Press and hold the Volume + button simultaneously, then press the Power button. Keep both buttons pressed until the Windows logo with the loading dots appears, then release them.
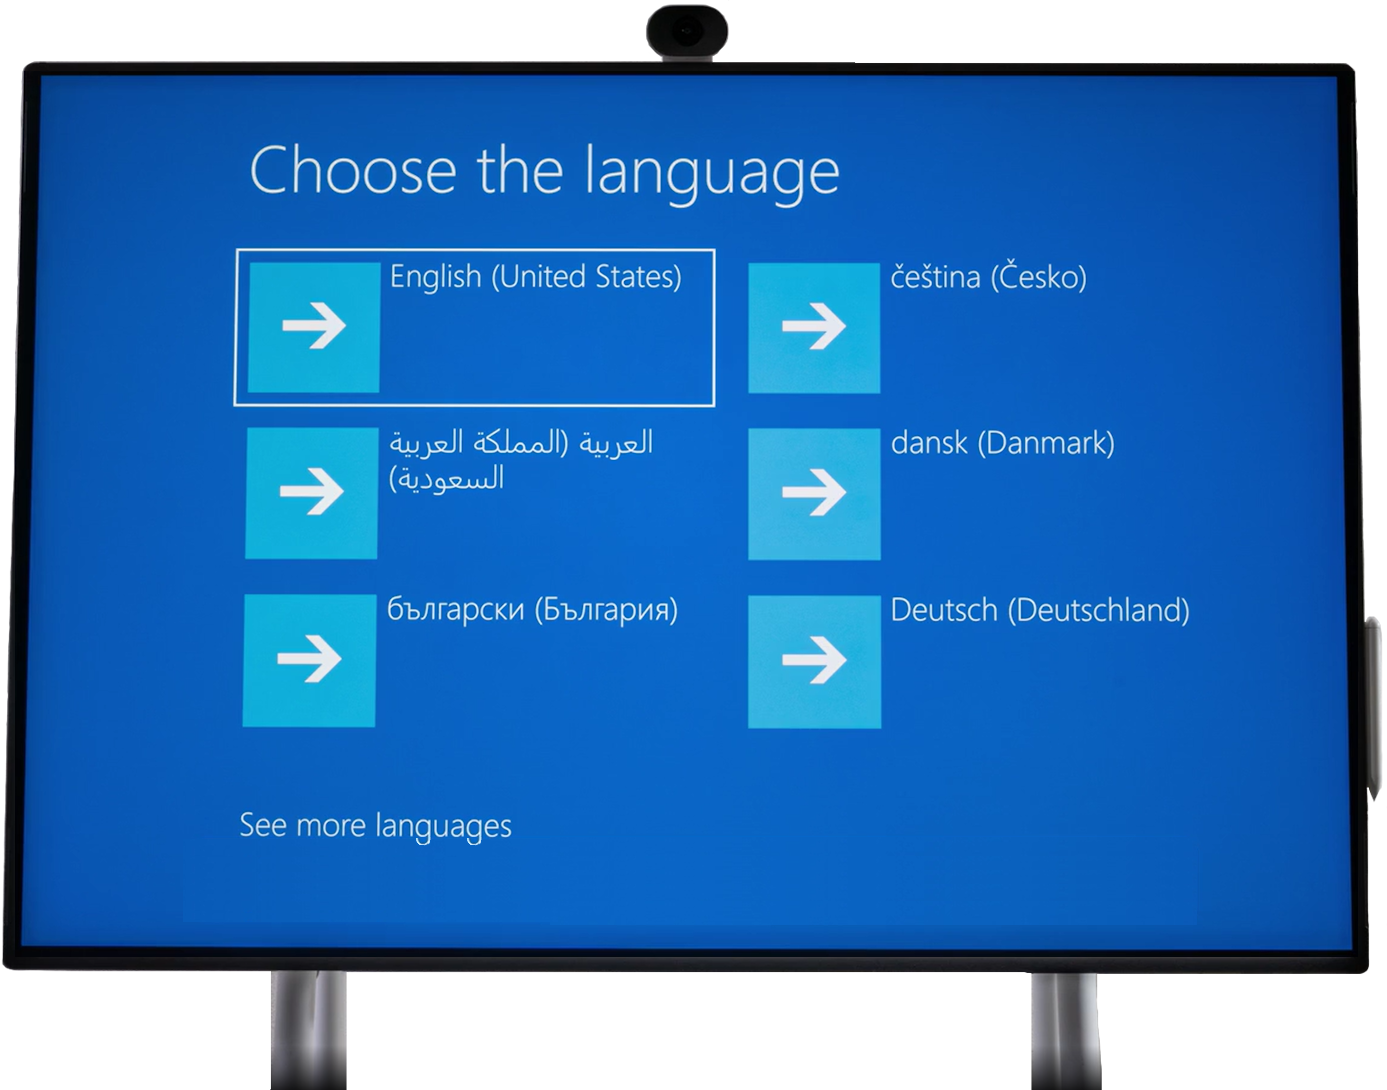
Select the language to use on the MTR.
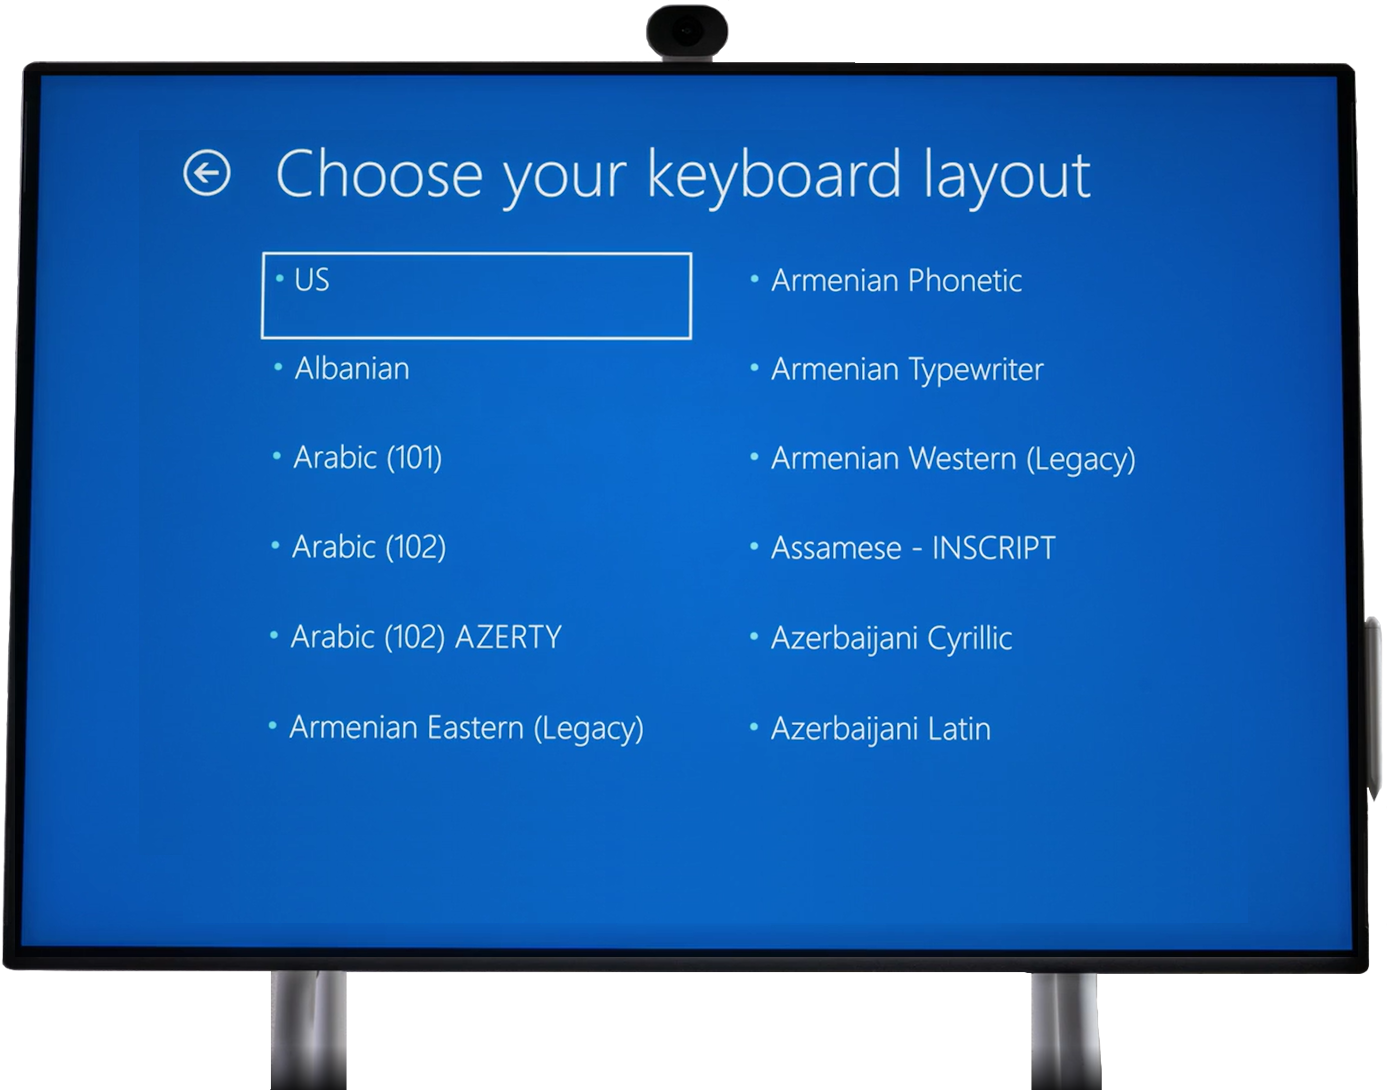
Choose the keyboard layout to use on the MTR.
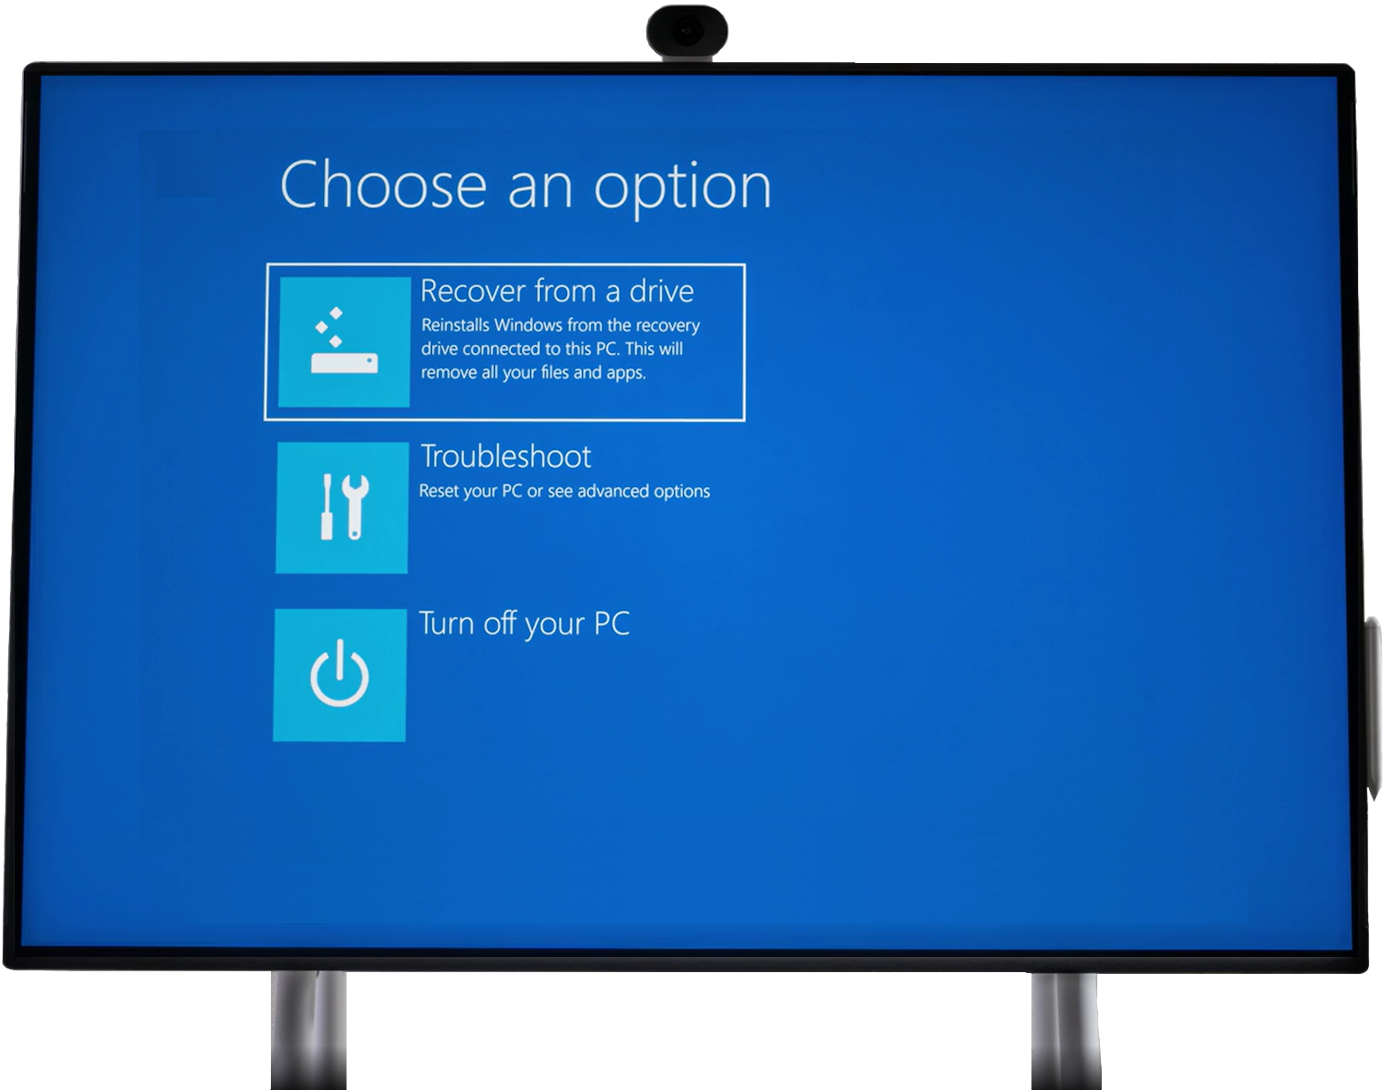
Tap Recover from a drive.
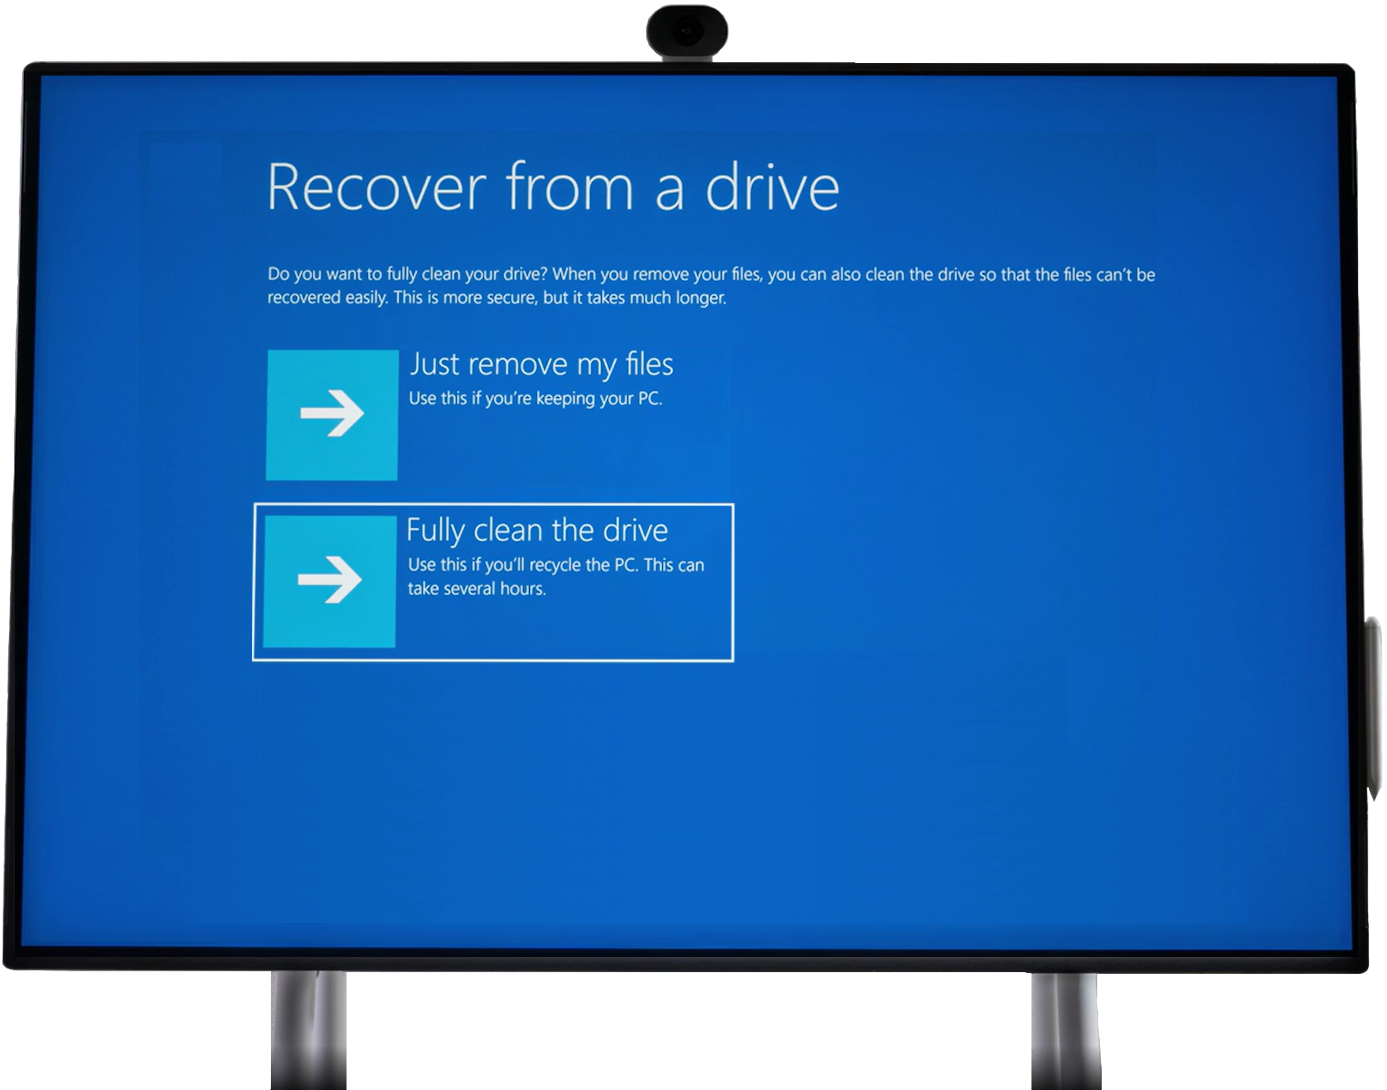
Tap Fully clean the drive.
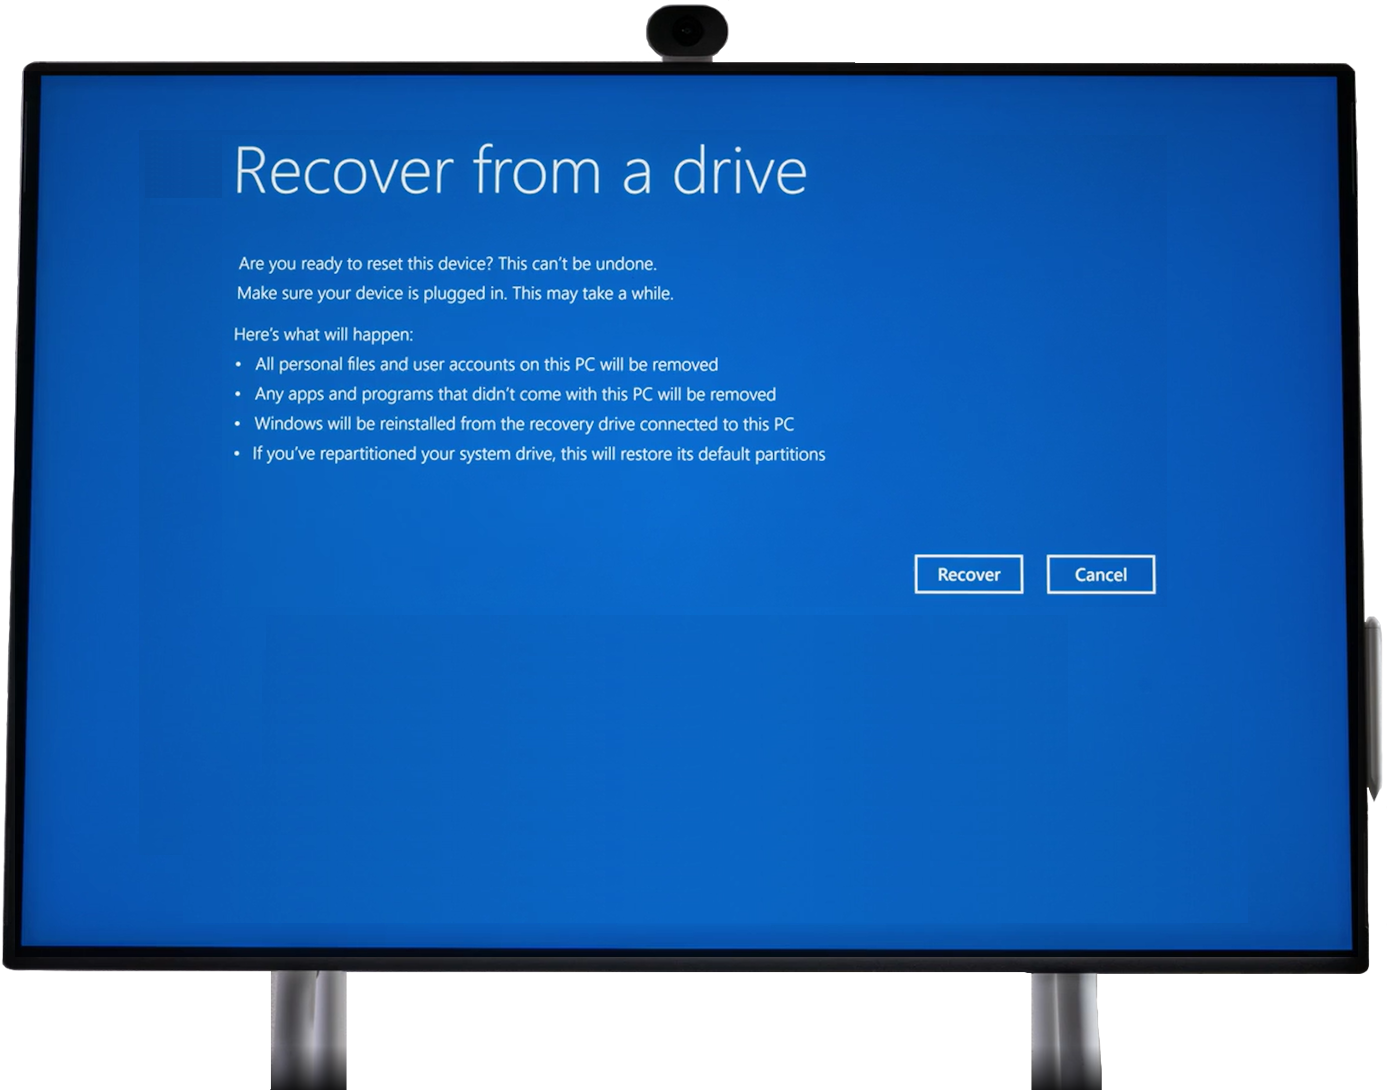
Tap Recover. If the system asks you for a BitLocker key, tap Skip this drive.
The Surface Hub 2S will restart several times during the process (up to 90 minutes). When the Windows 11 IoT Enterprise screen appears, eject the USB 2 drive and complete the initial Windows setup (language, region, network, etc.).
And then what ?
The Surface Hub 2S is now converted to MTRoW. However, you still need to configure several settings to make your device fully functional :
- Create an M365 account with a Teams Rooms Pro license
- Create conditional access rules to protect connections
- Create Intune rules (LAPS, BitLocker, EDR, MTR Pro portal, etc.)
- Enroll the MTR in Entra / Intune / MTR Pro portal
- Sign in to Teams
I won’t cover this part in this article.
Conclusion
You now know how to migrate a Surface Hub 2S to a Windows MTR.
Sources
Microsoft Learn - Migrating a Surface Hub 2S via USB
Did you enjoy this post ? If you have any questions, comments or suggestions, please feel free to send me a message from the contact form.
Don’t forget to follow us and share this post.