How to enable call history for Teams auto attendants
- Maxime Hiez
- Teams , Tutorial
- 17 Sep, 2026
Introduction
Shared voicemail for an auto attendant used to be confined to Outlook or the Teams channel of the associated Microsoft 365 group. The Teams Queues App now makes it viewable and manageable directly in Teams, the same way call queue voicemail already is.
Prerequisites
Microsoft Teams telephony enabled
- A shared voicemail already configured on the auto attendant concerned.
- Teams Queues App deployed.
Required licenses
- Microsoft Teams Premium.
Administrator role
- An account with the Global Administrator or Teams Administrator role to access the Microsoft Teams Admin Center.
Step 1 : Sign in to the Microsoft Teams Admin Center
Sign in to the Microsoft Teams Admin Center by opening your web browser to https://admin.teams.microsoft.com.
Step 2 : Create the shared call history template
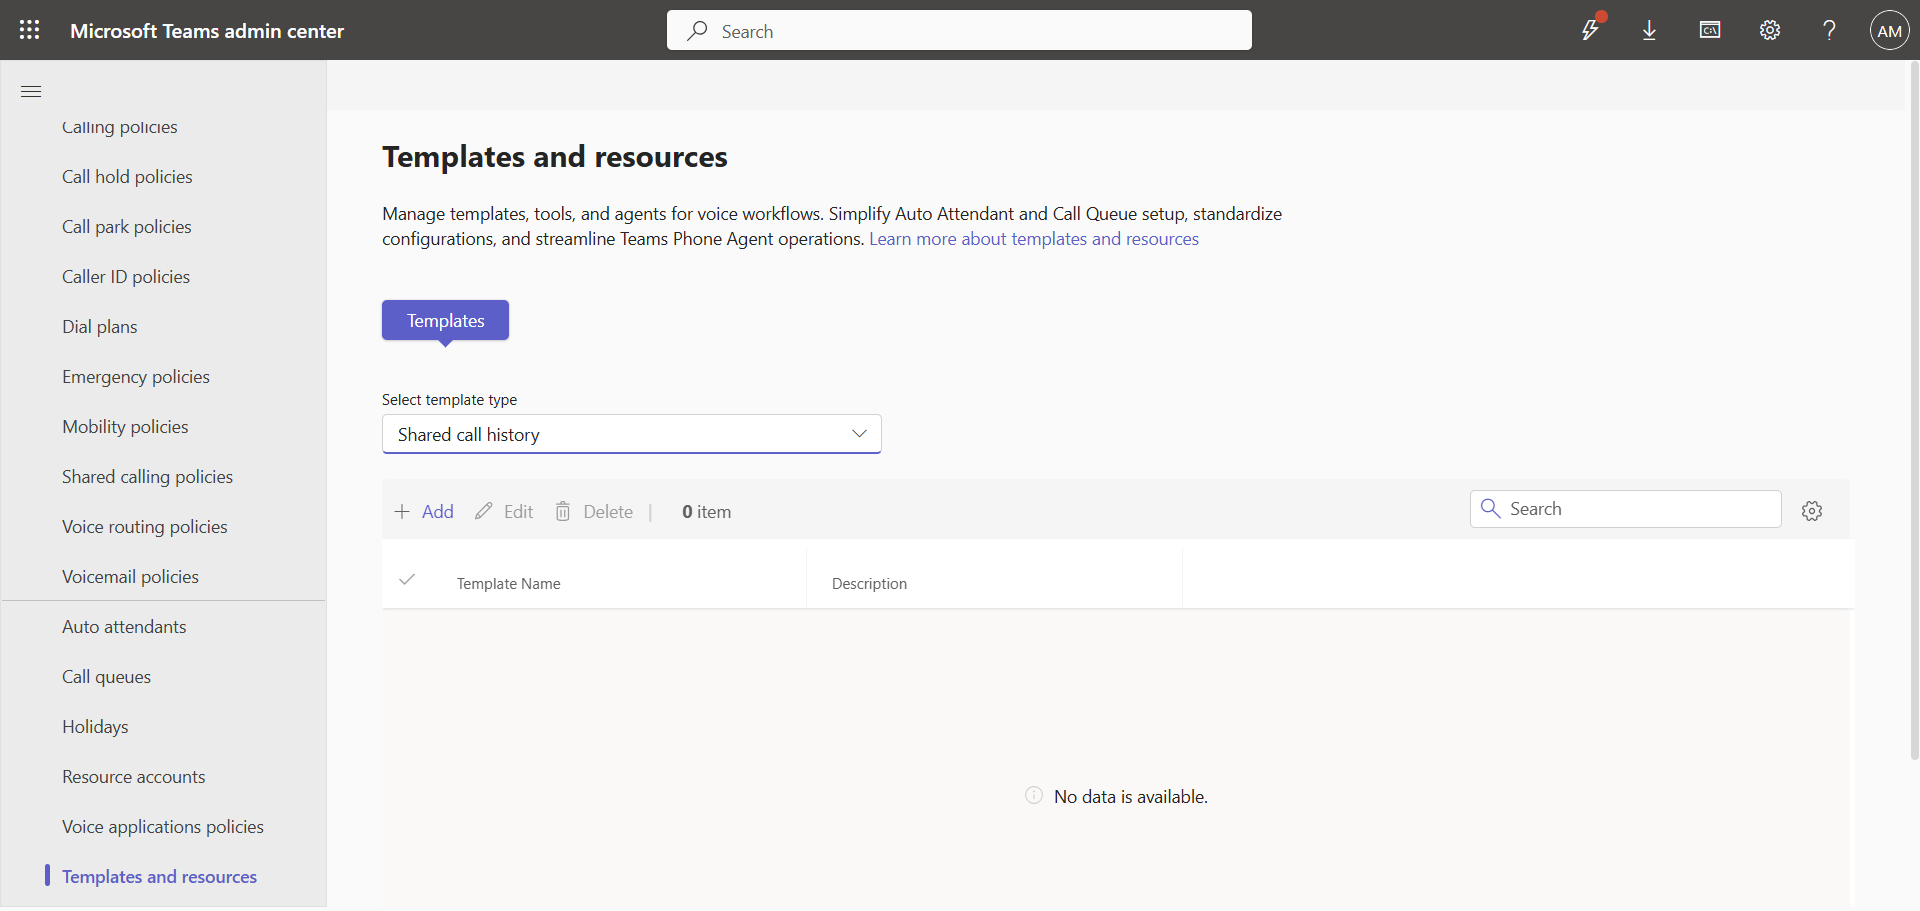
In the left menu, click Voice, then Templates and resources, and Templates.
Select Shared Call History as the template type and click Add.
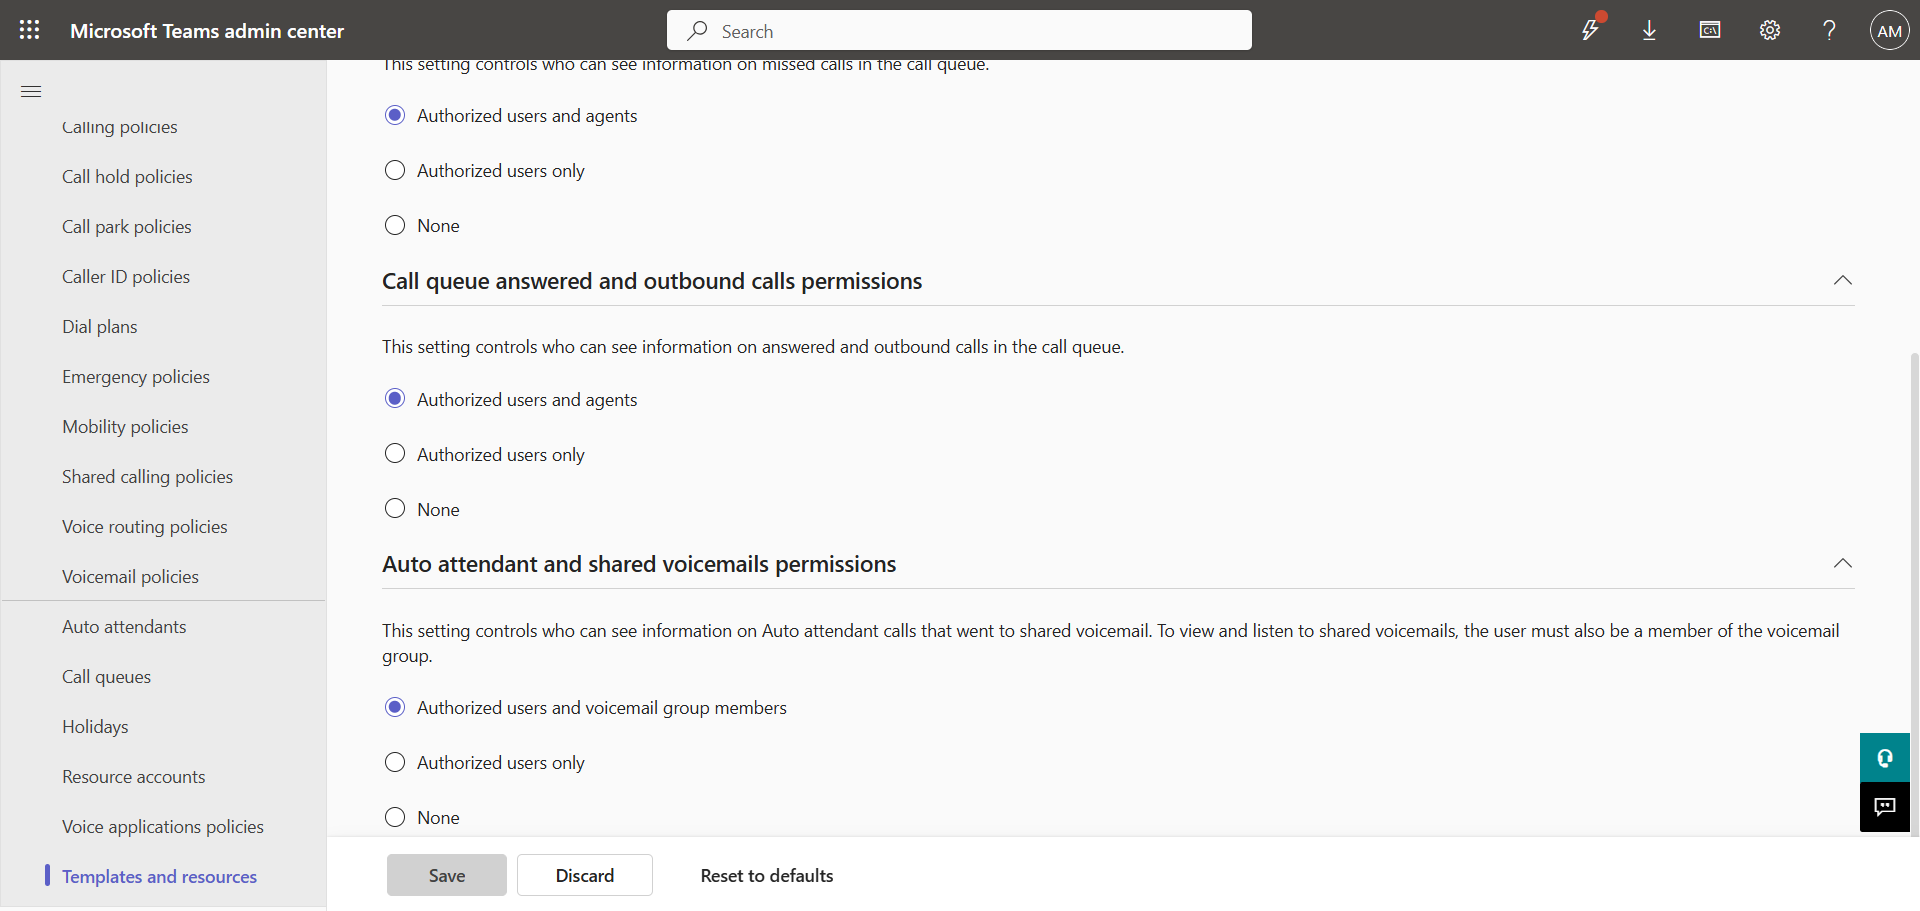
Set the desired Auto attendant and shared voicemails permissions level :
- Authorized users and voicemail group members : Authorized users and members of the associated Microsoft 365 group can access the voicemail history.
- Authorized users only : Only authorized users can access the voicemail history.
note
Step 3 : Apply the template to the auto attendant
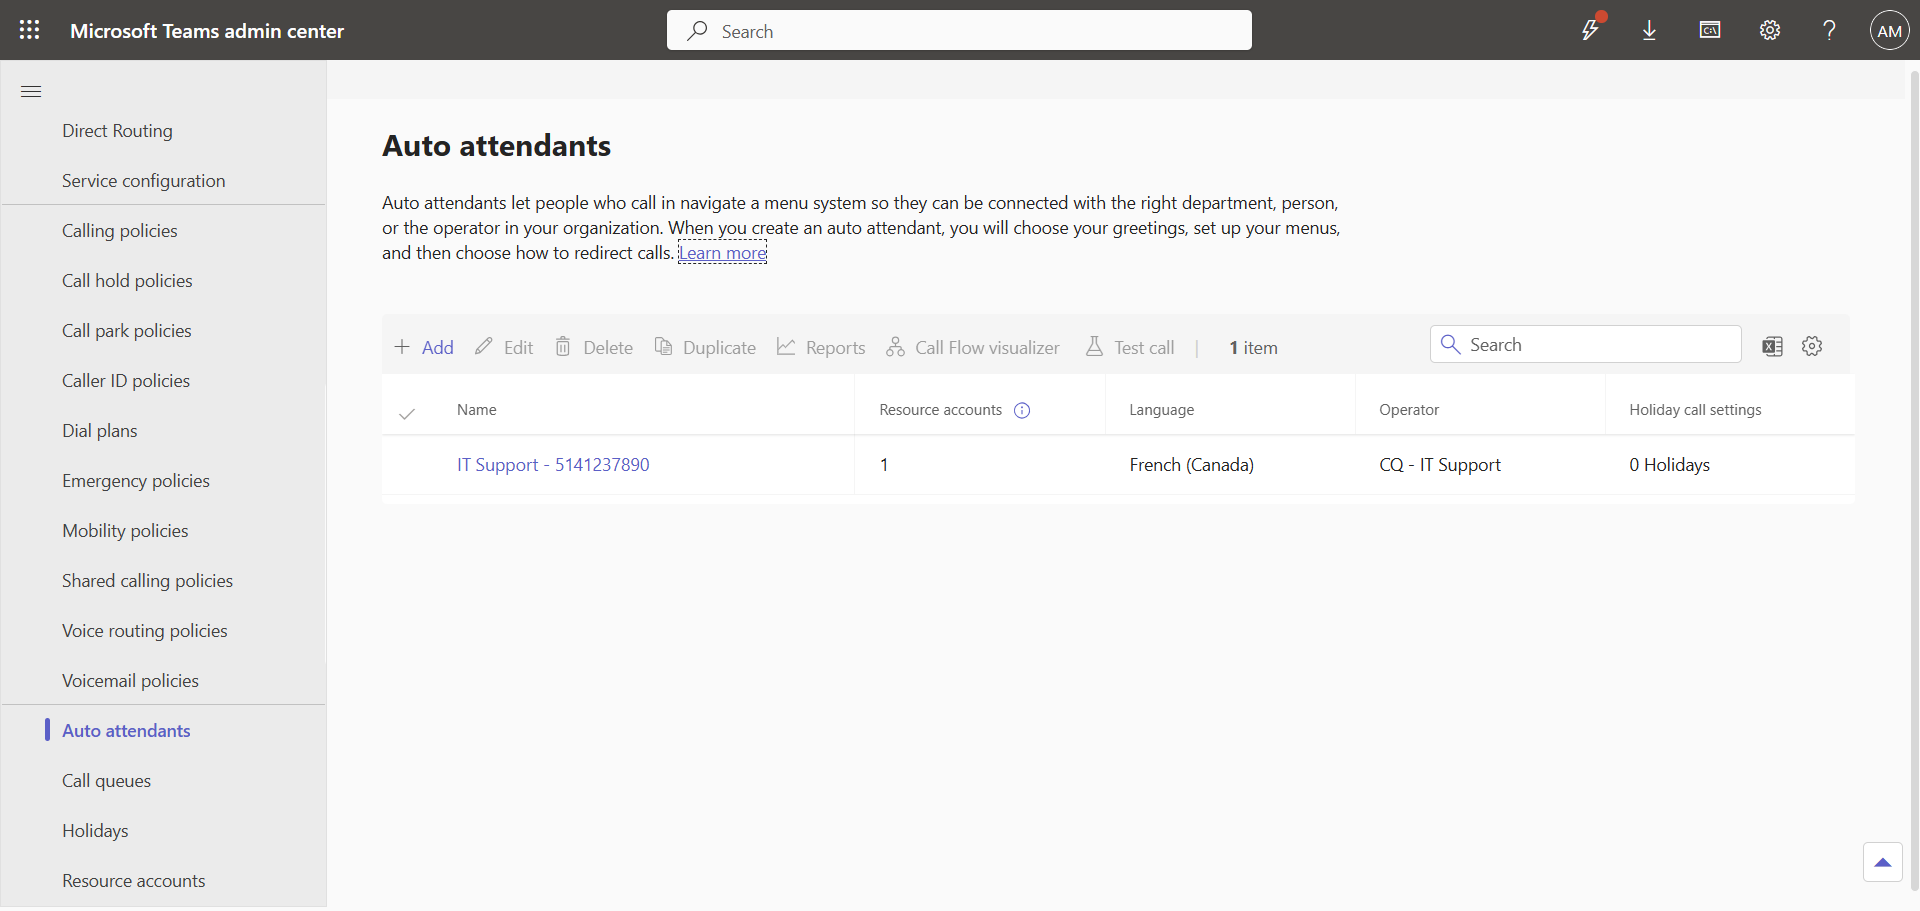
In the left menu, click Voice, then Auto attendants, and edit your auto attendant.
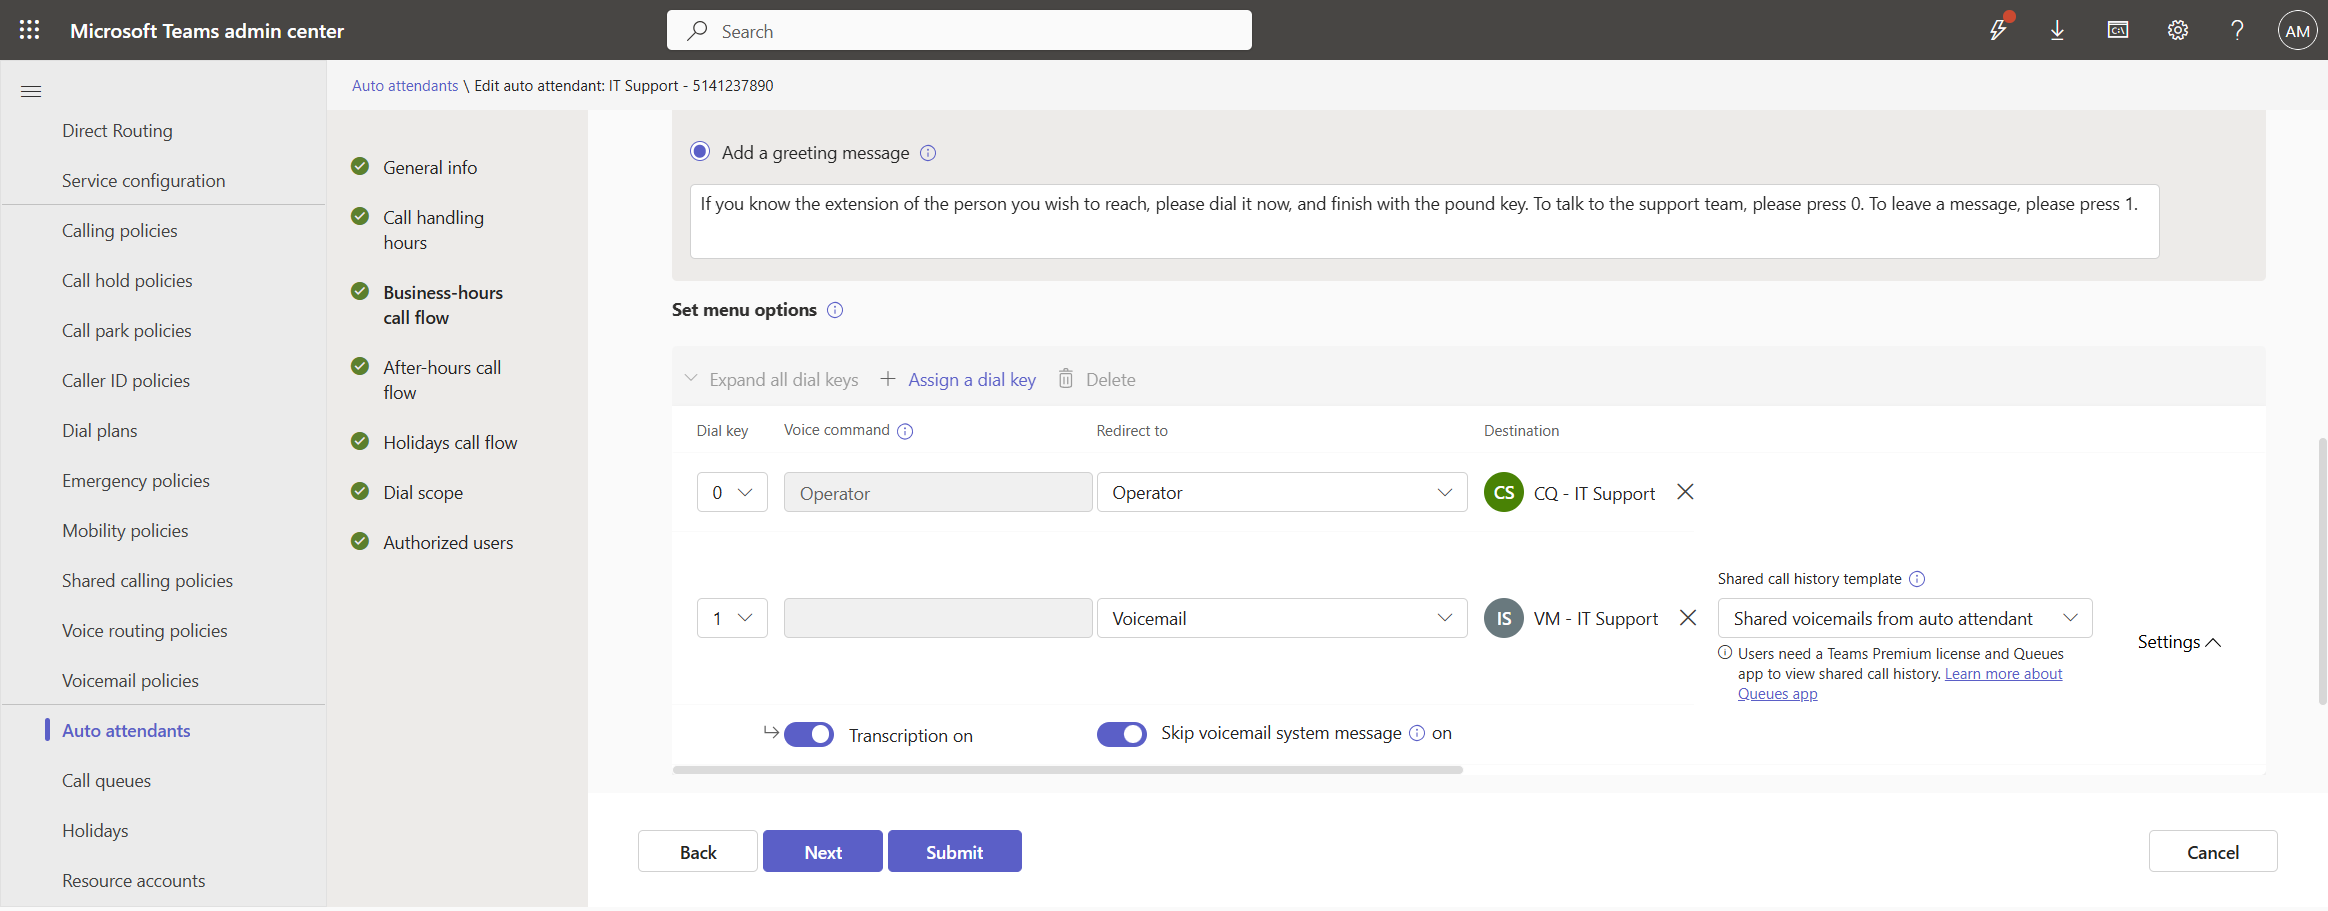
Wherever calls are redirected to Voicemail, the Shared Call History template field appears. Select the template created in the previous step, then click Submit.
tip
Confirm the result
Open the Microsoft Teams Queues App and call the auto attendant to leave a message. The new call will now be visible in the history.
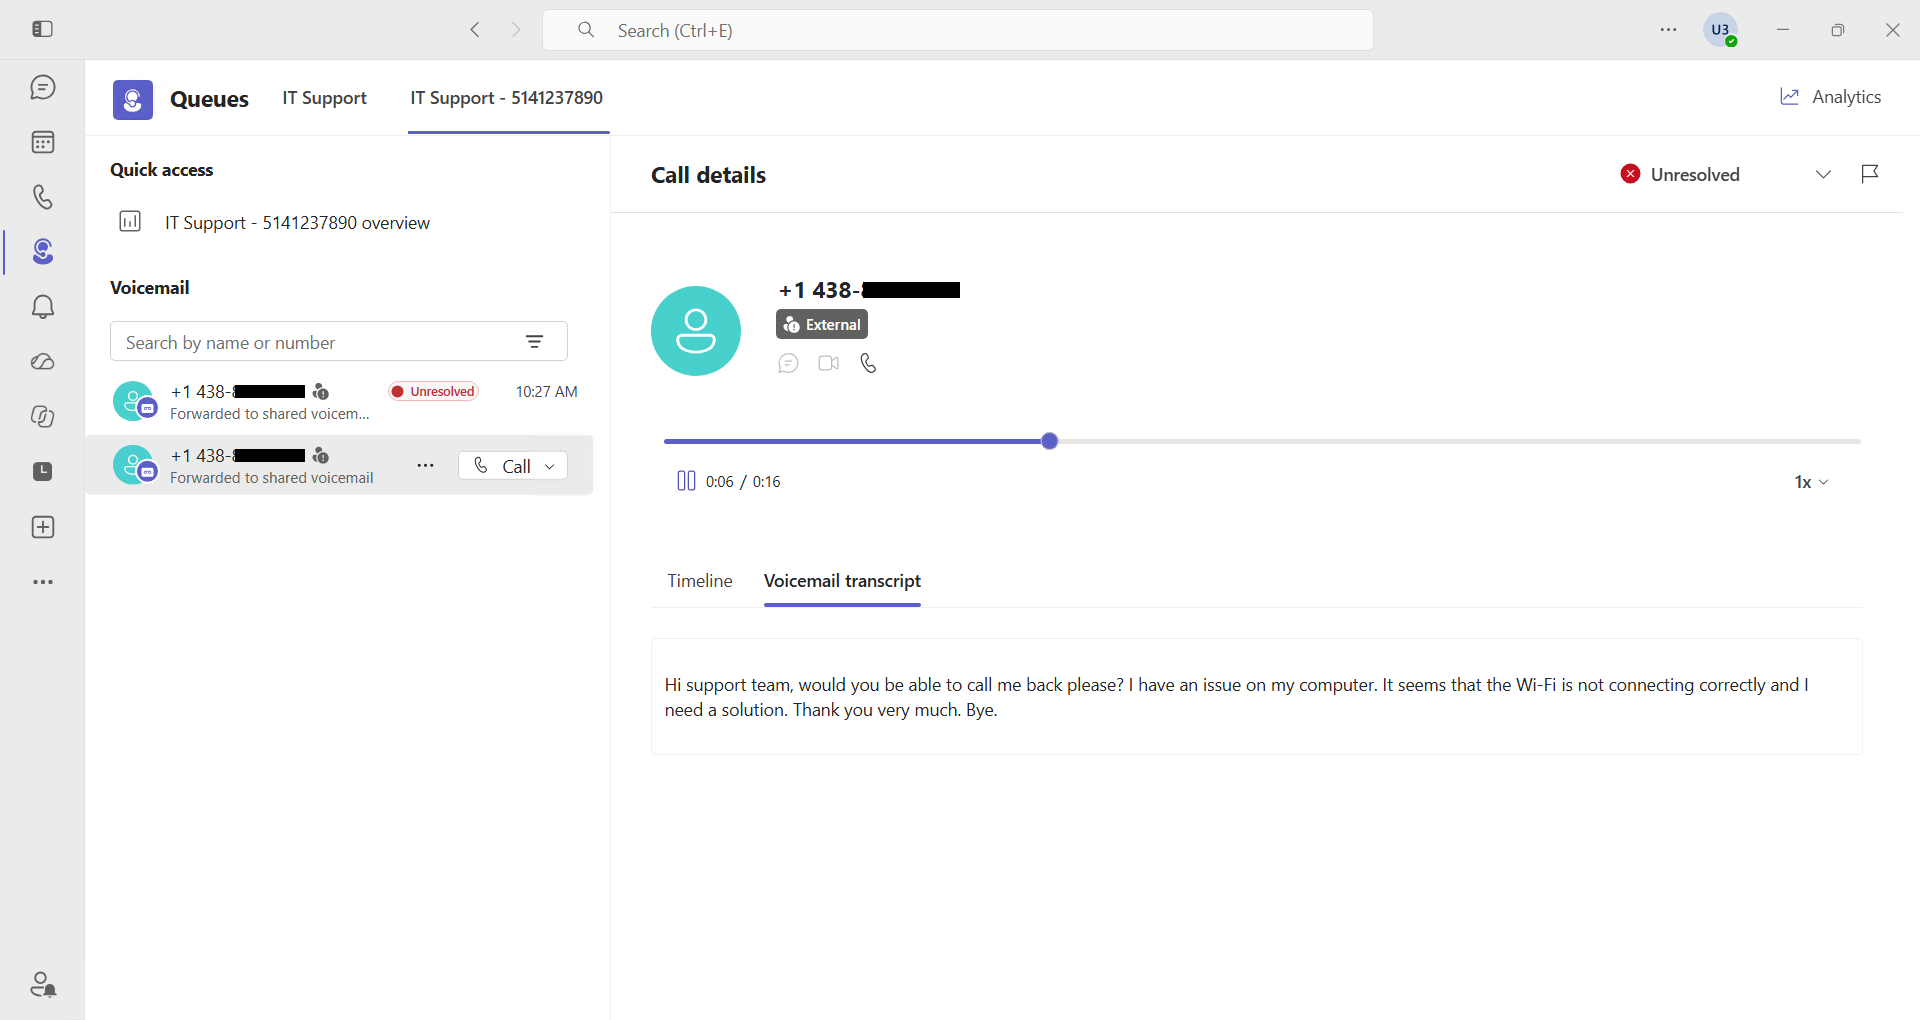
Authorized users get, for each message :
- Caller number : The caller’s number or identity
- Date and time : When the call took place
- Status : Unresolved, In progress, or Resolved
- Transcript : The message text, if transcription is enabled
From Teams Queues App, authorized users can update a message’s status (Unresolved, In progress, Resolved), filter by status, mark it as urgent to prioritize handling, and call the caller back directly from the history using the organization’s number. The exact permissions depend on the assigned shared call history template, some authorized users can only view, others can also change the status or mark a message as urgent.
Conclusion
You now know how to manage shared voicemail for an auto attendant directly from Teams Queues App.
Sources
Microsoft Support - View auto attendant voicemail history in Queues App
Microsoft Learn - Shared call history template for an auto attendant
Microsoft Learn - New-CsSharedCallHistoryTemplate
Microsoft Learn - Manage shared voicemail for auto attendants and call queues
Did you enjoy this post ? If you have any questions, comments or suggestions, please feel free to send me a message from the contact form.
Don’t forget to follow us and share this post.