How to enable LDAP routing in an Audiocodes SBC
- Maxime Hiez
- Audiocodes , Tutorial
- 10 Apr, 2025
Introduction
LDAP (Lightweight Directory Access Protocol) routing over an SBC (Session Border Controller) allows calls to be managed using information stored in an Active Directory. Here’s a detailed explanation of how it works.
Why implement LDAP routing ?
In a Microsoft Teams telephony project, the Caller ID and Caller Name are sent either via Teams or via the SBC. But in some cases, these two options are not possible (multi-system integration, etc.) and these two attributes must retrieve their values elsewhere. This is where LDAP routing comes in.
In my case, Teams telephony is connected to my Audiocodes SBC, which is also connected to Telnyx (a SIP provider) and Genesys (a contact center). I can’t force the Caller ID from Teams because my information would be overwritten for all my calls to Genesys. I also can’t force it via the SBC because my extensions aren’t designed to have a range per site, and each of my sites has its own number to display.
So I connect my SBC to my Active Directory servers to retrieve the information to display directly from the user profile.
Prerequisites
Service account
- A service account on the Active Directory server.
Administrator role
- An administrator account to access the Audiocodes SBC.
- An account with the Enterprise Administrator role to access the Active Directory server.
Others
- Schedule the configuration during off-hours.
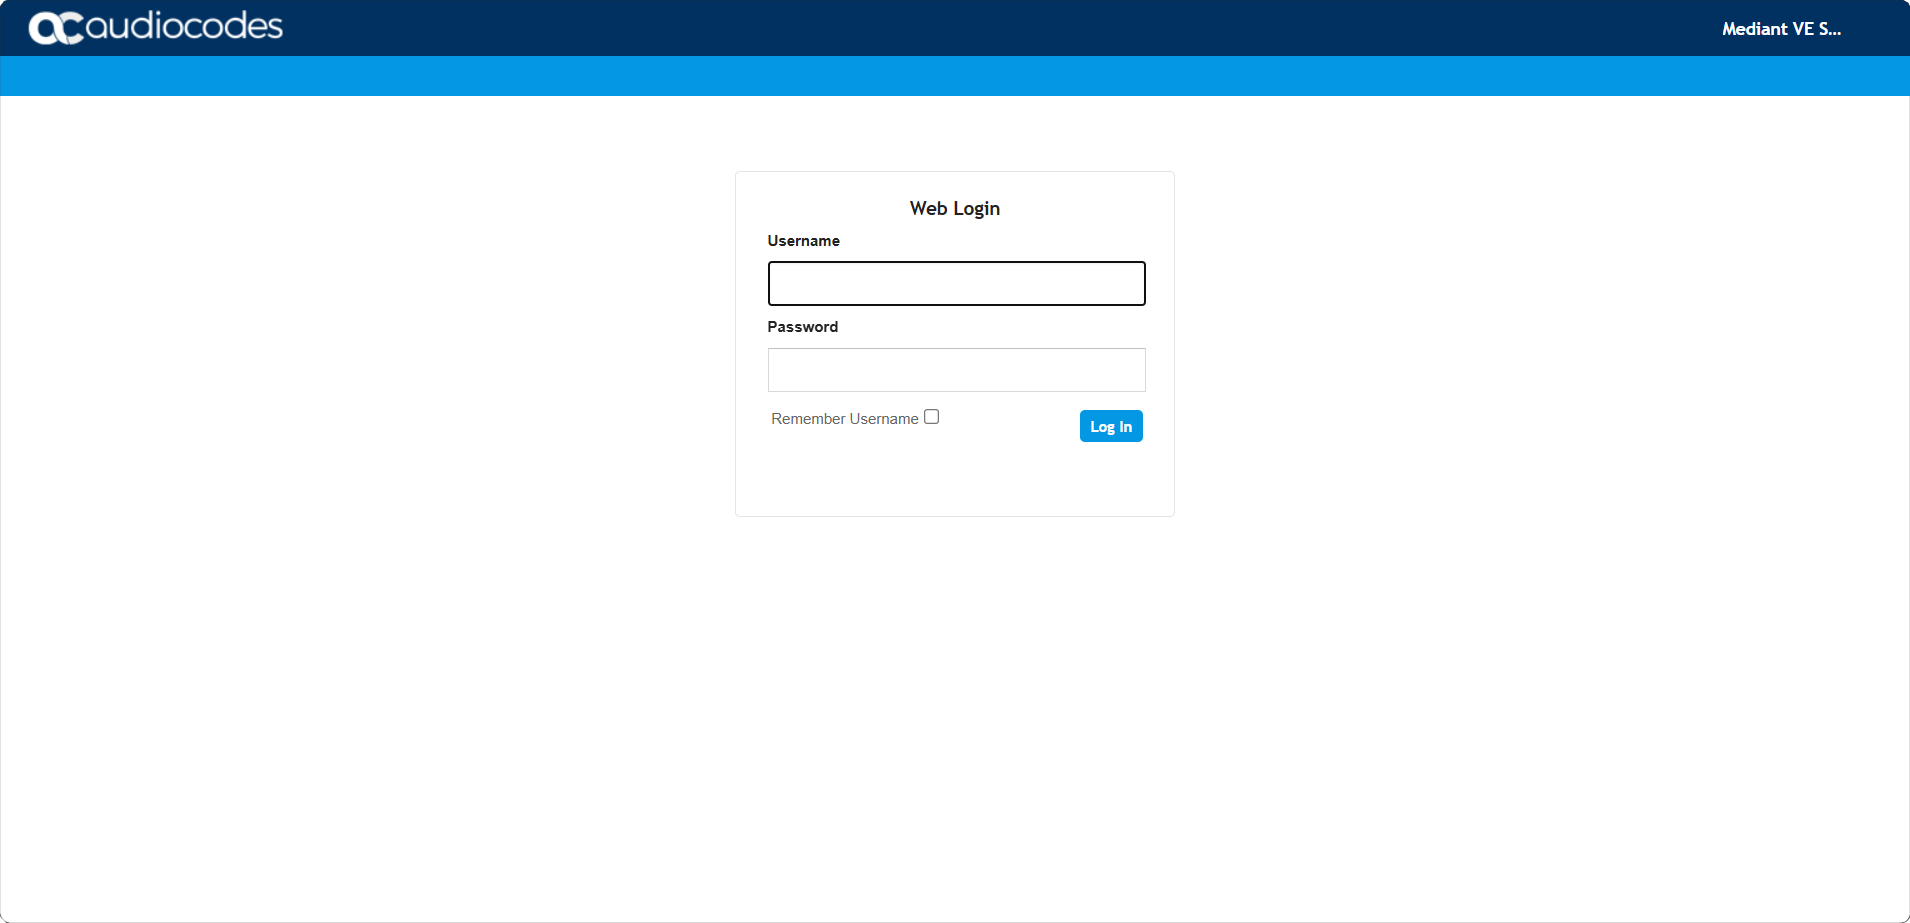
Step 1 : Log in to the SBC
Connect to the SBC by opening your web browser to https://YOUR_IP_ADDRESS.
Step 2 : Enable the LDAP service
warning
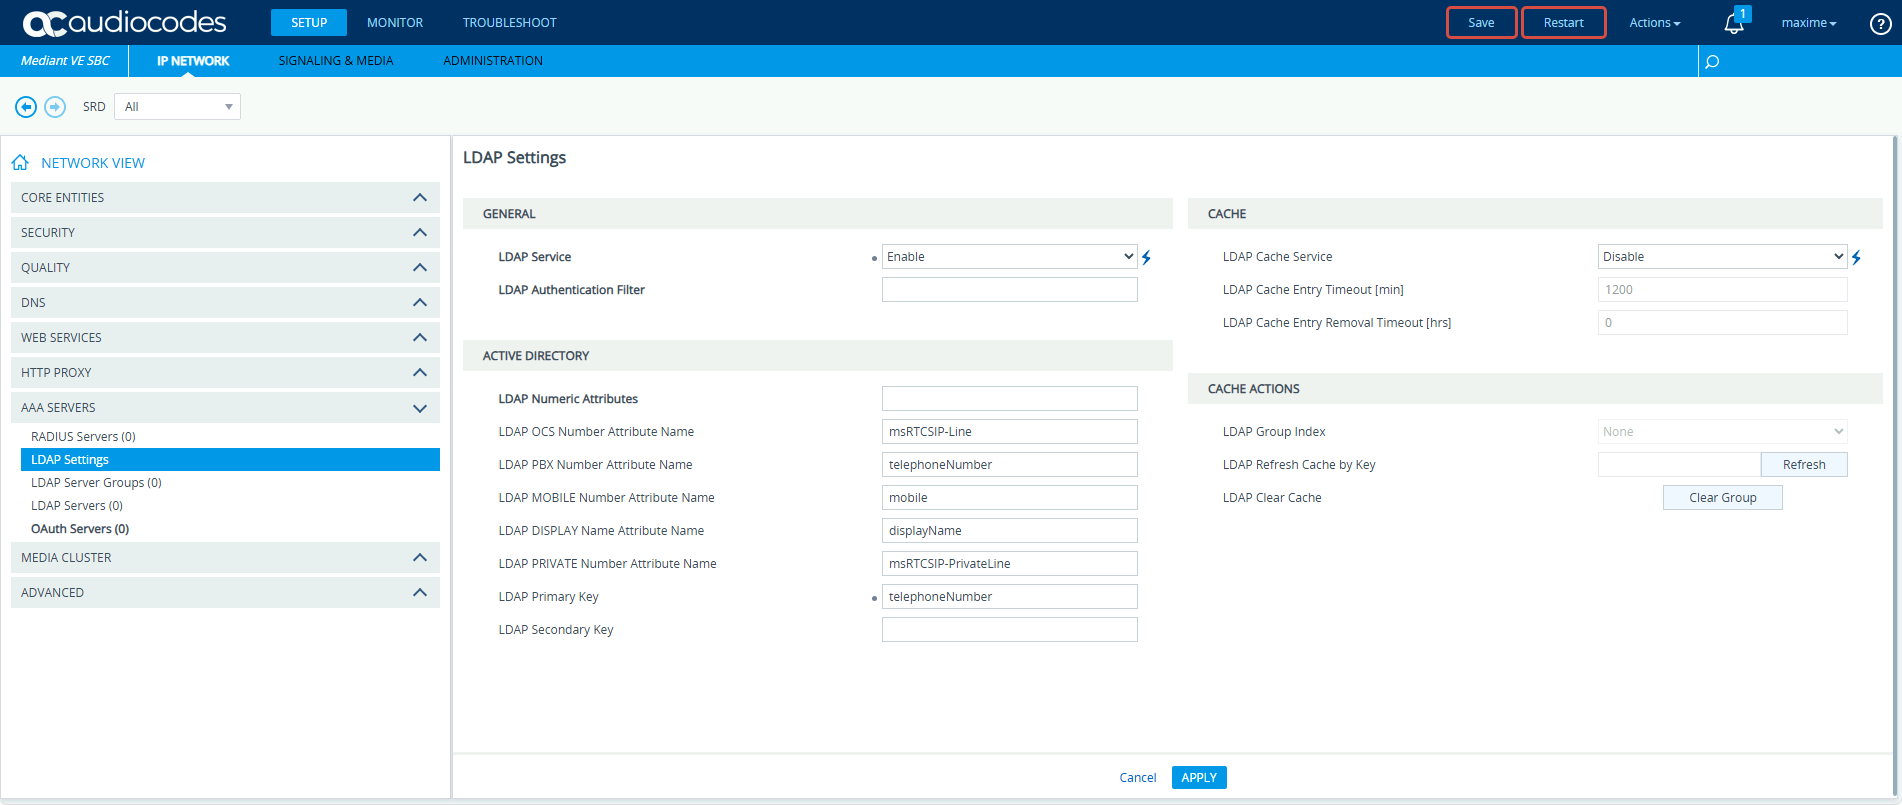
Click Setup, IP Network, then AAA Servers, and LDAP Settings.
Set the LDAP Service option to Enable.
Click Save, then Restart.
Step 3 : Create the server group
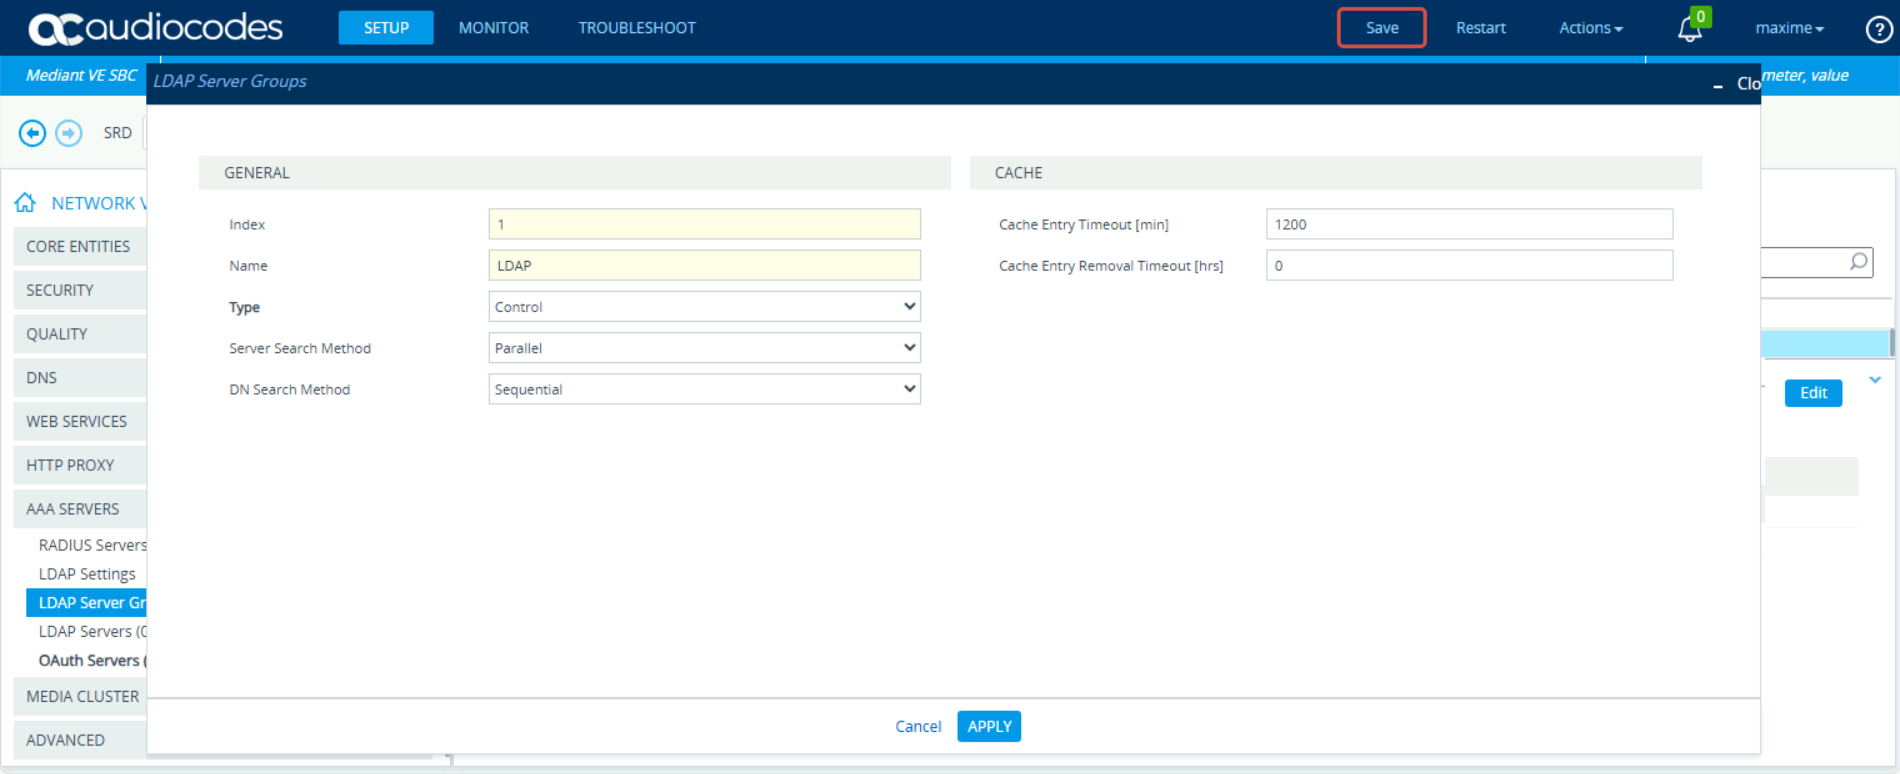
Click Setup, IP Network, then AAA Servers, and LDAP Server Groups.
Keep the default options, simply give the group a name.
Step 4 : Create the LDAP server(s)
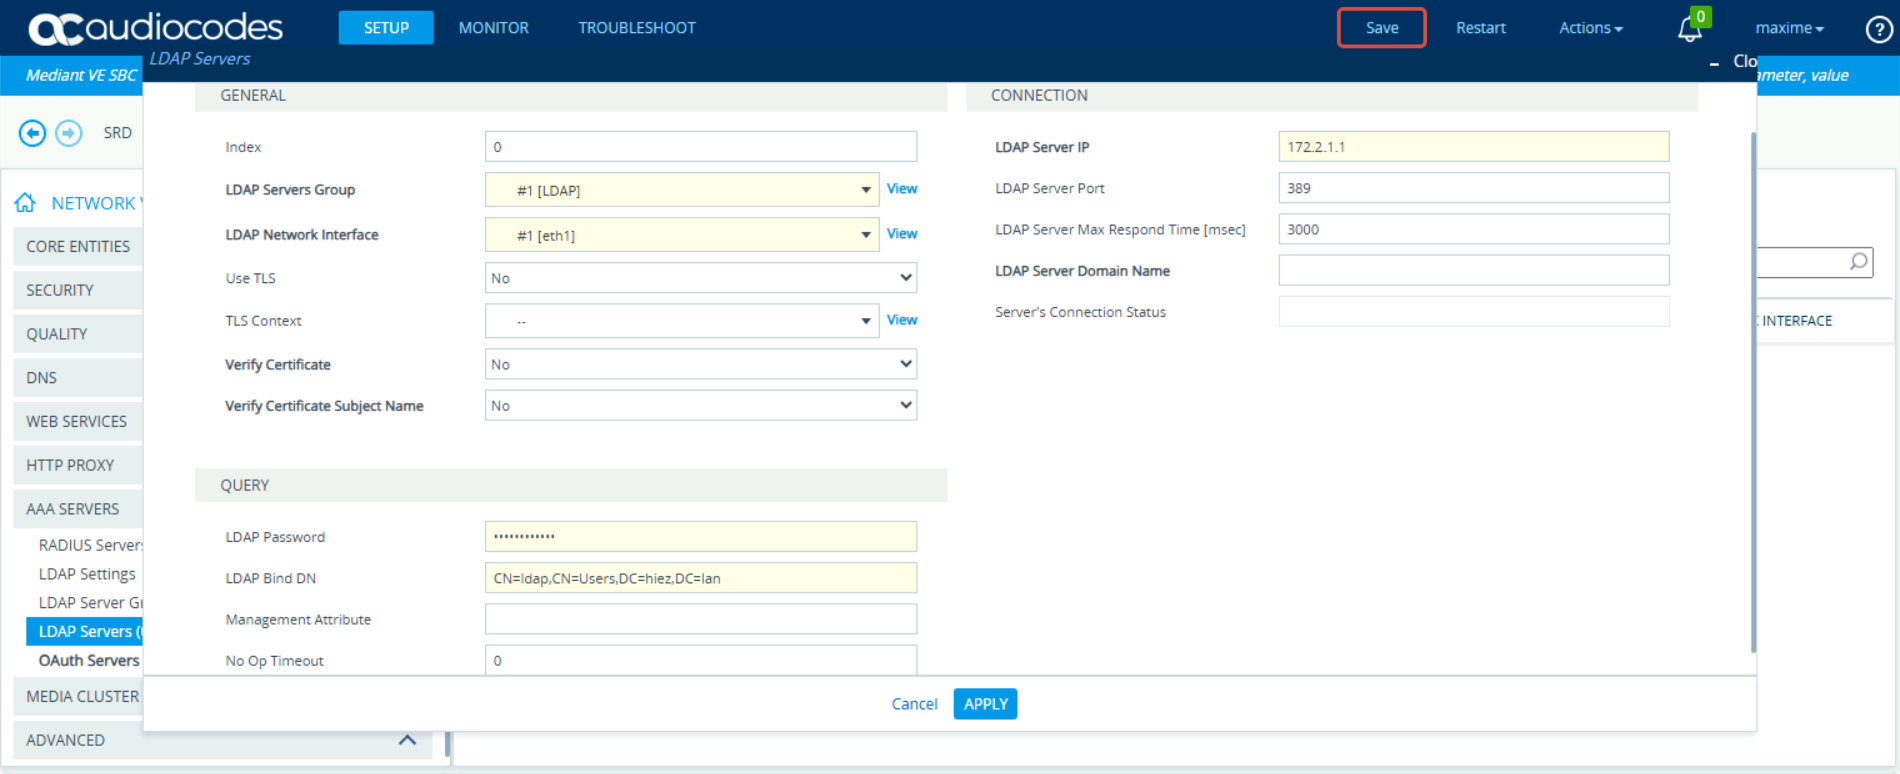
Click Setup, IP Network, then AAA Servers, and LDAP Servers.
Point your server to the group created in step 3 and add the following parameters :
- LDAP Network Interface : the SBC’s telephony interface
- Use TLS : if you want to switch to LDAPS (secure)
- LDAP Password : the service account password
- LDAP Bind DN : the location of the service account on the server
- LDAP Server IP : the server’s IP address
- LDAP Server Port : the connection port (636 if TLS)
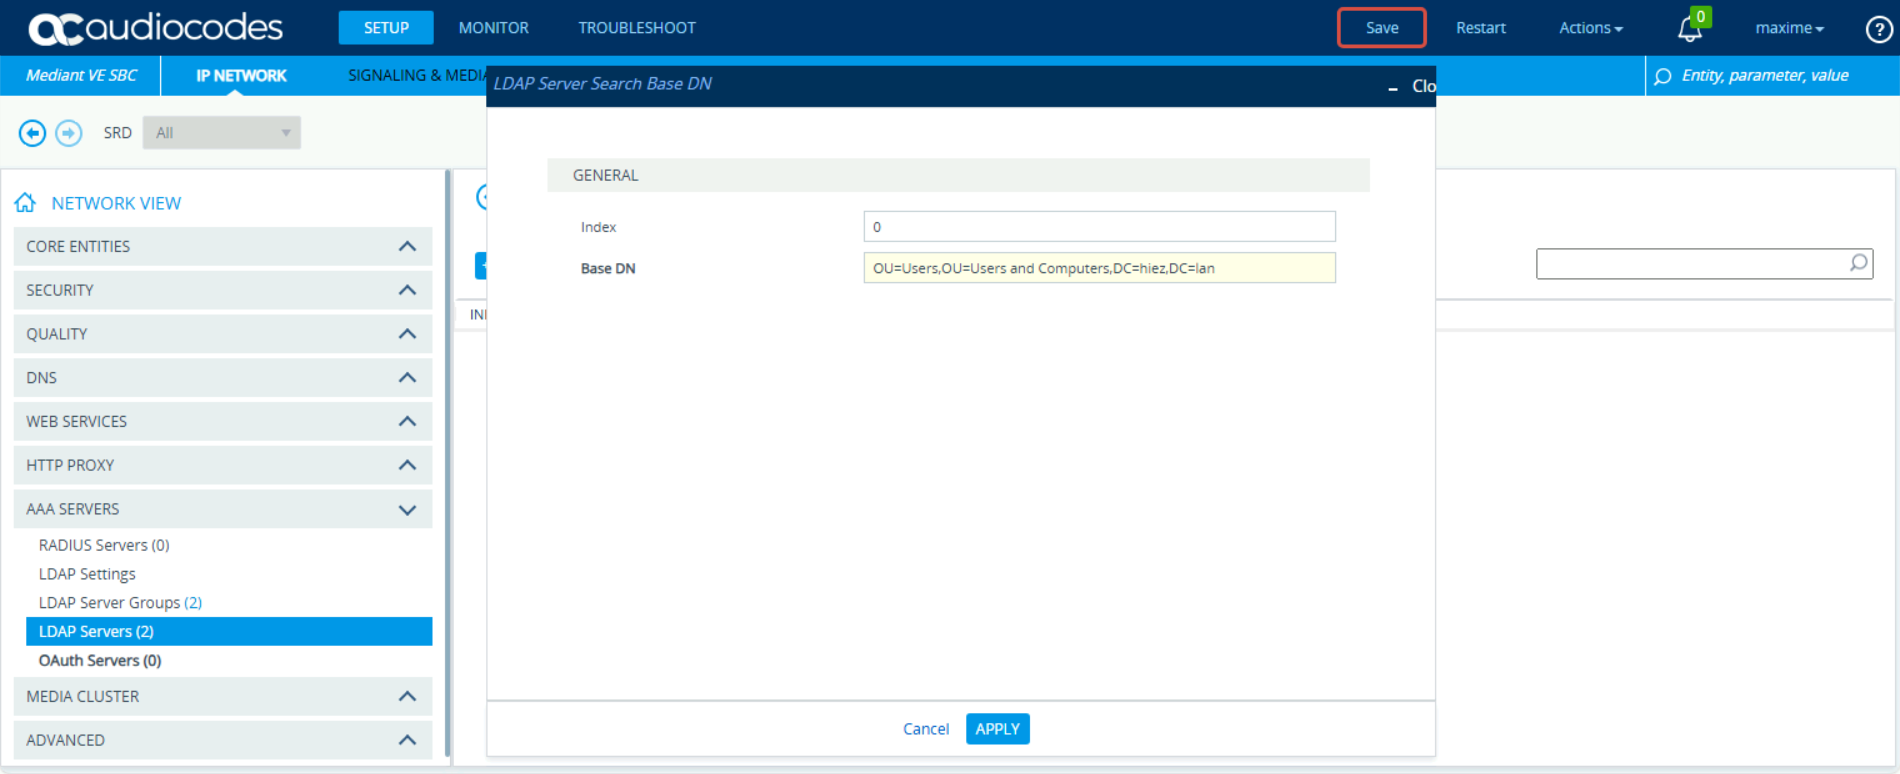
Step 5 : Create the search base
Click LDAP Servers Search Based DNs 0 items on each of the created servers and enter the OUs where the user accounts are located.
Step 6 : Create the LDAP queries
Click Setup, Signaling & Media, then SIP Definitions, and Call Setup Rules.
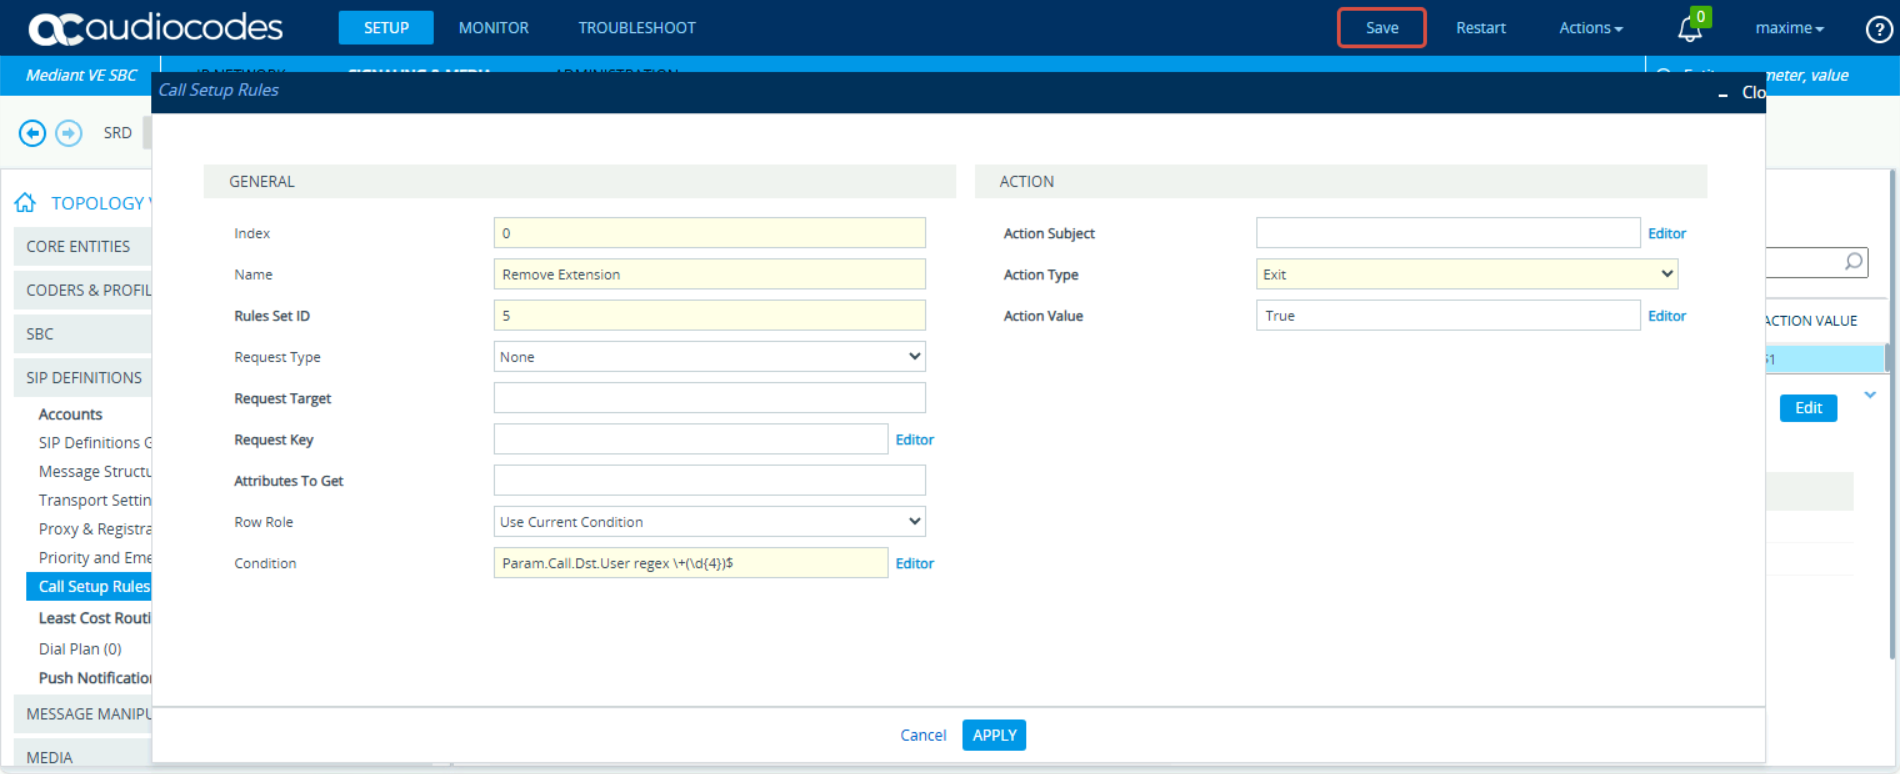
Create the first rule with the following parameters :
- Rules Set ID : Rule ID
- Condition : Param.Call.Dst.User regex +(\d4)$
- Action Type : Exit
- Action Value : True
Create the second rule with the following parameters :
- Rule Set ID : same ID as the first rule
- Request Type : LDAP
- Request Target : LDAP
- Request Key : ‘otherIpPhone=tel:’ + Param.Call.Src.User
- Attributes To Get : ipPhone
- Condition : LDAP.Attr.ipPhone exists
- Action Subject : Param.Call.Src.User
- Action Type : Modify
- Action Value : LDAP.Attr.ipPhone
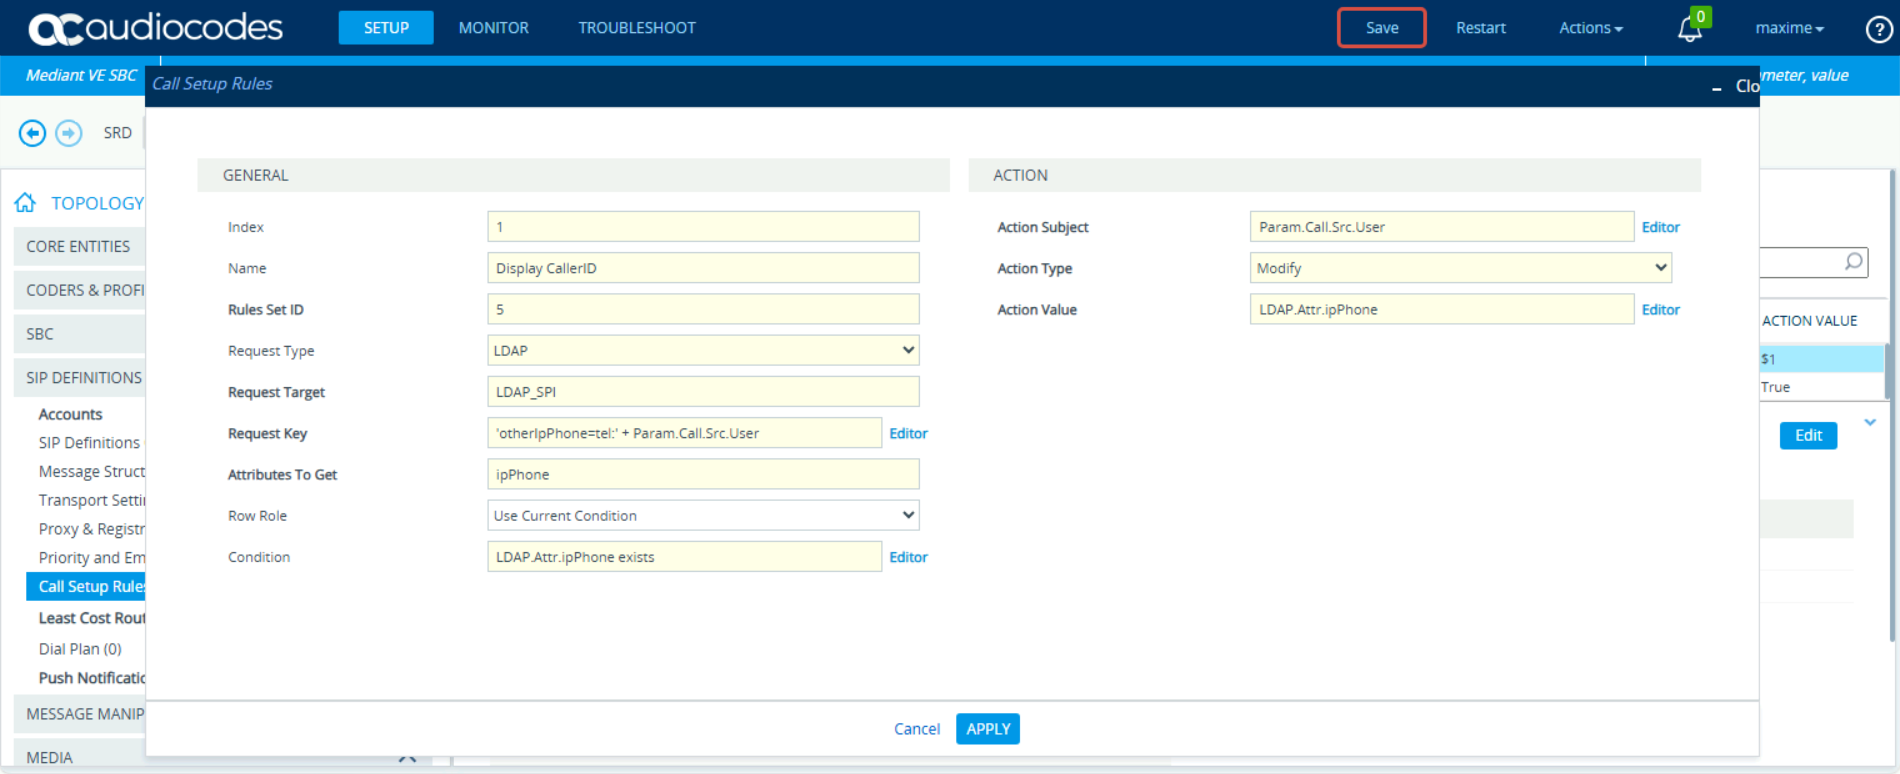
This rule will search for the user account whose extension matches the value of the otherIpPhone attribute, and replace it with the value of the ipPhone attribute (if it is correctly entered).
Optionally, you can create a third rule with the following parameters :
- Rule Set ID : same ID as the first rule
- Request Type : LDAP
- Request Target : LDAP
- Request Key : ‘cn=’ + Param.Call.Src.Name
- Attributes To Get : Company
- Condition : LDAP.Attr.Company exists
- Action Subject : Param.Call.Src.Name
- Action Type : Modify
- Action Value : LDAP.Attr.Company
This rule will allow you to replace the Caller Name with the value found in your user’s Company attribute.
Step 7 : Create the route
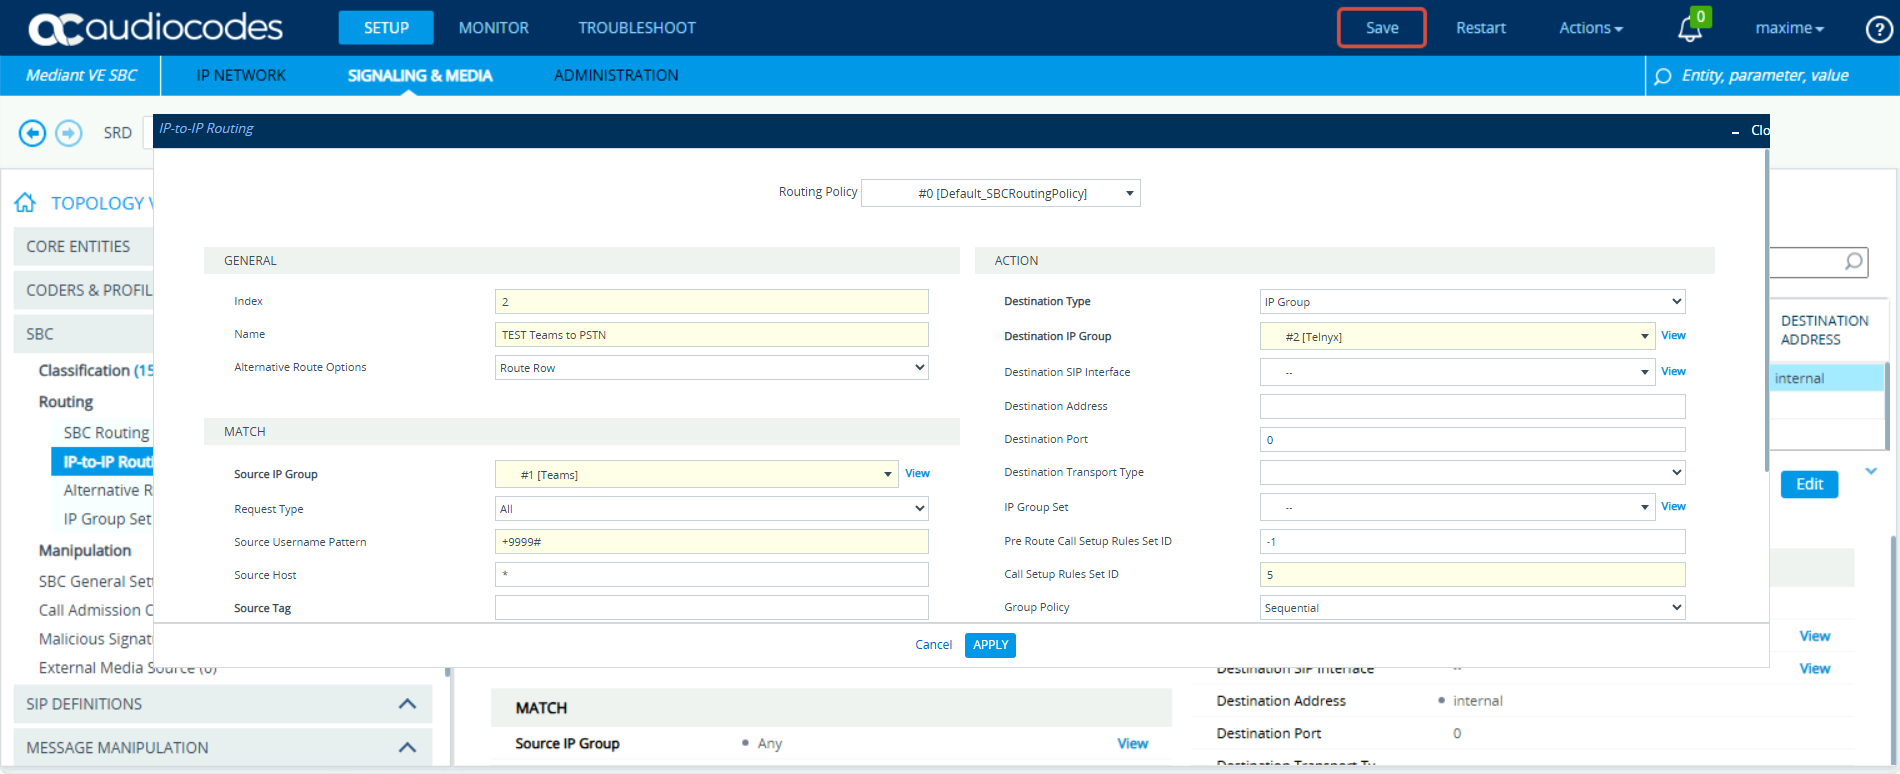
Click Setup, Signaling & Media, then SBC, and IP-to-IP Routing.
Create a route to your SIP trunk and modify the Call Setup Rules Set ID option with your rule ID.
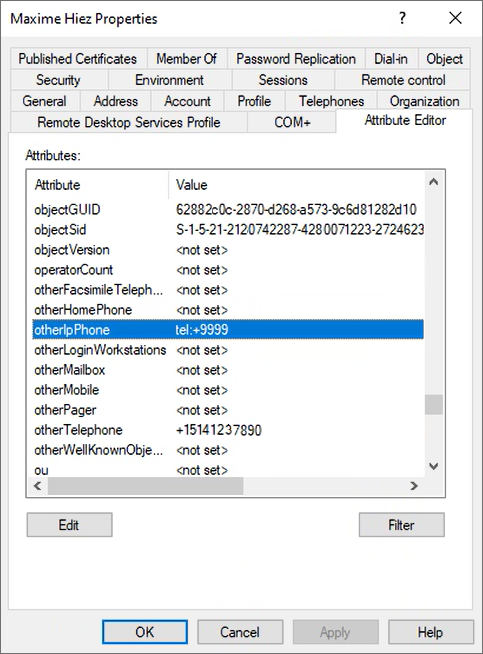
Step 8 : Edit Active Directory attributes
For the purposes of this demo, I used the otherTelephone attribute instead of ipPhone (you can use any other attribute you like).
- otherIpPhone : tel:+9999 (where 9999 is the user’s extension)
- otherTelephone : +15141237890 (where 5141237890 is the number to display)
- Company : Maxime Lab
Call analysis
We can see in the Syslog capture of my Audiocodes SBC that my call goes out with the extension +9999 as Caller ID and Maxime Hiez as Caller Name.
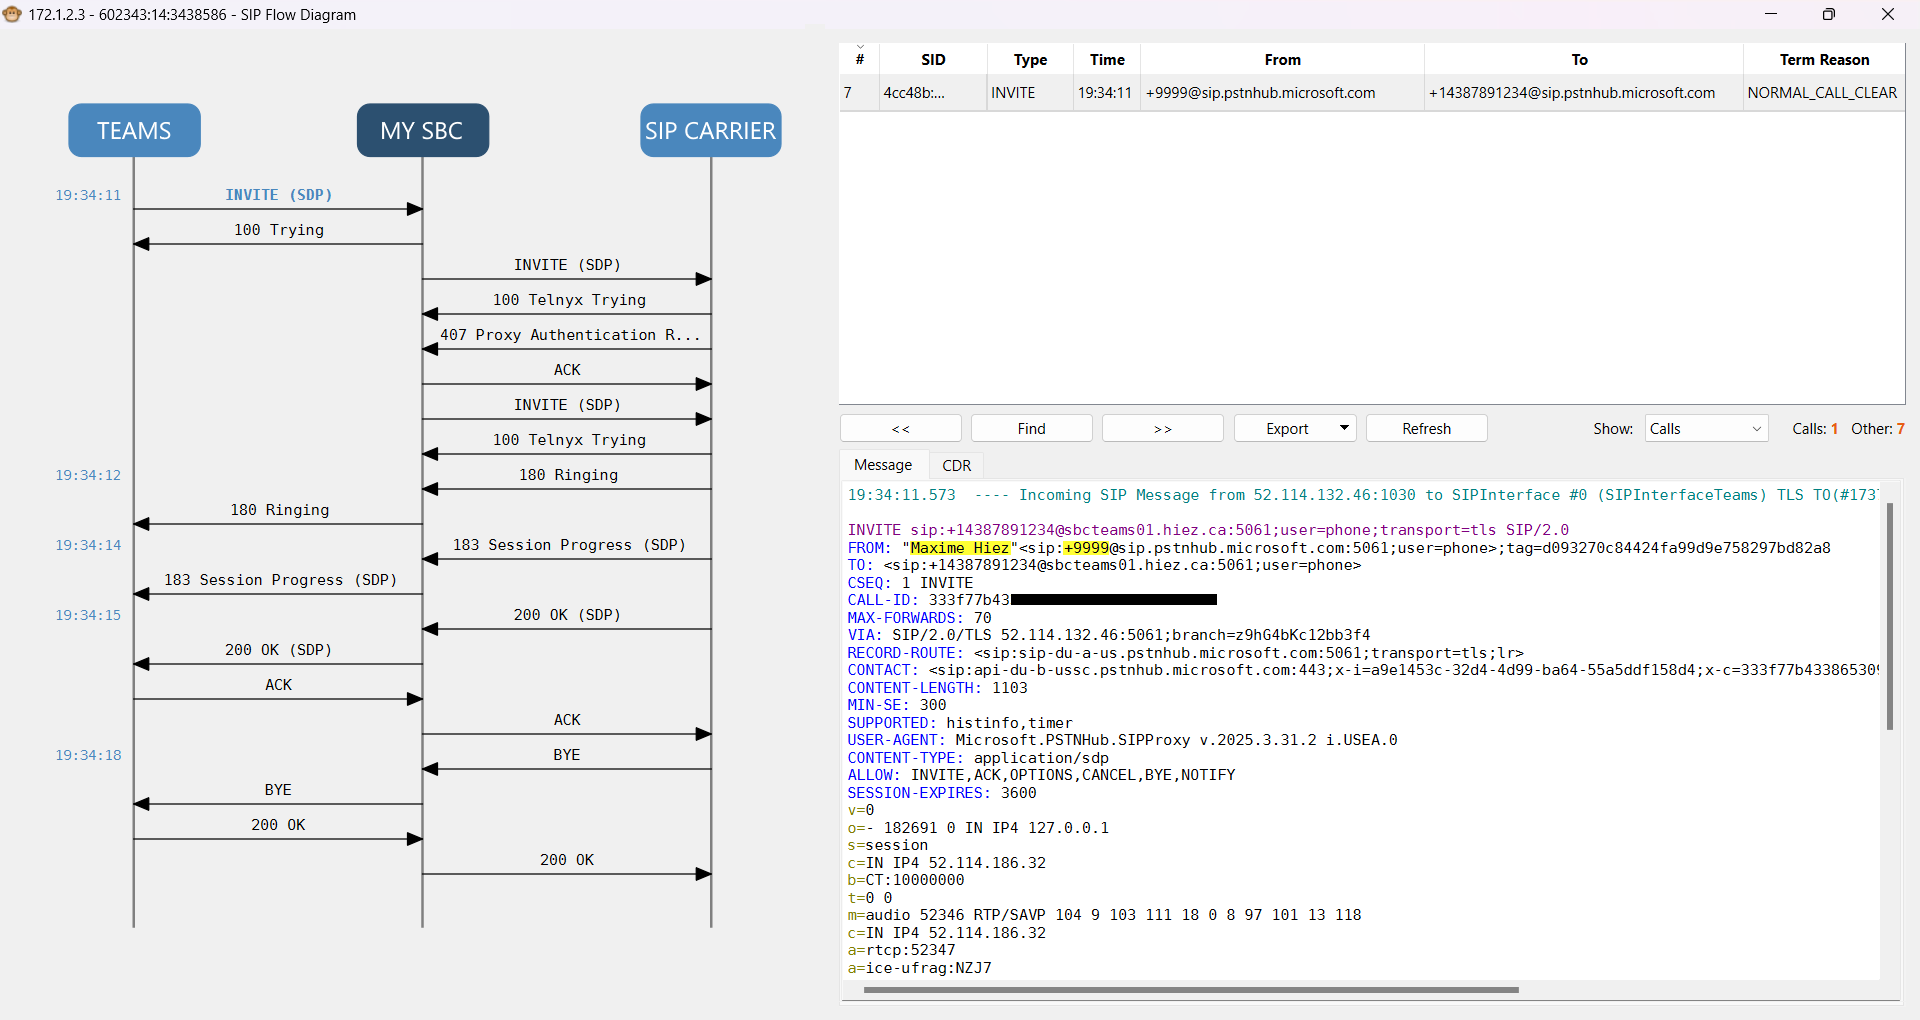
Both LDAP queries found a match in the Active Directory and the conditions were able to execute.
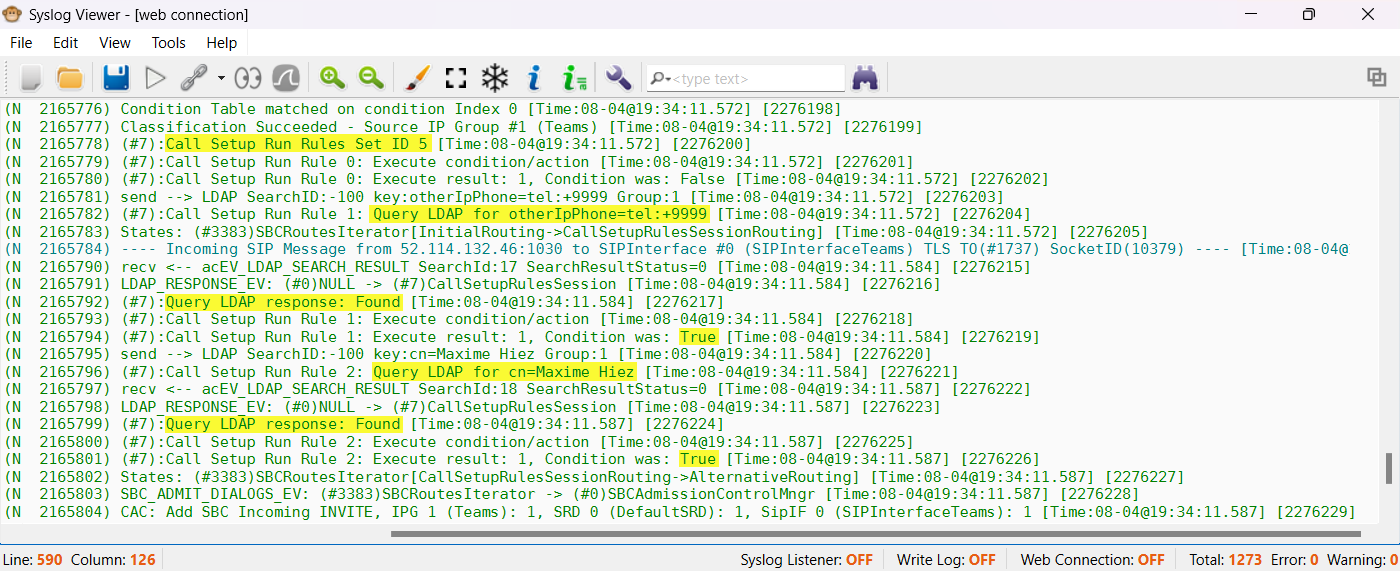
My Caller ID was rewritten to +15141237890 and my Caller Name to Maxime Lab.

Conclusion
LDAP routing on an SBC provides an effective solution for managing caller IDs and caller names when it’s not possible to do so from Teams/the PBX.
You now know how to configure LDAP routing on an Audiocodes SBC.
Sources
Did you enjoy this post ? If you have any questions, comments or suggestions, please feel free to send me a message from the contact form.
Don’t forget to follow us and share this post.