How to configure and analyze emergency calls in Teams
- Maxime Hiez
- Teams , Tutorial
- 25 Jun, 2025
Introduction
Microsoft Teams telephony offers an essential feature for organizations : emergency call management. This feature allows users to make emergency calls while dynamically providing precise location information to emergency services. Here’s a detailed overview of how it works and best practices for its implementation.
What is an emergency call ?
Emergency calls in Teams allow users to contact emergency services by dialing emergency numbers such as 911 in the US / Canada or 112 in Europe. When an emergency call is placed, Teams transmits precise location information to help emergency services locate the caller quickly.
Teams allows users to configure and route emergency calls based on the Teams client’s location when logged in to an organization’s location. This feature uses network connectivity information to determine the user’s location and route the call to the appropriate 911 center.
Prerequisites
Microsoft Teams Telephony enabled
- Direct Routing configuration with an SBC.
Administrator role
- An account with the Global Administrator or Teams Administrator role to access the Microsoft Teams Admin Center.
Step 1 : Sign in to the Microsoft Teams admin center
Sign in to the Microsoft Teams Admin Center by opening your web browser to https://admin.teams.microsoft.com.
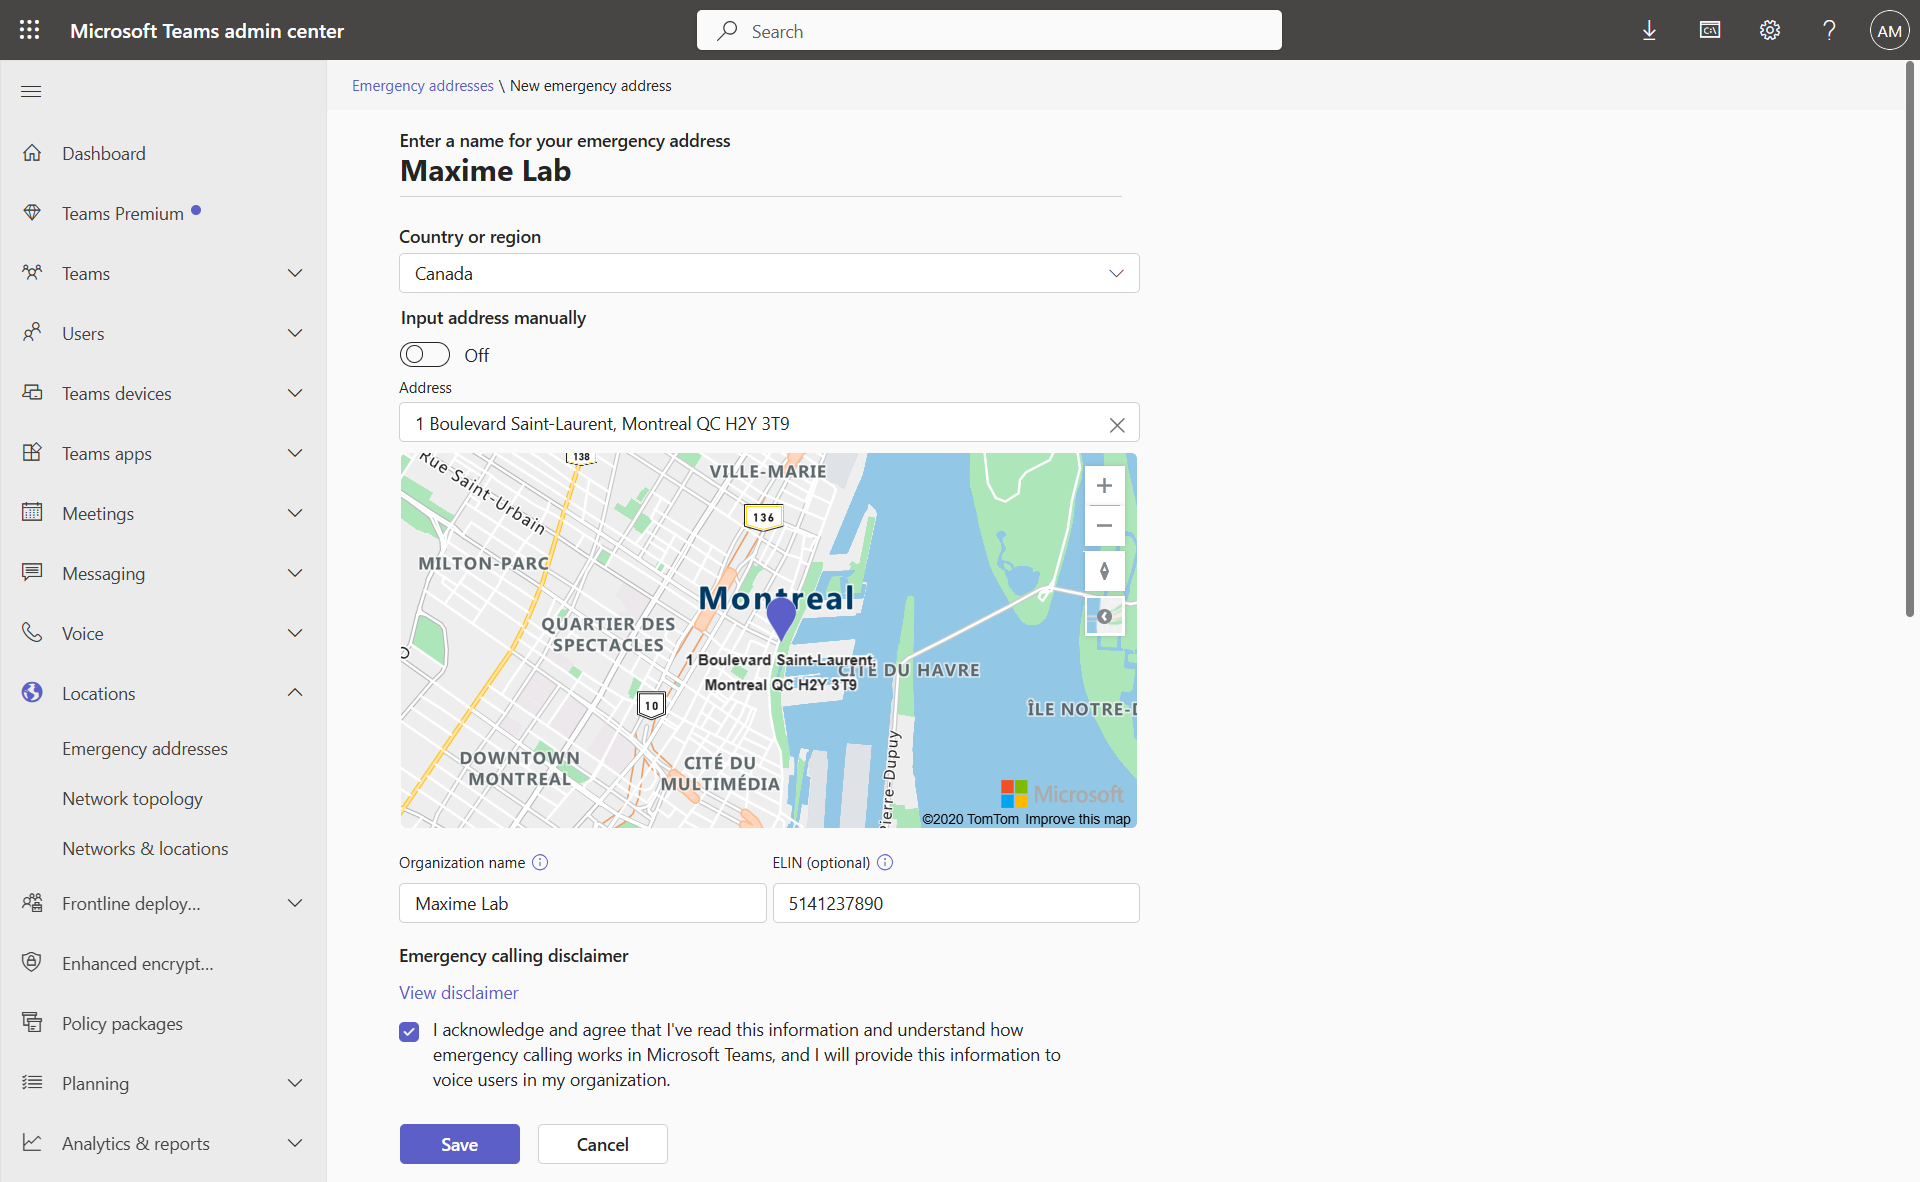
Step 2 : Create emergency addresses
In the left menu, click Locations, then Emergency Addresses.
Create an emergency address by entering the address, including the ELIN number ; even if it is indicated as optional, it is important to include it.
info
Step 3 : Create network conditions
Click on your location to edit it, then click Subnets.
Create all your wired and wireless subnets for this site.
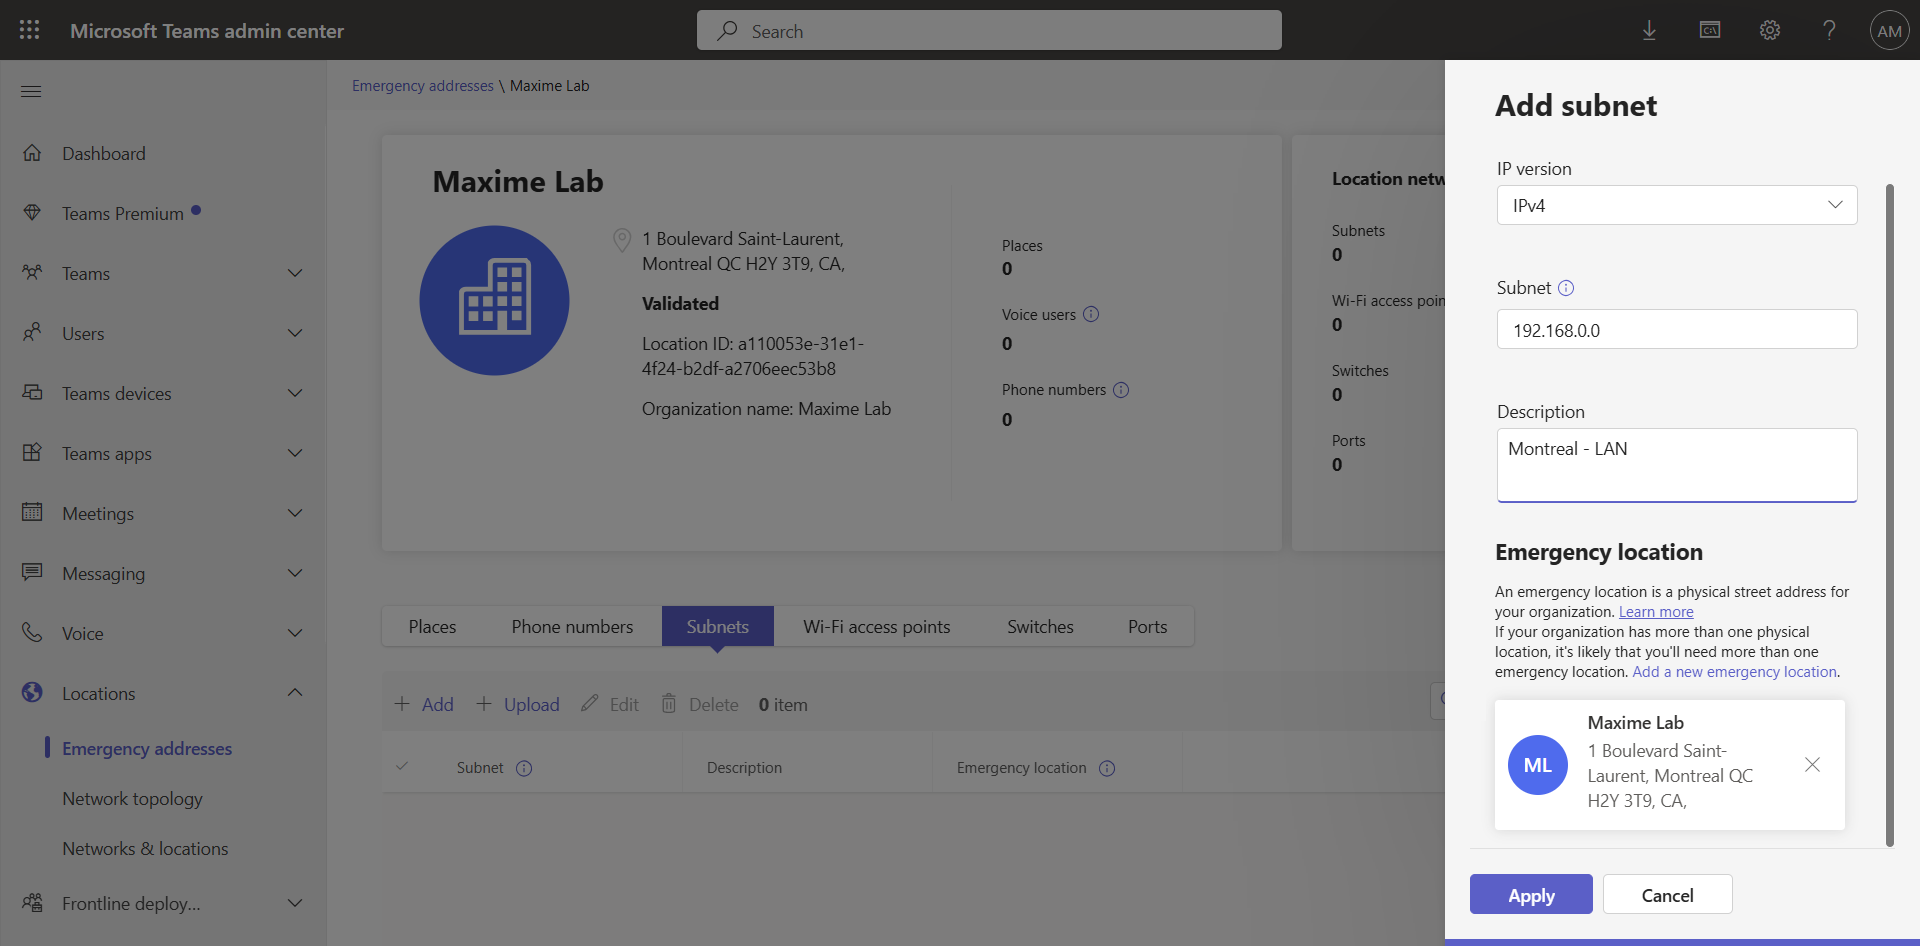
You can also create the subnet via the following PowerShell commands :
$subnet1 = "192.168.0.0"
$description1 = "Montreal - LAN"
$locationid1 = "a110053e-31e1-4f24-b2df-a2706eec53b8"

Set-CsOnlineLisSubnet -Subnet $subnet1 -Description $description1 -LocationId $locationid1
tip
Step 4 : Create the network topology
In the left menu, click Locations, then Network topology.
In the Network sites tab, create a site and connect all your wired and wireless subnets. Also define a region.
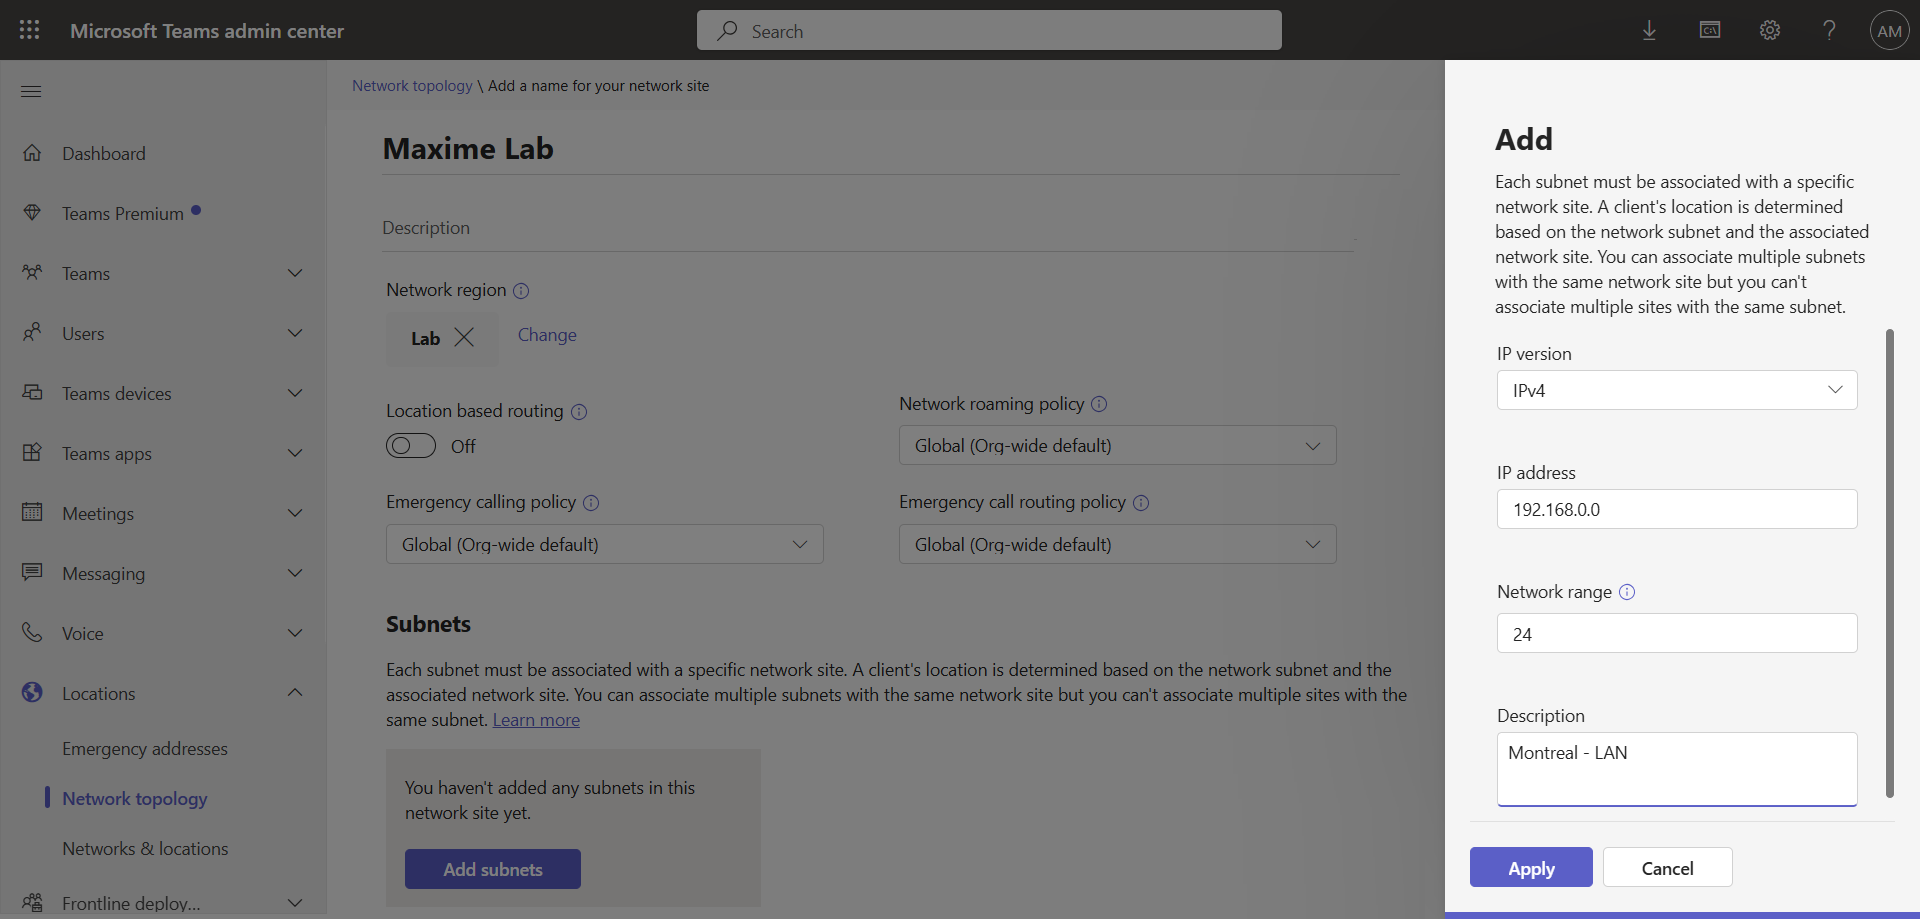
You can also create the topology via the following PowerShell commands :
$subnet1 = "192.168.0.0"
$mask1 = "24"
$description1 = "Montreal - LAN"
$region = "Lab"
$nsite1 = "Maxime Lab"
$nr = New-CsTenantNetworkRegion -Identity $region
$site1 = New-CsTenantNetworkSite -Identity $nsite1 -NetworkRegionID $nr.NetworkRegionId

New-CsTenantNetworksubnet -Identity $subnet1 -MaskBits $mask1 -Description $description1 -NetworkSiteID $site1.NetworkSiteID
Set-CsTenantNetworkSite -Identity $site1.Identity
tip
Step 5 : Create public IPs
In the left menu, click Locations, then Network Topology.
In the Trusted IPs tab, create all your public IPs / public IP pools. These will help differentiate a Teams client when they are in the office or away from home.
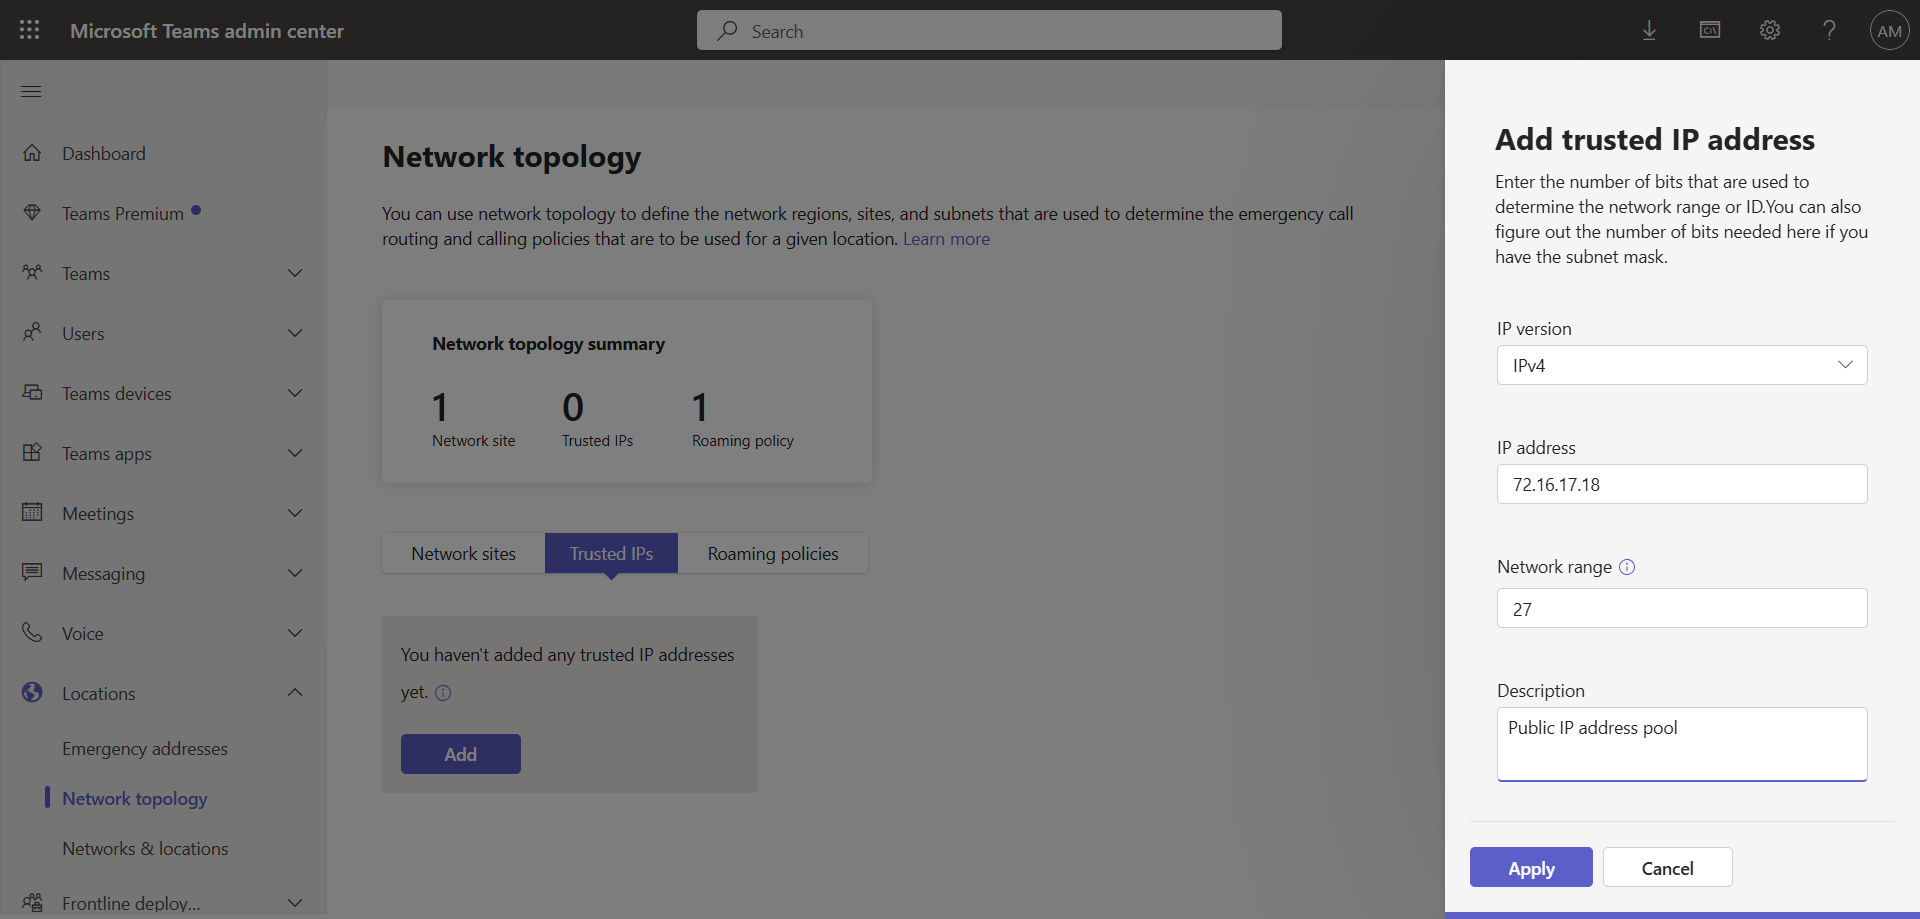
You can also create public IPs via the following PowerShell commands :
$publicip1 = "72.16.17.18"
$publicmask1 = "27"
$publicdescription1 = "Public IP address pool"

New-CsTenantTrustedIPAddress -IPAddress $publicip1 -MaskBits $publicmask1 -Description $publicdescription1 | Out-Null
Step 6 : Create emergency call routing policies
In the left menu, click Voice, then Emergency policies.
In the Call Routing Policies tab, edit the Global (Org-wide default) policy or create a new one.
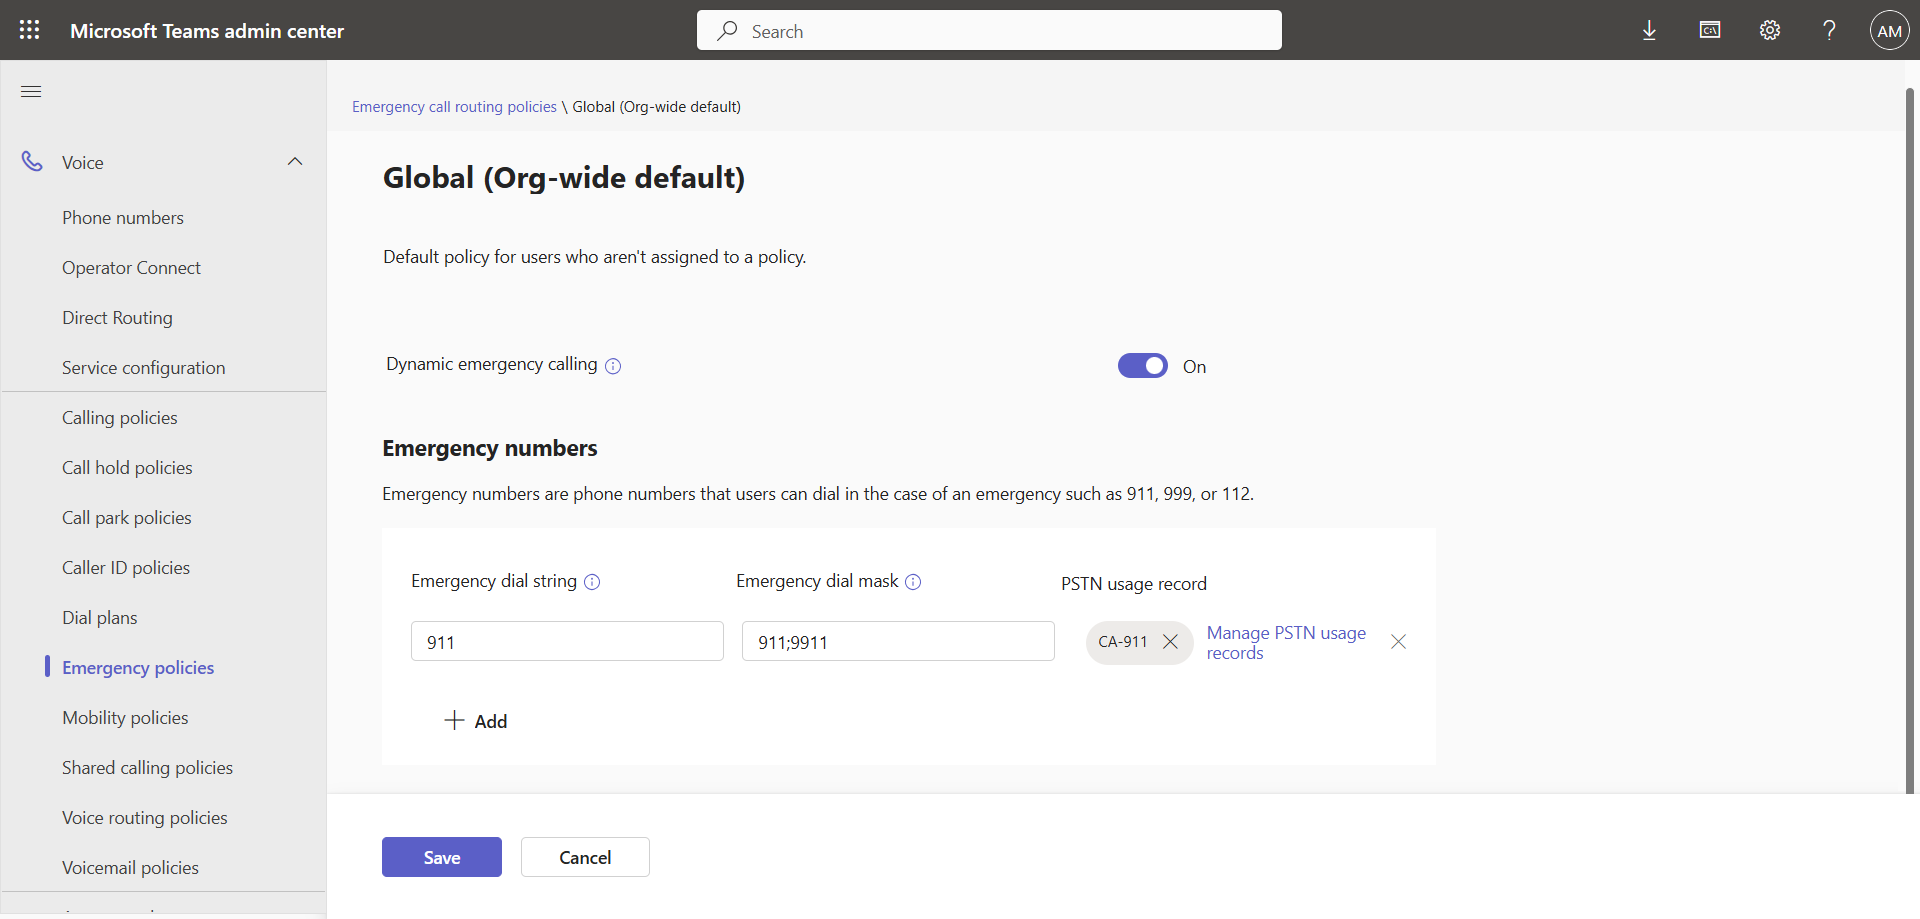
You can also create the emergency call routing policy via the following PowerShell commands :
$emergencyusage = "CA-911"
$emergencystring = "911"
$dialmask = "911;9911"
$CA=New-CsTeamsEmergencyNumber -EmergencyDialString $emergencystring -OnlinePSTNUsage $emergencyusage -EmergencyDialMask $dialmask

Set-CsTeamsEmergencyCallRoutingPolicy -Identity global -EmergencyNumbers @{add=$CA} -AllowEnhancedEmergencyServices $true
Step 7 : Create notification policies (optional)
In the left menu, click Voice, then Emergency policies.
In the Calling policies tab, edit the Global (Org-wide default) policy or create a new one.
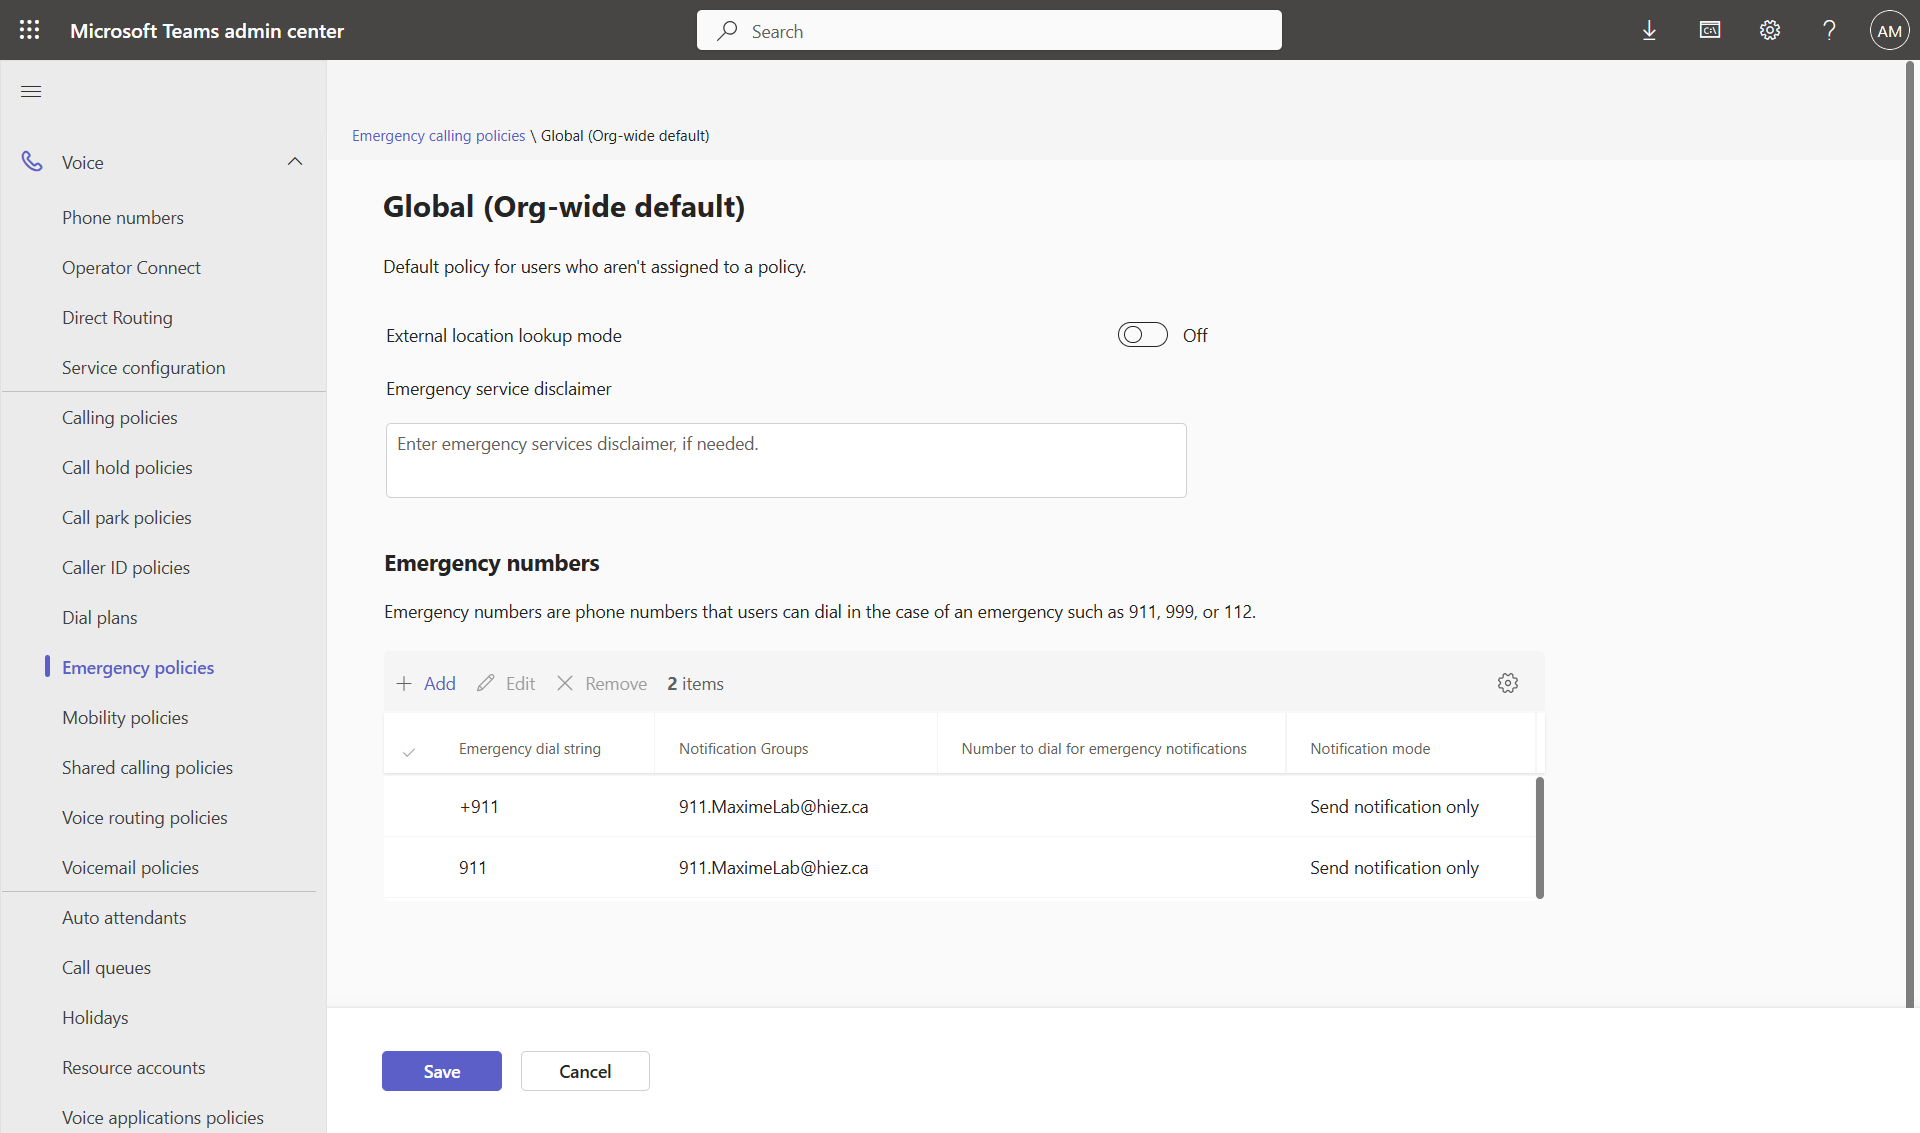
You can also create the notification policy via the following PowerShell commands :
$emergencystring1 = "+911"
$emergencystring2 = "911"
$emergencygroup = "911.MaximeLab@hiez.ca"
$notifs1 = New-CsTeamsEmergencyCallingExtendedNotification -EmergencyDialString $emergencystring1 -NotificationGroup $emergencygroup -NotificationMode NotificationOnly
$notifs2 = New-CsTeamsEmergencyCallingExtendedNotification -EmergencyDialString $emergencystring2 -NotificationGroup $emergencygroup -NotificationMode NotificationOnly

New-CsTeamsEmergencyCallingPolicy -Identity $global -ExternalLocationLookupMode Disabled -ExtendedNotifications @{add=$notifs1,$notifs2}
How dynamic emergency calls work ?
When a user signs in to their Teams client, a location query is generated to determine if the public IP address used is known to the tenant.
- If there is no match, the Teams client stops attempting to locate the user, as it is automatically detected as being out of the office.
- If there is a match, the private IP address is recognized and used to determine the location of the site where the user is located. Location data (address, ELIN, etc.) is included in the emergency call.
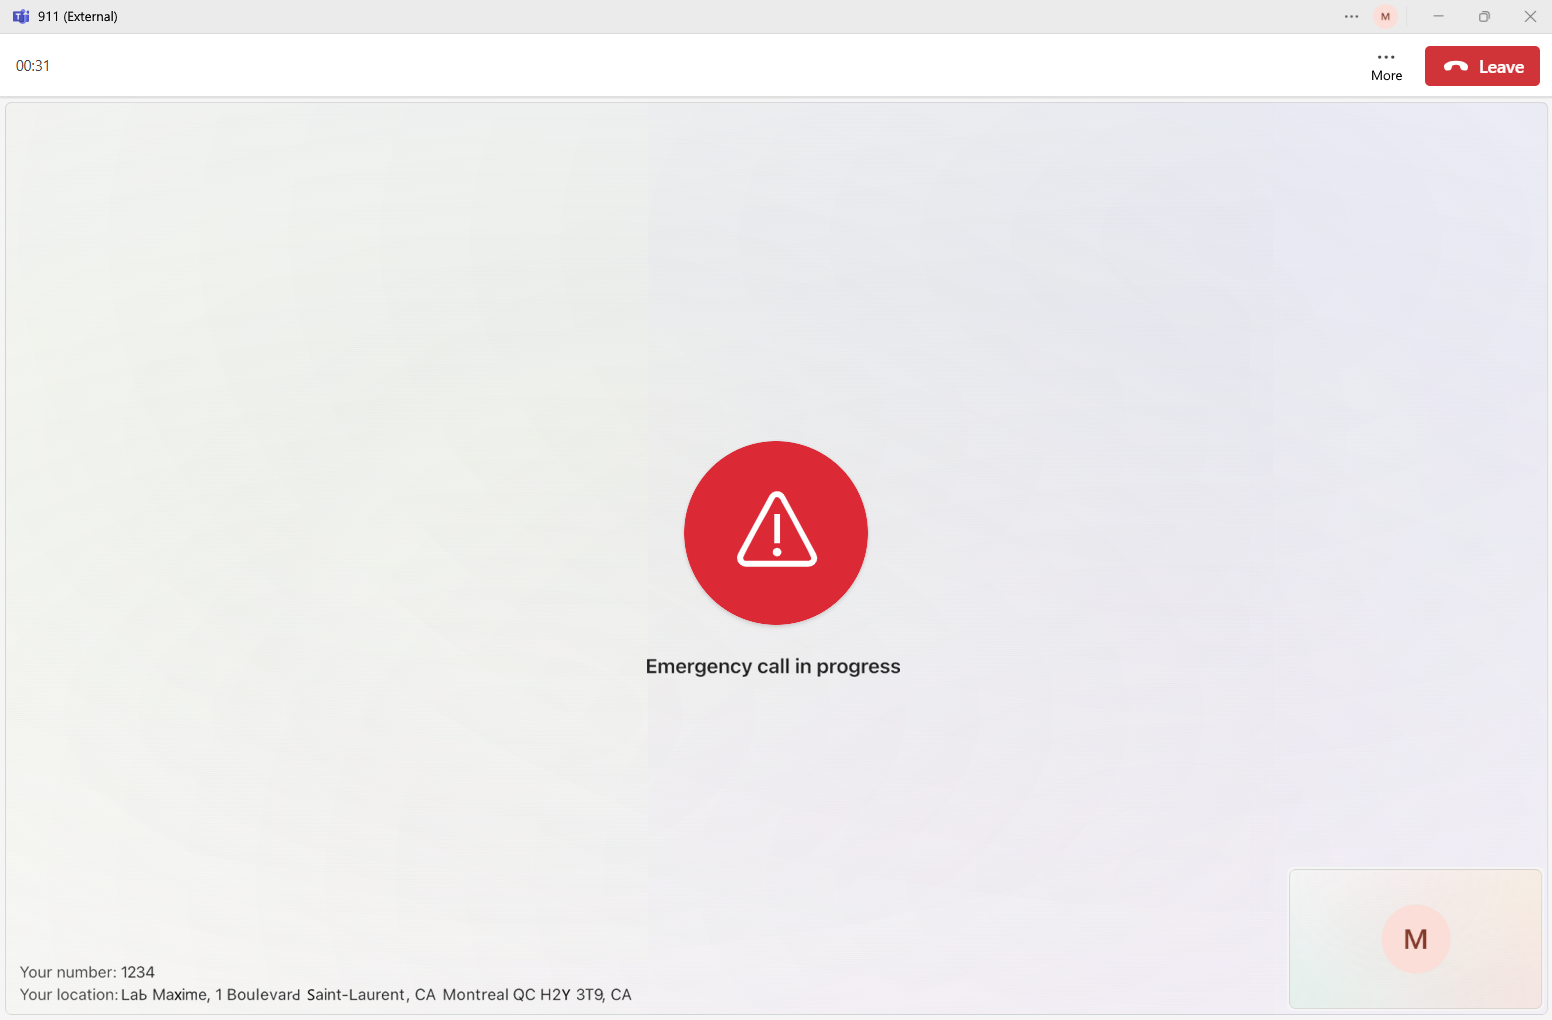
You can see that my 911 call displays my location. It was detected because my public IP address and subnet are correctly configured in Teams.
911 call analysis
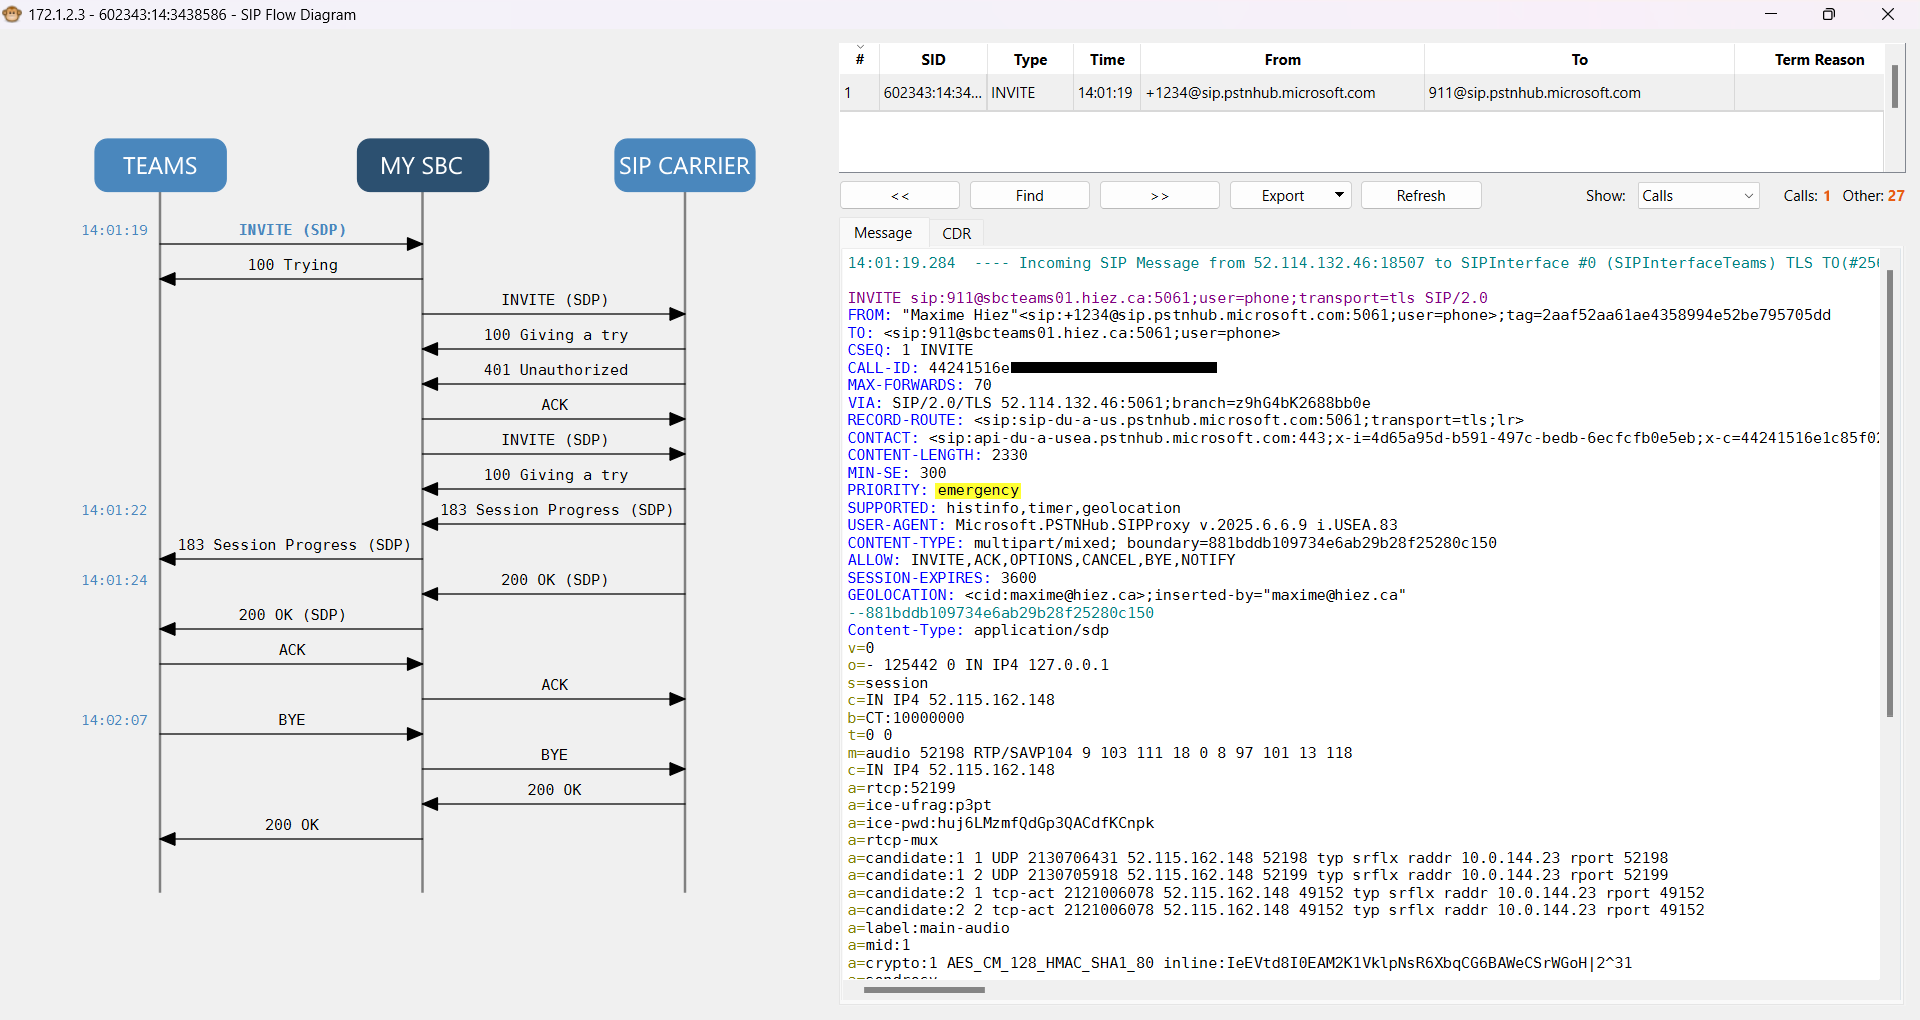
We can see in the Syslog capture from my Audiocodes SBC that the call from my +1234 extension is tagged with the Emergency priority, which will allow the call to be prioritized. If my SBC has reached its maximum capacity, a call will be disconnected so that the emergency call can be placed.
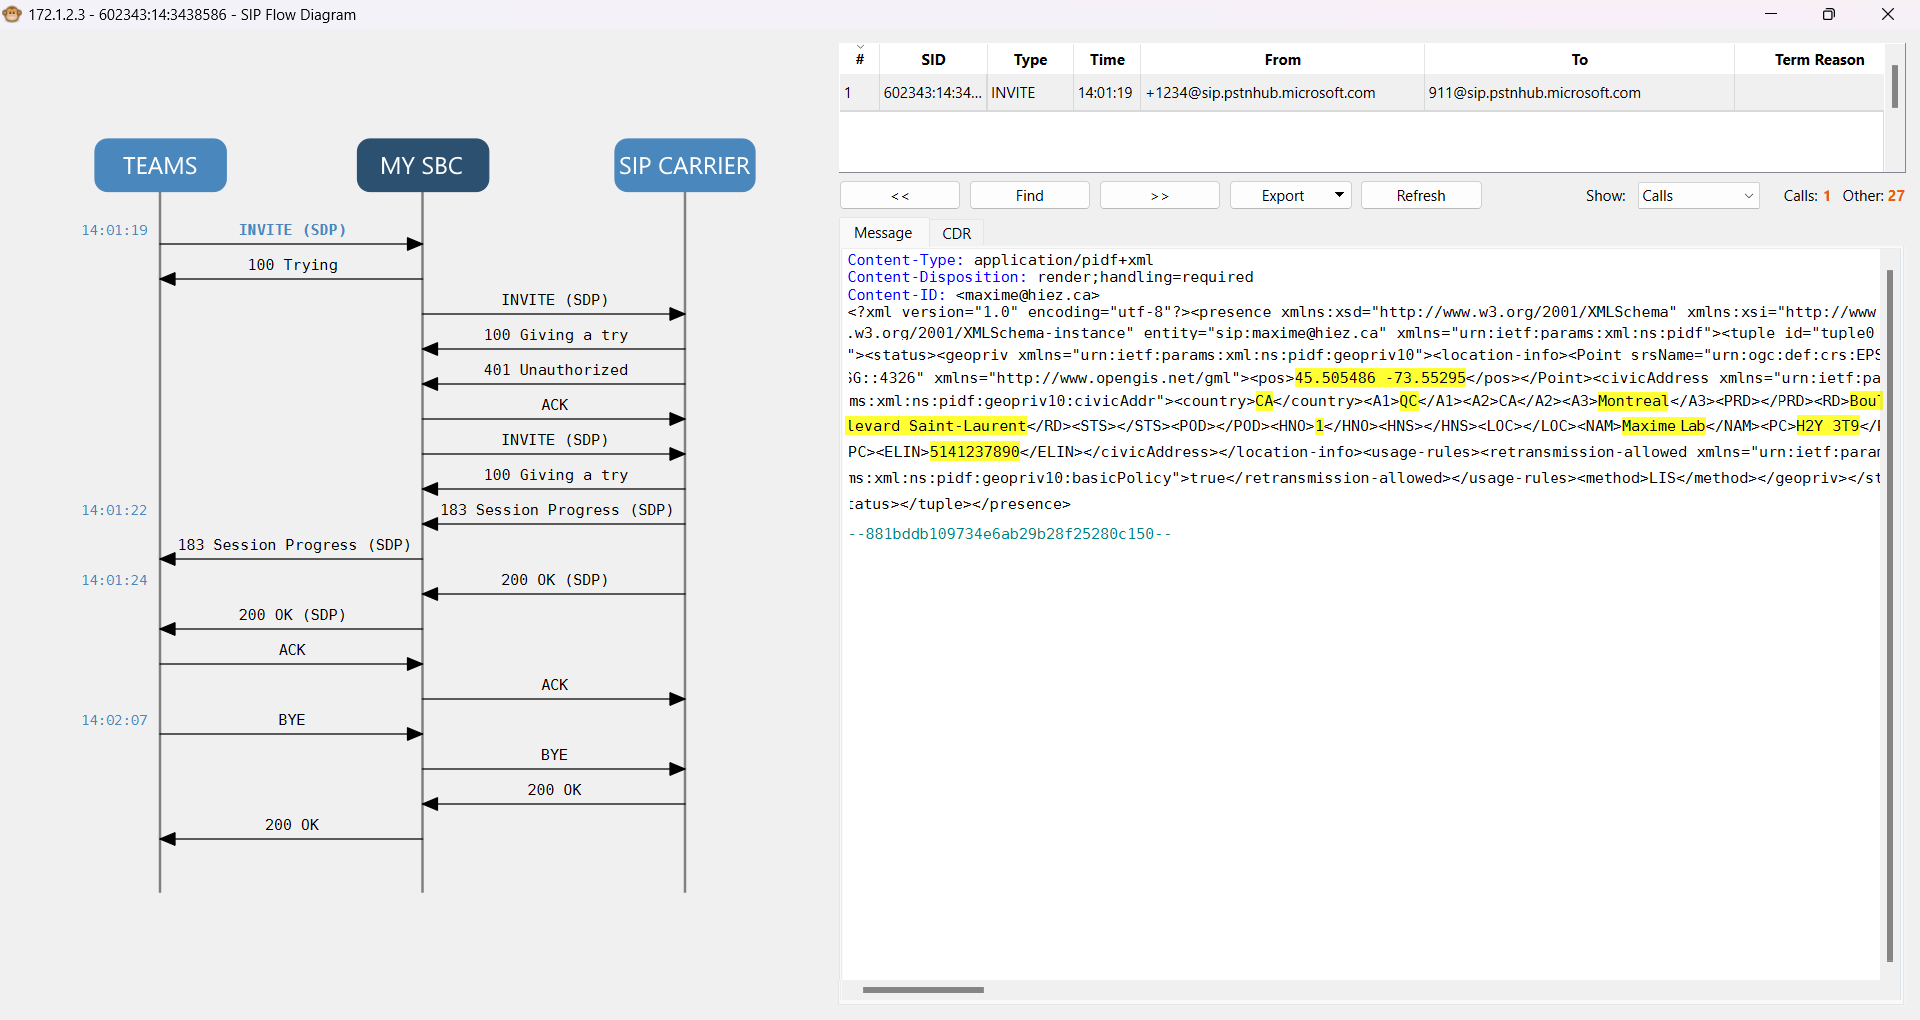
Continuing to dig into the call capture, we find the location information that was configured in the Microsoft Teams Admin Center.
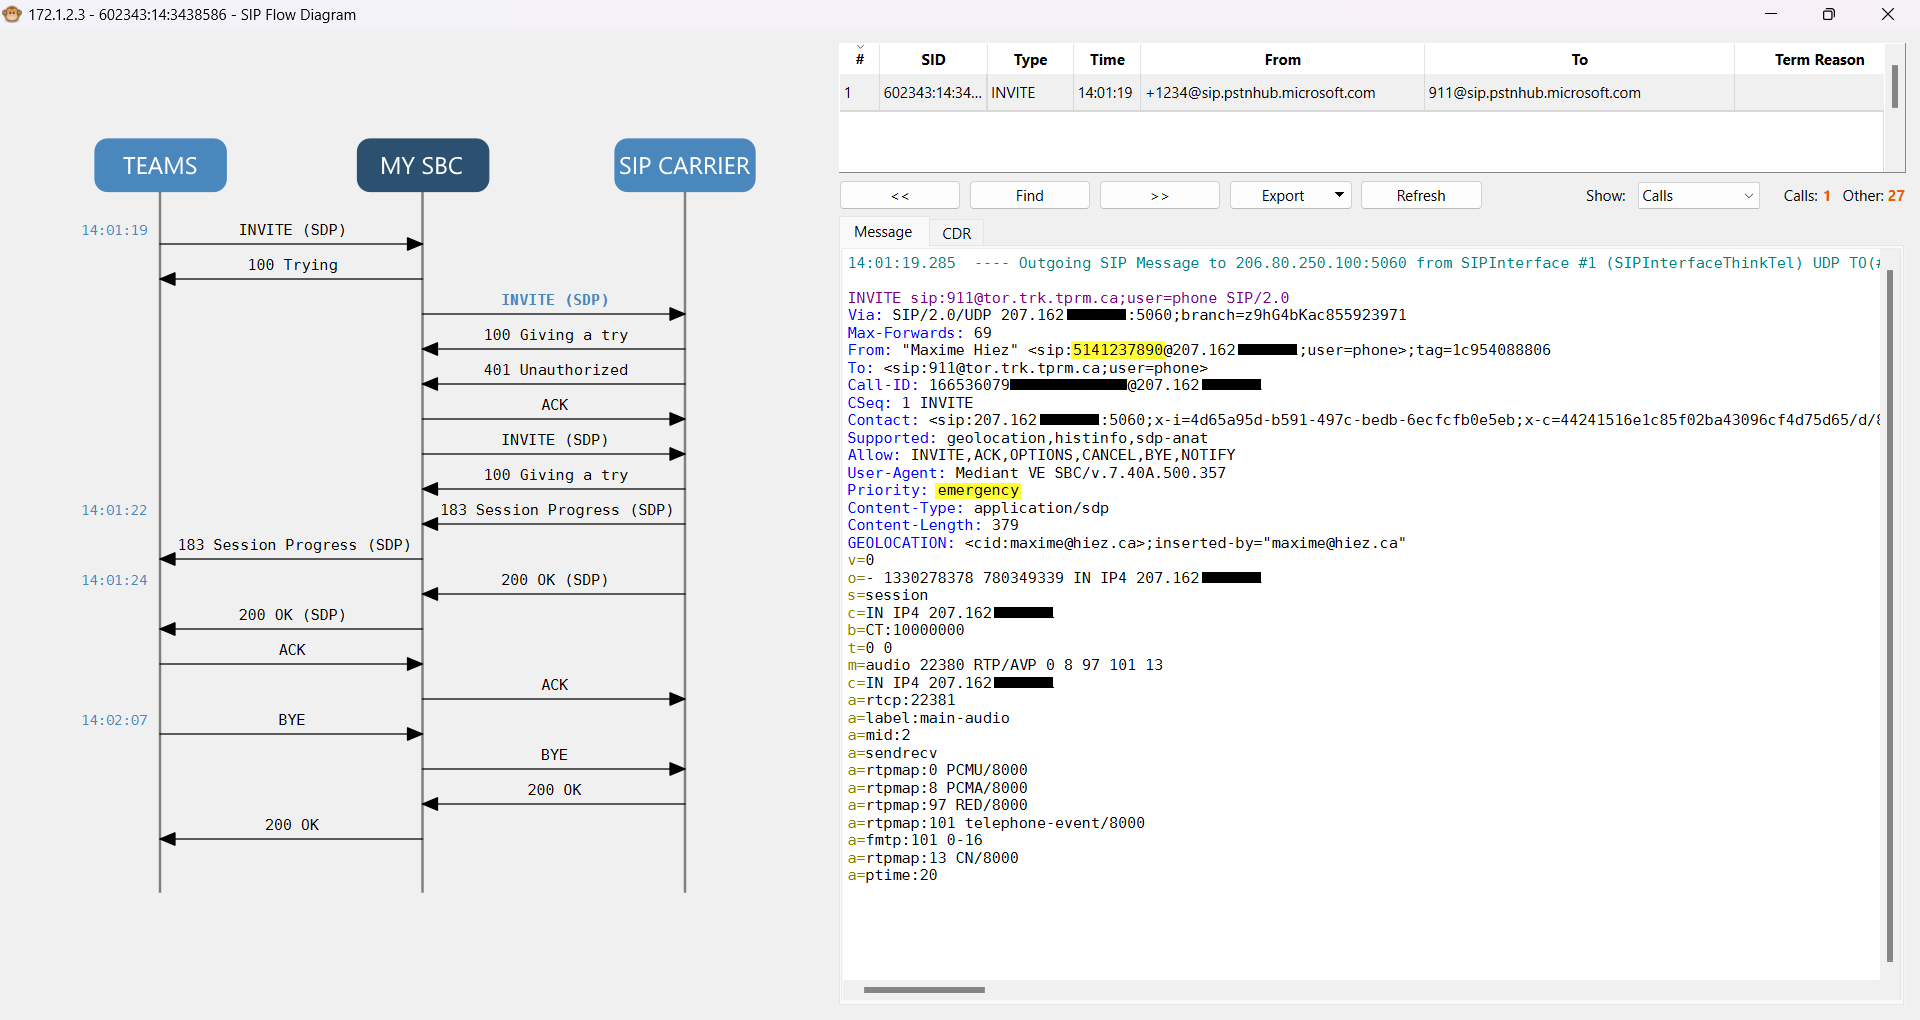
I configured a rule in my SBC to replace the FROM header with the ELIN attribute value sent by Teams, which allows me to display the number of the site I am currently on and not the number I display during my regular calls. The 911 agent who answers the call is therefore able to locate me with this mechanism.
In the United States, there is no need to manipulate calls with ELIN since 911 centers are able to read the location information sent. Canada does not yet have this feature, but it should be available when Next-generation 9-1-1 is implemented (as of this article, the CRTC announces March 31, 2027).
info
Benefits of dynamic emergency calling
- Precise location : Provides precise location information based on the user’s current network connectivity.
- Notification : Allows internal security personnel to be notified in the event of an emergency call.
- Regulatory compliance : Helps organizations comply with local security regulations.
Conclusion
Emergency call management in Teams telephony is a crucial feature for ensuring user safety. By properly configuring emergency addresses and using dynamic emergency calling, organizations can ensure accurate location information is provided to emergency services, improving responsiveness and safety.
You now know how to configure dynamic 911 for emergency calls in Teams.
Sources
Microsoft Learn - Manage emergency calling
Did you enjoy this post ? If you have any questions, comments or suggestions, please feel free to send me a message from the contact form.
Don’t forget to follow us and share this post.